


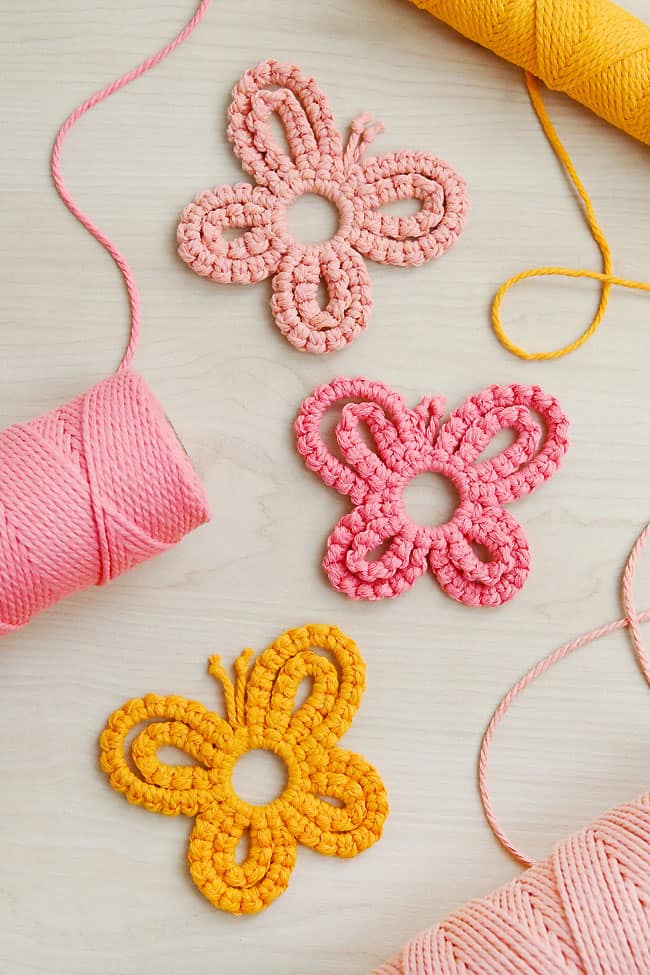
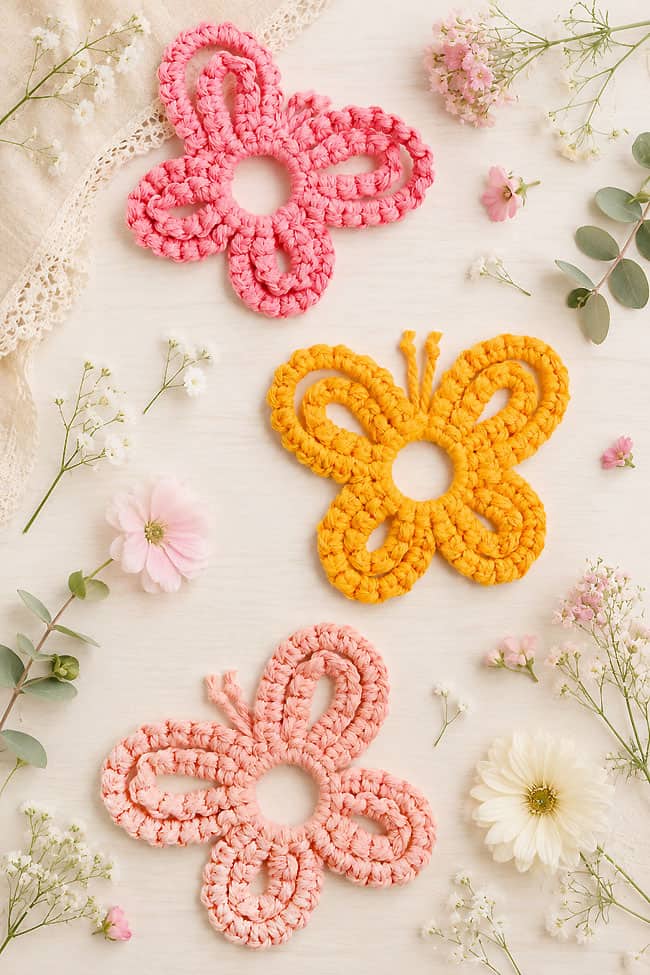
This macrame butterfly looks impressively detailed, but it’s surprisingly easy to make! Repeat a simple series of knots and bring the cords together to form four layered wings. Once you get started, it’s so satisfying to watch each loop take shape and connect around the center ring.
This small macrame project is a fun way to practice your knotting skills without committing to a large wall hanging. Make the butterfly in a soft pastel, a bold summer colour, or several different shades, then use the finished pieces to decorate walls, gifts, garlands, bags, or other handmade projects.
This post contains affiliate links. If you use these links to buy something, we may earn a small commission at no extra cost to you. This helps support our website and allows us to keep creating fun, free content.
How to Make a Macrame Butterfly
Materials:
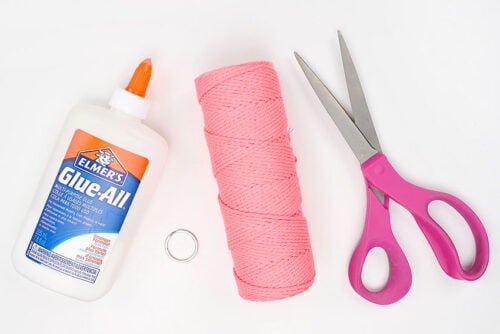
- Split ring keyring
- Macrame cord
- Elmer’s Glue-All (or white glue, tacky glue, fabric glue)
Equipment:
See the craft in action:
Instructions:
Step 1: Find what you need
- Gather your supplies and materials.

Step 2: Attach cords for the top wings
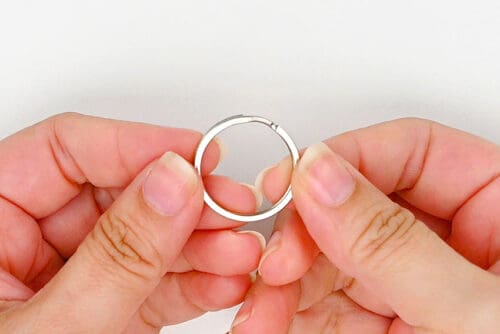
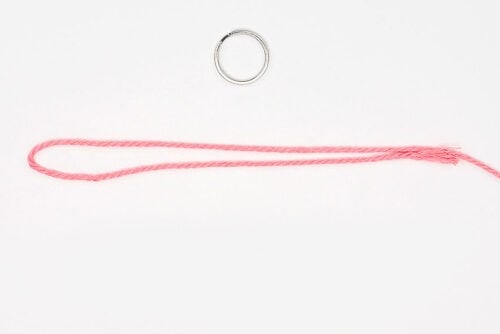
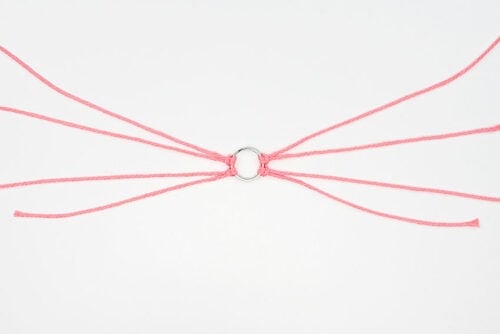
- To make your butterfly you’ll need a 1 inch ring. We’re using a split key ring, but you can also use a wooden or plastic ring.
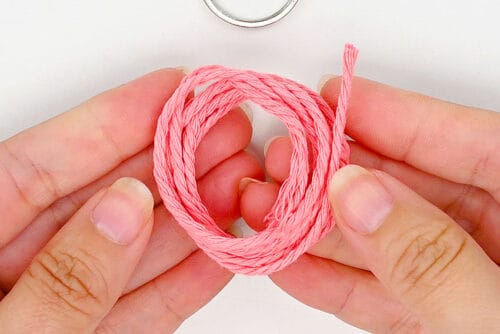
- Cut 8 pieces of macrame cord, each at least 3 feet (36 inches) long.
- Fold one of the cord ends in about 7 inches.
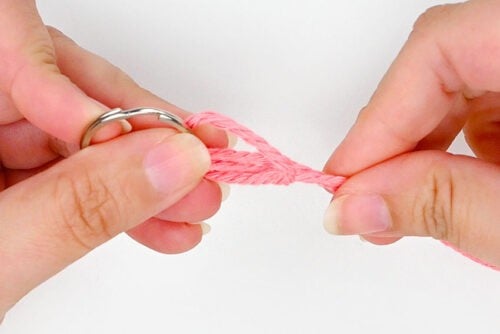
- Attach this folded section to the ring using a lark’s head knot. To do this, bring the loop down through the ring and back out. Pull the cords down through the loop.
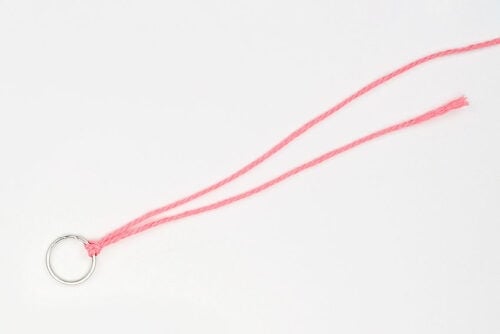
- Pull the cord ends so the knot is tight on the ring. Then arrange the cords so the longer one is at the top and the shorter one is closer to you.
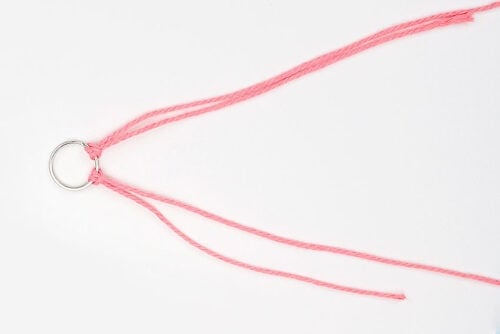
- Fold a second cord the same way (the fold can be an inch or so shorter) and attach it with a lark’s head knot below the first cord.Again, the short cord should be on the bottom.
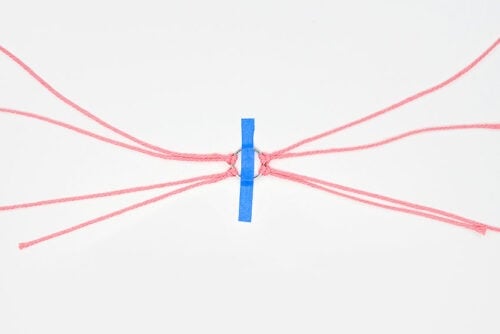
- Repeat on the opposite side so you have 4 cords attached, with 4 short ends.
- Attach the ring to your working surface with a piece of tape. This will allow you to make the knots neatly without the ring moving.
Step 3: Knot the first part of the butterfly
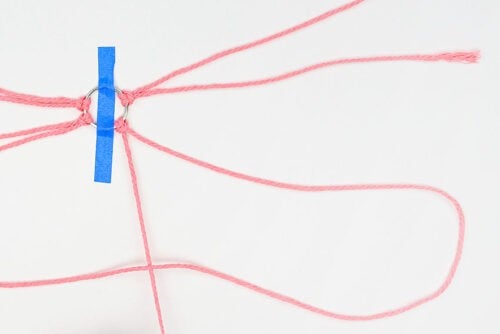
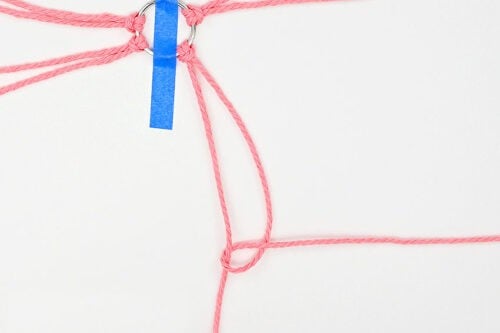
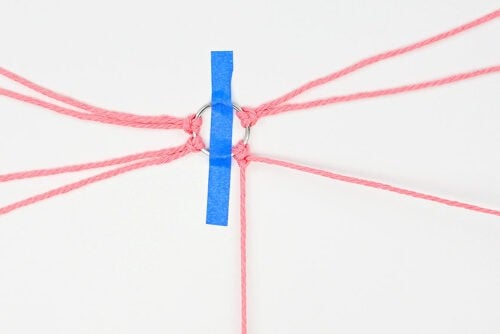
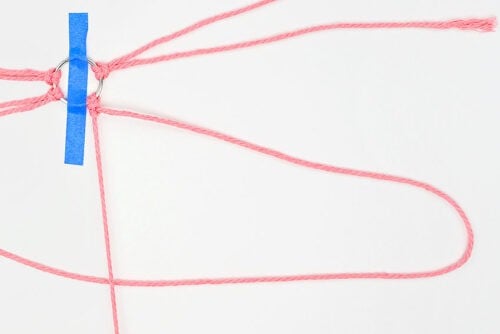
- The butterfly wings will be made from chains of vertical lark’s head knots.We’re going to begin by making the center of the top right wing, using the bottom right two cords. The knots will be tied around the bottom (shorter) cord.Begin by bringing the top cord over the short cord.
- Bring the long cord around the short cord, back to the right and up through the loop.

- Hold the short cord and pull the knot tight, so it’s up against the ring.
- Working with the same cords, to complete the vertical lark’s head knot you need to bring the long cord under the short cord.
- Then bring the long cord back over the short cord to the right and up through the loop. Pull the knot tight next the previous one.This completes your first vertical lark’s head knot.
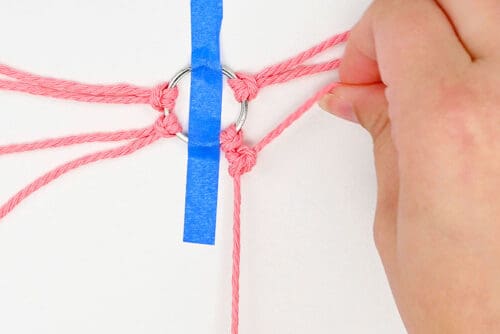
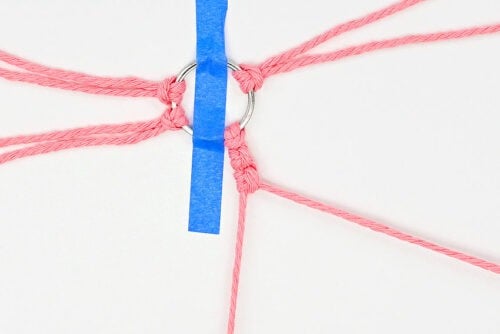
- To make the next vertical lark’s head knot you’ll repeat the same process. Make the first knot with the long cord starting over the short cord. Then the next knot will start under.
- Repeat the alternating sequence until you have a chain of 9 vertical lark’s head knots.
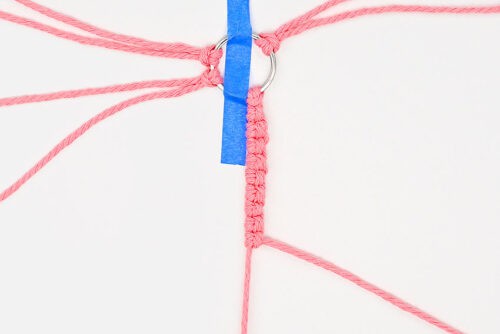
Step 4: Continue to form the top of the butterfly
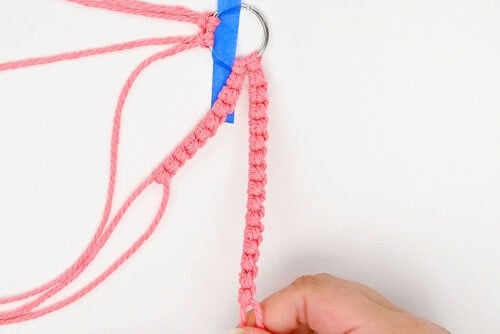
- Repeat the exact same knots with the 2 cords on the top right, this time making 15 knots.Again, make all the knots around the shorter cord. Start by going over the short cord, with the 2nd half of the knot going under.
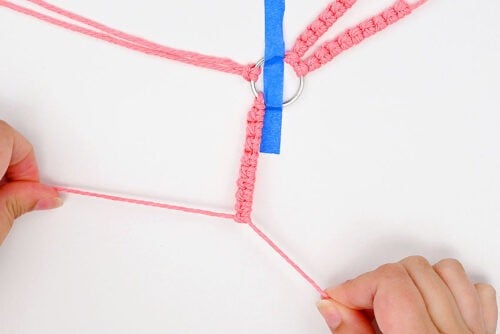
- Now we’re going to make the same chain of knots with the lower 2 cords on the left. It’s the exact same process, with the longer cord tied around the short, alternating over and under. Make 9 knots with these cords.
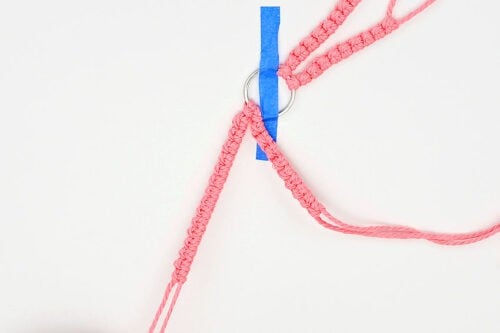
- Finish up with the top left cords. Make 15 vertical lark’s head knots.
Step 5: Tie knots for the bottom of the butterfly
- Now we’re going to attach the rest of the cords to the ring. This time attach the cords so the short cord is above the long cord (further away from you).
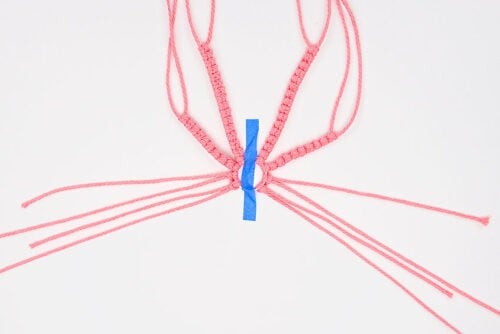
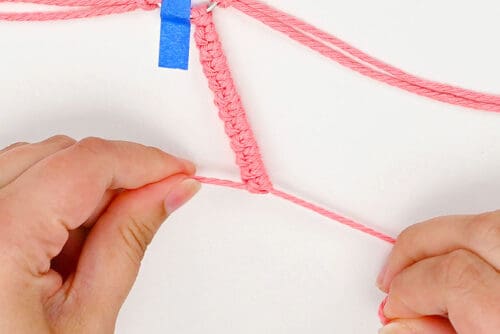
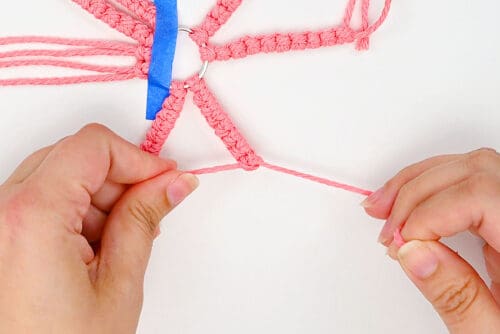
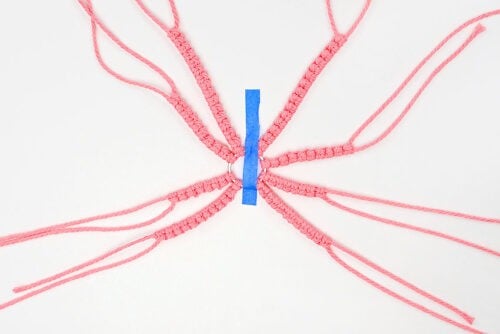
- Begin by working with the bottom 2 cords on the right. This first chain will be the outside of the bottom wings. Make 11 vertical lark’s head knots.
- Use the 2 remaining cords on the right to make 7 vertical lark’s head knots.
- Repeat on the left side, making 11 knots with the bottom 2 cords and 7 with the top 2.
Step 6: Make the antennae
- Cut a piece of cord off your longest cord, at least 5 inches long.
- Fold it in half and attach it to the top center of your ring with a lark’s head knot.
- Make knots in each cord, placing each about 1/2 to 3/4 inch above the ring.
Step 7: Form the butterfly shape
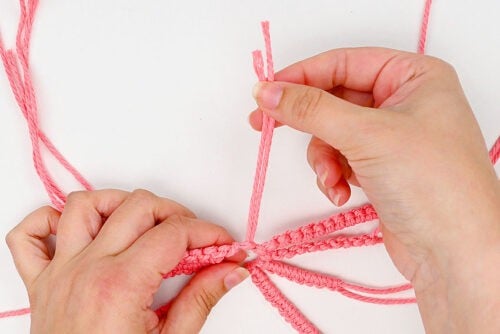
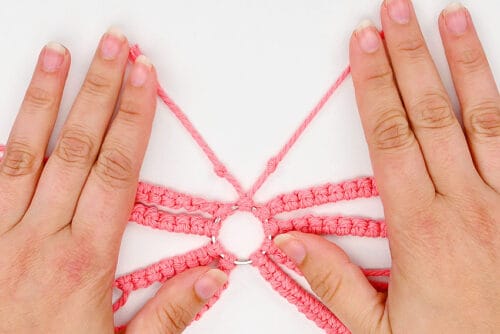
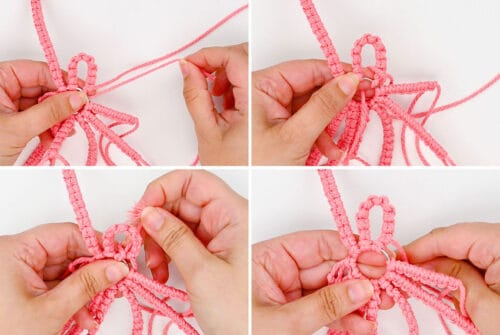
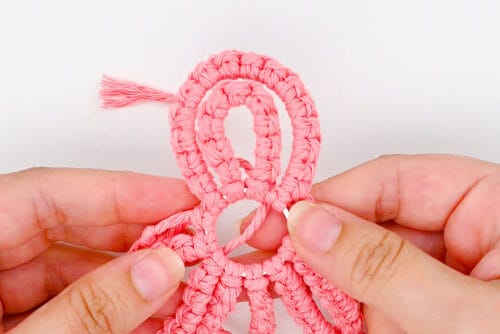
- Now we’re going to shape the butterfly wings. Begin with the first chain you knotted — the inside of the top right wing. Bring the end of the chain in to the ring.
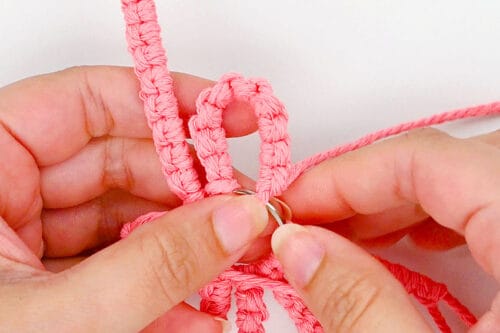
- To secure the wing section, you’re going to tie a knot with the short cord while holding the chain in place. Bring the short cord down through the ring. Bring it around the outside of the ring, back down through the center of the chain, and back up through the ring. Don’t pull this too tight.Now bring the short cord back through the loop you just made, going down through the center of the chain. Pull tight.

- Attach the top right chain in the same way, forming it around the smaller one. These two chains will make up the top right wing.
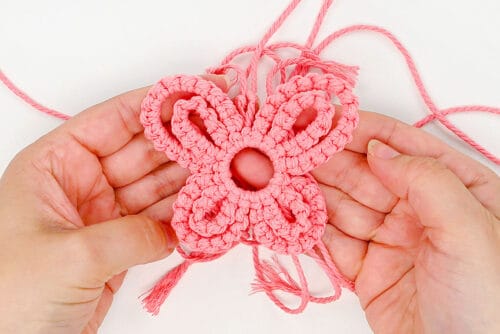
- Repeat around, attaching all the ends to the ring, connecting the inner wings first. Note that the bottom wings will go up to connect, so that all the ends will be beside each other on the back.As more cords are wrapped around the keychain it may get a little snug. Just smush the others together so that you have room to work.
Step 8: Finish the butterfly
- Now we’re going to finish off the ends so that the butterfly looks pretty. Start by trimming the antennae just above the knots you made.
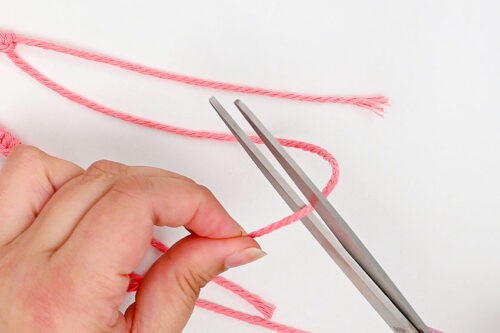
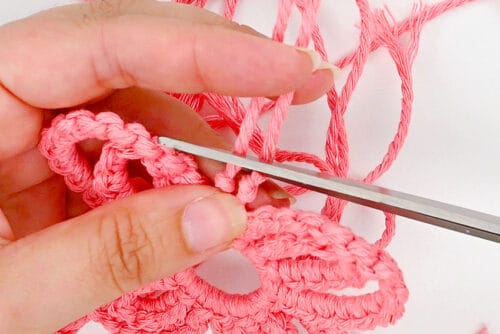
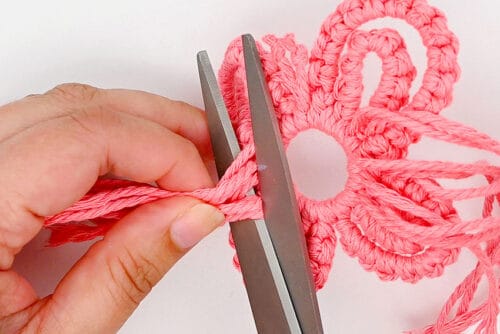
- Turn the butterfly over so you can see the ends. Cut the excess cord off very close to the knots, leaving about 1/8 inch.
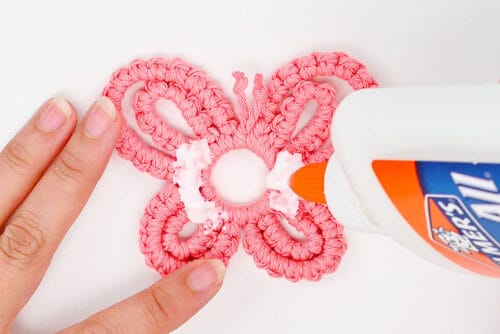
- Add glue on top of the knots. Use the nozzle of the bottle (or your fingertip) to spread the glue into a thin layer. Allow to dry.
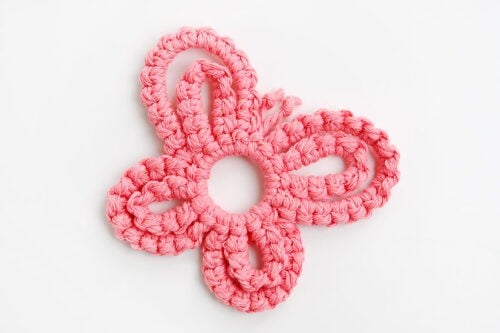
- Your macrame butterfly is complete!
Helpful Tips:
- Keep the tension consistent: Pull each knot snugly against the previous knot, using about the same amount of tension each time. This helps the macrame chains stay even and prevents the wings from twisting or bunching.
- Secure the cord ends carefully: Glue-All works, but it can make the back of the butterfly feel hard or even sharp if the cord ends aren’t pressed down smoothly. For a softer finish, before cutting the ends use a tapestry needle to tuck each cord underneath a couple of knots. Then cut off the excess and secure the end with a tiny dot of flexible fabric glue. Apply the glue with a toothpick or needle tip bottle so you don’t use too much.
What type of ring should I use for the center of my macrame butterfly?
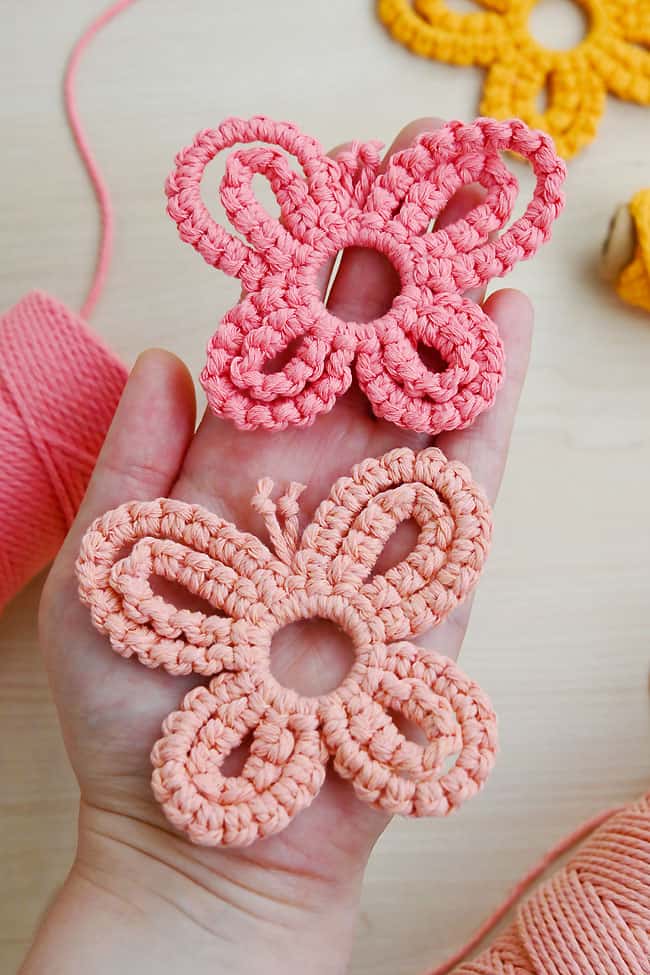
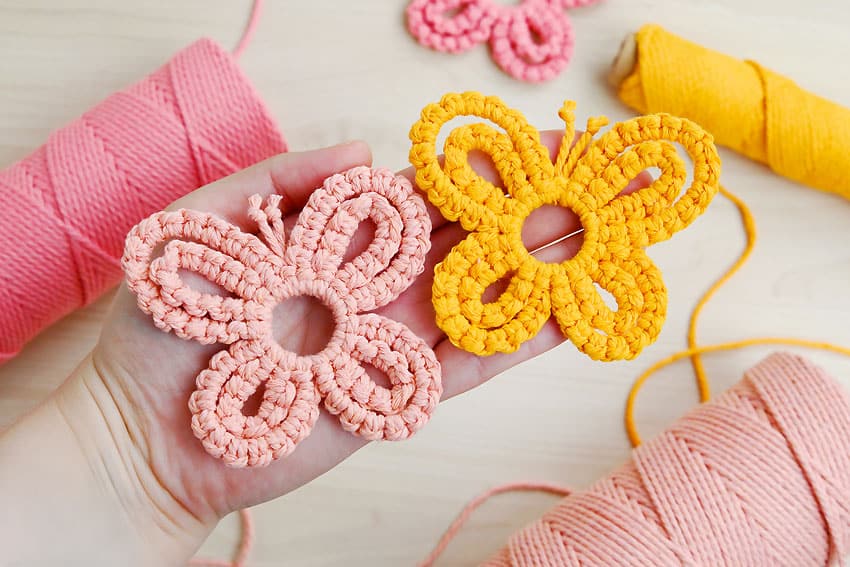
We used split ring key rings for the center of our butterflies. You can also use a plastic curtain ring, plastic craft ring, an O-ring (plastic, rubber, or metal), or a wooden macrame ring.
Choose a ring that’s smooth, sturdy, and large enough to hold all four wings without crowding the knots (about 1 inch diameter). Keep in mind that the size of the ring determines how the wings fit around and the proportions of the wings, so if you use a larger ring you’ll want to cut your cords longer and make more knots.
What size cord should I use to make my macrame butterfly?
We used 2 mm cotton macrame cord. This size is easy to knot and gives the butterfly a sturdy shape without making the wings look too bulky. It fits perfectly around a 1-inch ring, following our pattern above.
You can use thicker cord, but you’ll need a larger center ring if you do so. You may also need to adjust the length of the cords and make more knots to keep the wings proportional.
What type of knot is used to make this macrame butterfly?
This butterfly is made with two simple macrame knots. The cords are first attached to the center ring with lark’s head knots, and the wing chains are made with continuous lark’s head knots, which are also called vertical lark’s head knots.
A continuous lark’s head knot is made from a repeating pair of half hitch knots. Make the first half hitch by taking the working cord over the filler cord, then make the next one by taking it under the filler cord. Continuing to alternate between the two directions creates the decorative chains used to shape each wing.
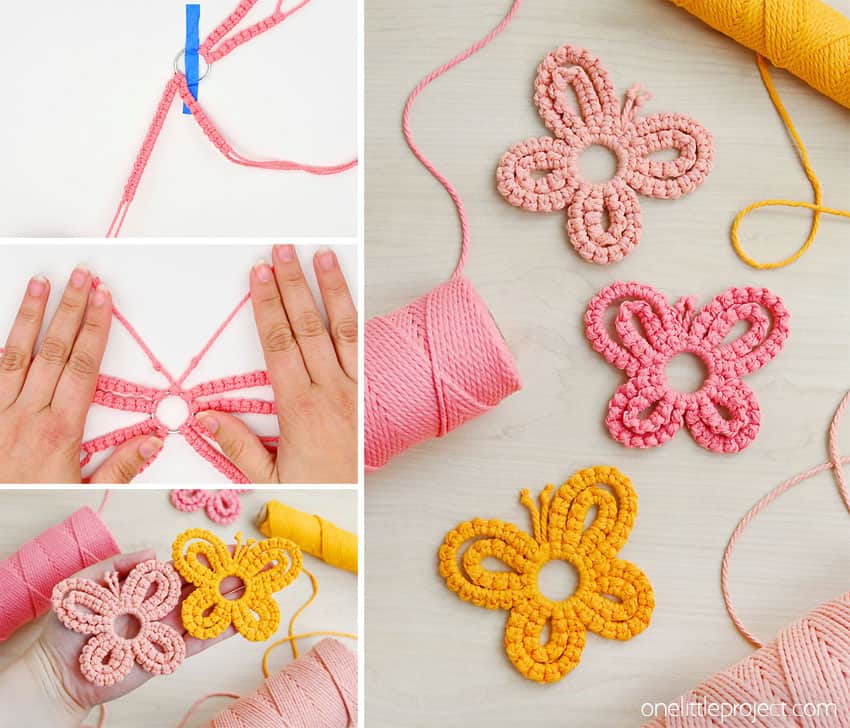
Once you get the hang of the continuous lark’s head knots, this little macrame butterfly comes together in such a satisfying way. It’s a great project for using up shorter pieces of cord, practicing even tension, and seeing how a few simple knots can create a surprisingly detailed shape. Try making a few butterflies in different colours or sizes! They’re small enough to finish quickly, but still feel special when they’re done.
Here’s even more butterfly craft ideas:


Now available
Low-Mess Crafts for Kids Book
72 cute and fun crafts that kids and parents alike can enjoy. All with as little mess as possible!
Where to buy:
You can purchase Low-Mess Crafts for Kids from Amazon, or wherever books are sold:
Amazon | Barnes and Noble | Books-A-Million | Indiebound | Amazon Canada






Leave a Reply