Do you remember going to Halloween parties, probably in elementary school, where you tricked your senses into thinking you were doing something really gross? I remember being in third or fourth grade and we had a great little Halloween party at school. I was blindfolded, and then I remember being told to put my hand into a series of mysterious bowls.
My fingers gently poked the disgusting contents of the bowls and then I’d work up the courage to give it a big squeeze. And then of course, since I was a kid, I giggled with delight and terror!
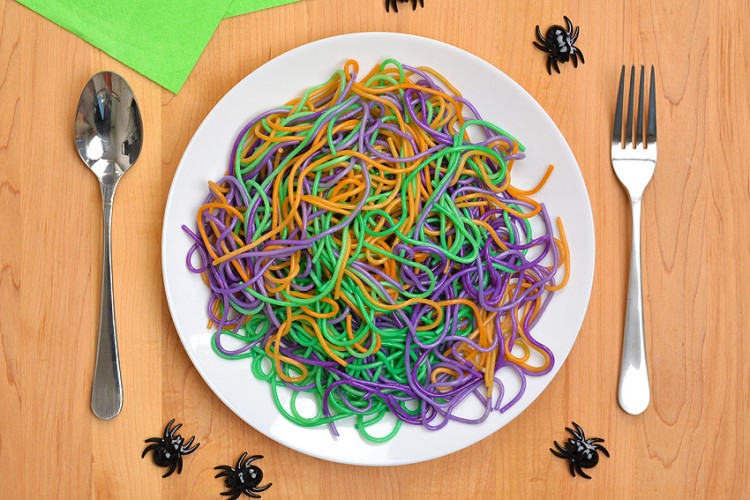
One of the bowls might have been peeled grapes, which our class was told was a bowl of eyeballs. One of them was a bowl of pipe cleaners which was supposed to be fat, hairy spider legs. (That couldn’t have helped my life-long fear of spiders…) And one of them was a bowl of wet spaghetti, which we were told was… hmmm… I forget… was the spaghetti supposed to be brains? Can you remember?
Do they still do that in schools? Or is that considered unsanitary these days?
These jello worms would have worked perfectly for that little sensory party! Maybe not so much for squeezing them, but holy smokes could you ever freak someone out with a bowl of these worms! Never before have I made something so realistic and disgusting looking. They seriously look like earth worms. And even though I know they are sweet and taste like jello, it is HARD to make yourself eat them! Or at least I found it hard to eat them.
My three year old and my five year old LOVED the idea of making a bowl of worms! Except when it came down to it, neither one of them would eat them. haha Too realistic I guess! So if you’re trying to freak someone out with crazy Halloween food or maybe even April Fool’s, I can tell you confidently that you HAVE to try this recipe!
How to make Jello Worms
Now, I’m not going to lie, it does take a bit of effort to make these. They turned out really well, but you have to give yourself a day to let them set, and then at least 45 minutes to push them all out of the straws. So it’s definitely not a last minute thing.
The full printable recipe is at the bottom of this post, but here’s a quick list of what you’ll need:
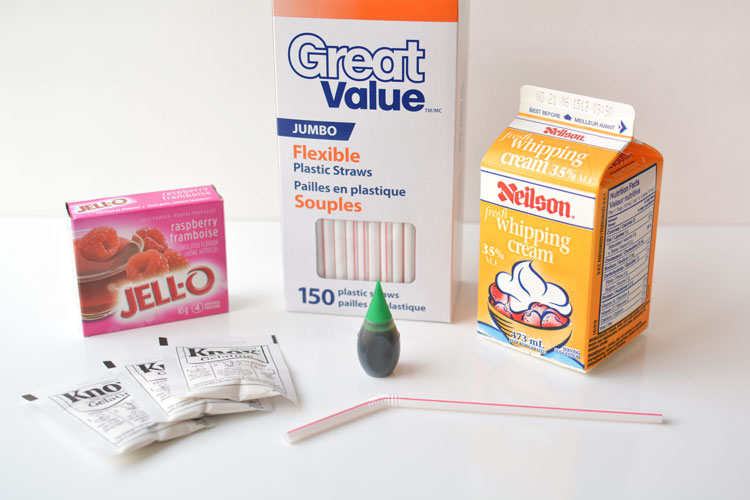
- 150 Flexible Straws
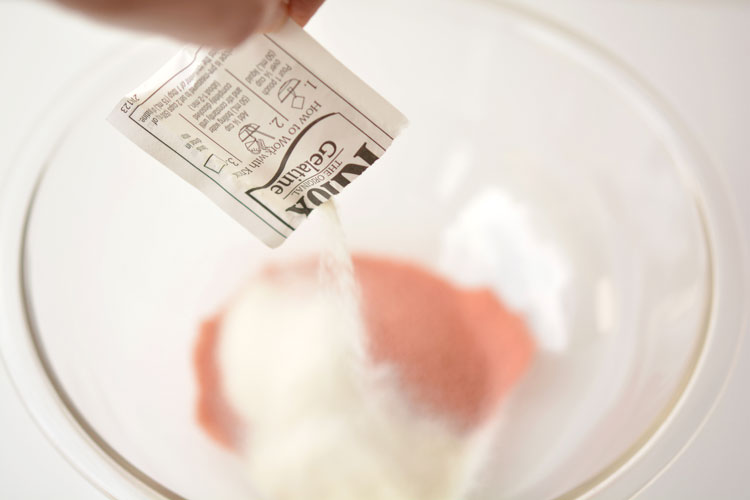
- 1 package Raspberry Jello
- Whipping Cream
- Green Food Colouring
- 3 packages Unflavoured Gelatin
- 1 Mason Jar (I used a 4 cup mason jar)
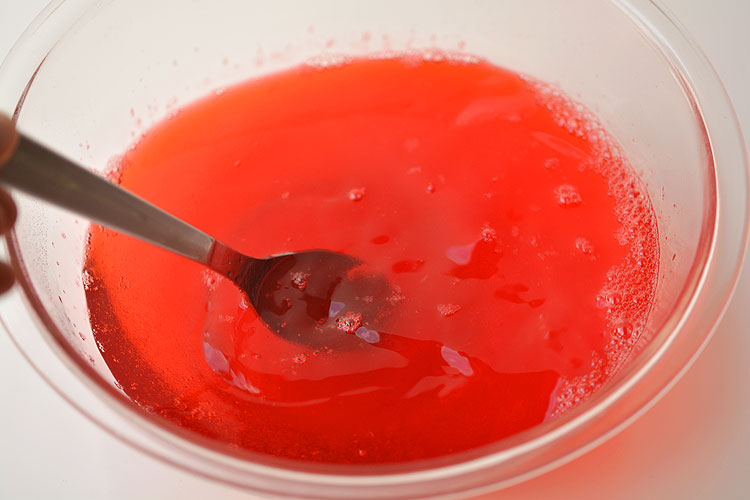
Combine the raspberry Jello and the unflavoured gelatin in a large bowl.
Add 3 cups of boiling water.
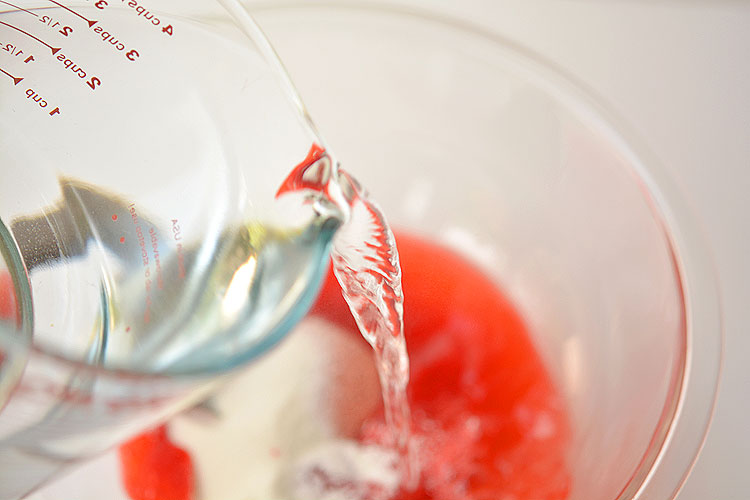
Stir until all of the gelatin is dissolved. And then put it in the fridge for about 20 minutes or until it’s lukewarm.
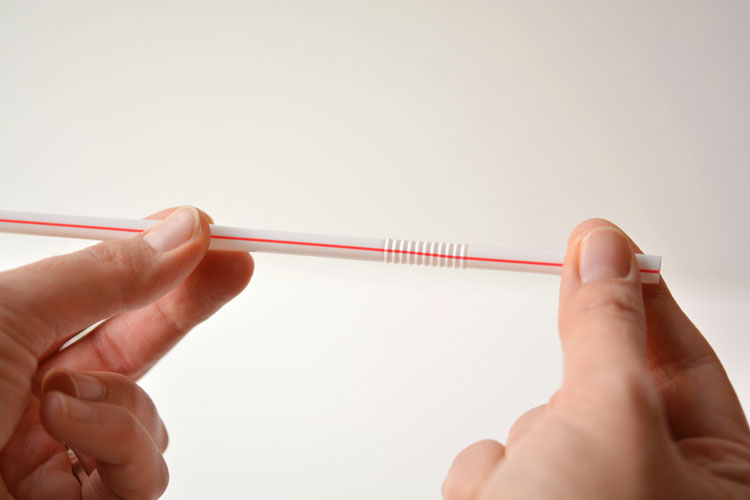
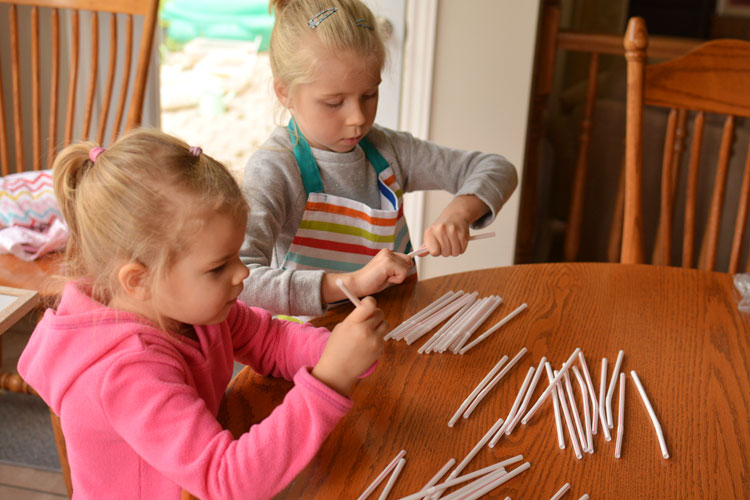
While you’re waiting, start getting your straws ready by stretching them all open.
This was a perfect job for my two little helpers!
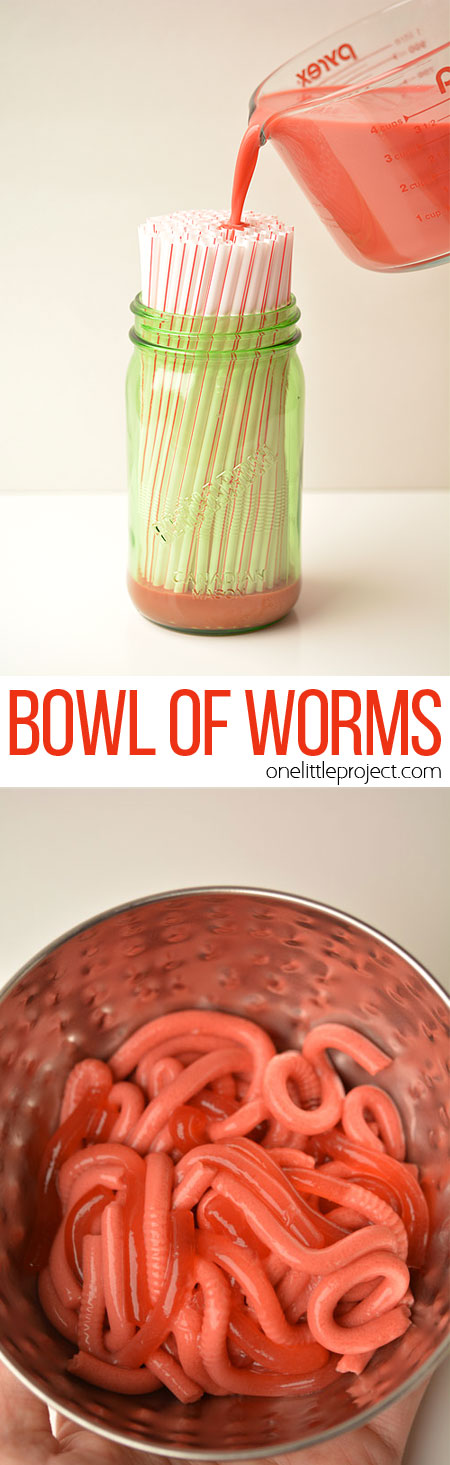
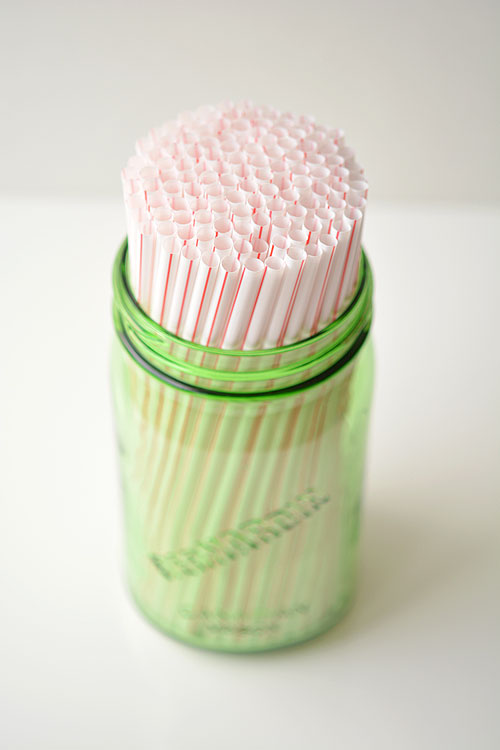
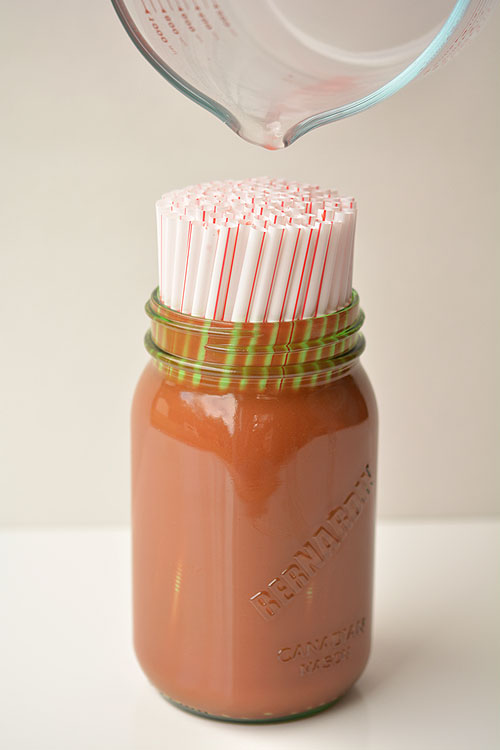
Fill up the mason jar with the straws, making sure the flexible part of the straw is closer to the bottom of the jar.
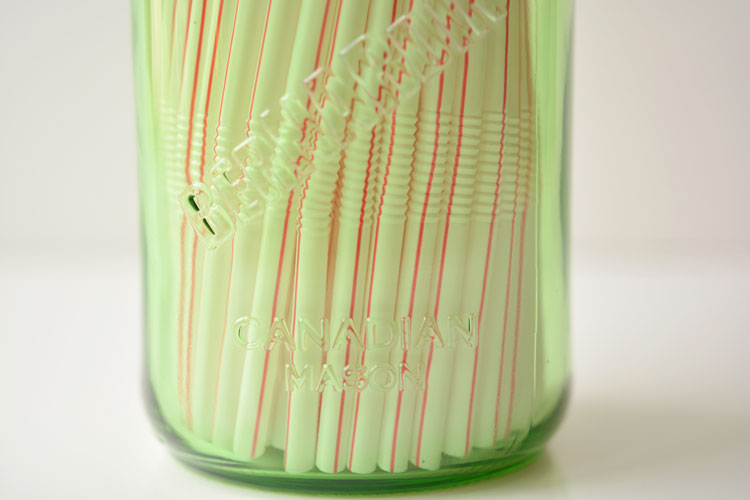
I couldn’t fit all 150 of the straws in the jar, but close enough. I think I managed to get about 125 straws in there, but I didn’t count them.
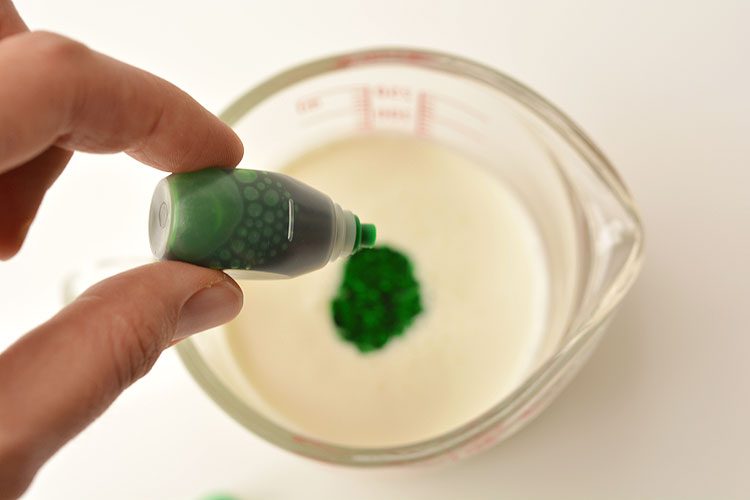
Once the Jello mixture is lukewarm, measure out 3/4 cups of whipping cream. (Remember, the full printable recipe is at the bottom of the post!) Add at least 15 drops of green food colouring. I added exactly 15 drops and you can see the colour mine turned out. You can add a few more drops of green if you want them browner.
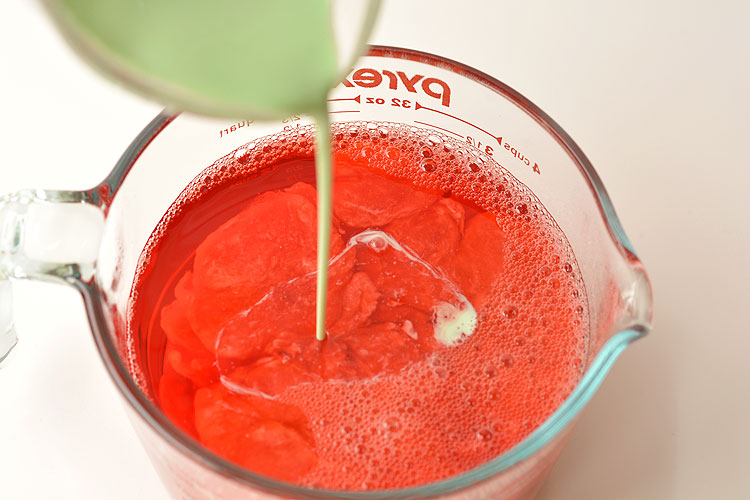
I transferred the Jello to a 4 cup measuring cup, but any large bowl or measuring cup with a spout will work. Add the green whipping cream (unwhipped) to the Jello and stir until it’s combined.
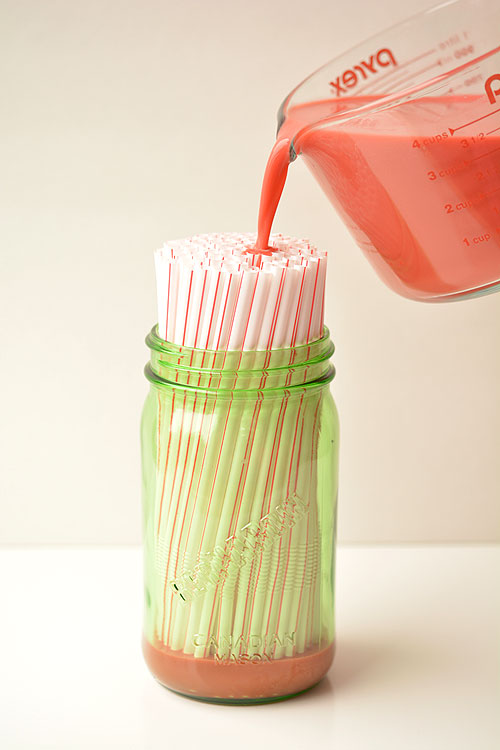
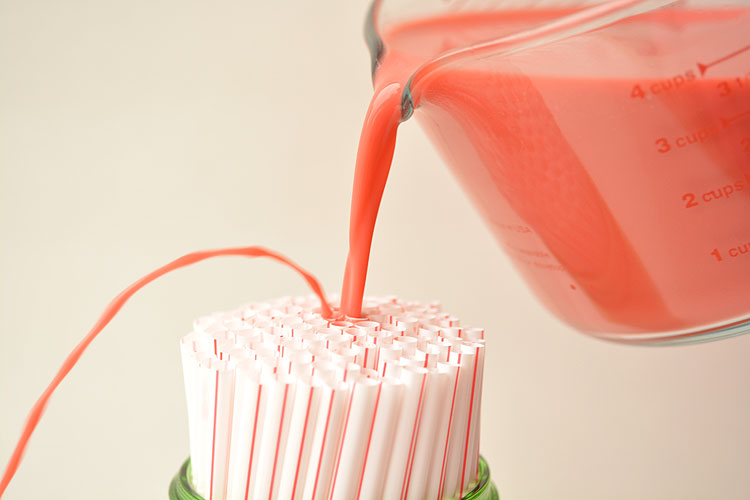
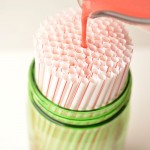
I don’t know why, but I found this part really fun! Pour the Jello into the top of the straws.
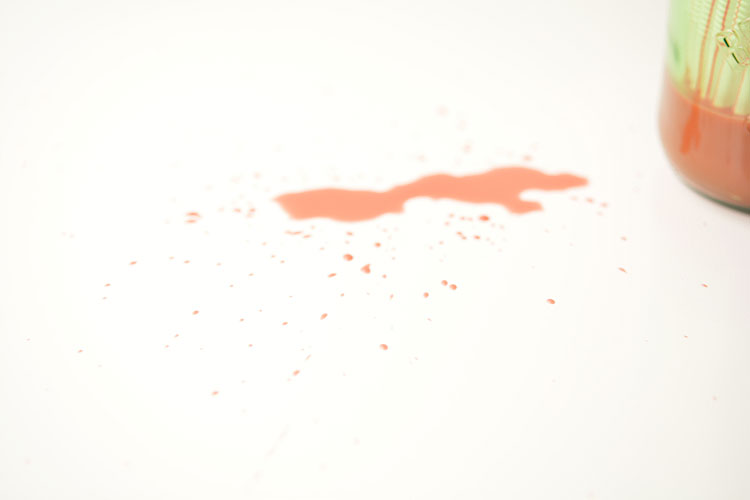
Don’t pour too fast though, or this will happen. I love that my husband actually managed to snap a picture of this. Oops!
And he also snapped a picture of my splatter, because he wanted to rub it in that I messed up. Men!
It will self level through all of the straws so you don’t need to worry about filling each individual straw.
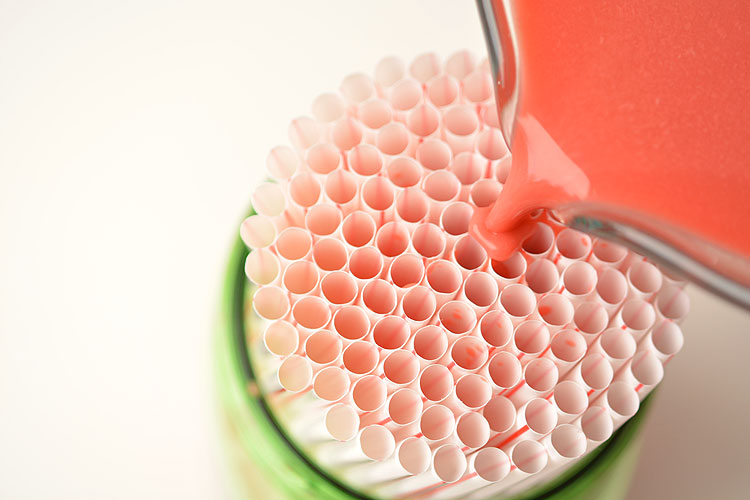
Just pour it into the middle of the jar and it will even itself out.
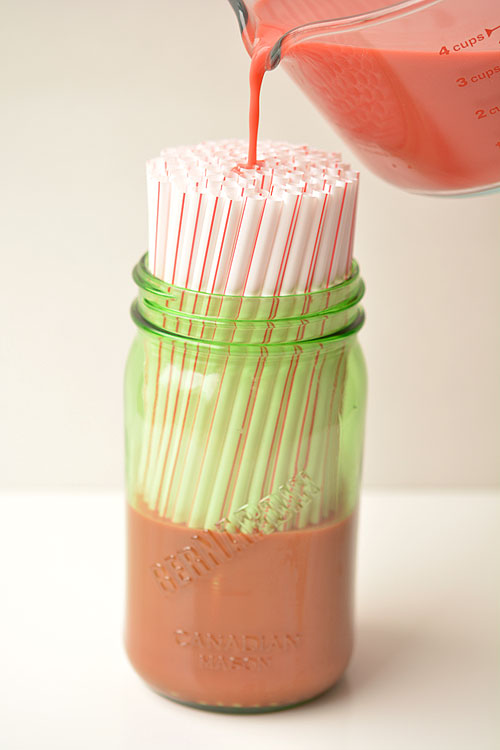
Now this was one of those glorious moments that made the perfectionist in me REALLY happy. See the empty measuring cup? And see the level of the liquid in the mason jar? PERFECT FIT!! : )
I put the jar in the fridge for 24 hours to set. The recipe I followed said they’ll be fine after 8 hours in the fridge, but I ran out of daylight hours to take my photos for you, so I had to wait until the following day.
It was a bit of a challenge getting the first straw out of the jar, but I managed to wiggle it out without too much damage. The ones after the first straw were much easier to remove.
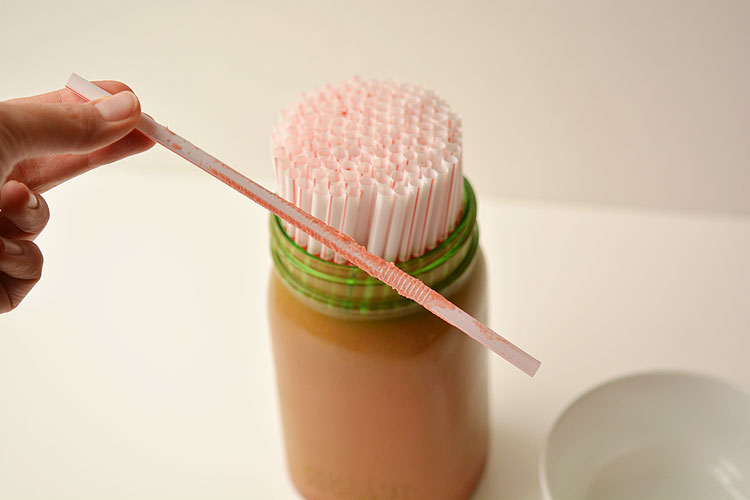
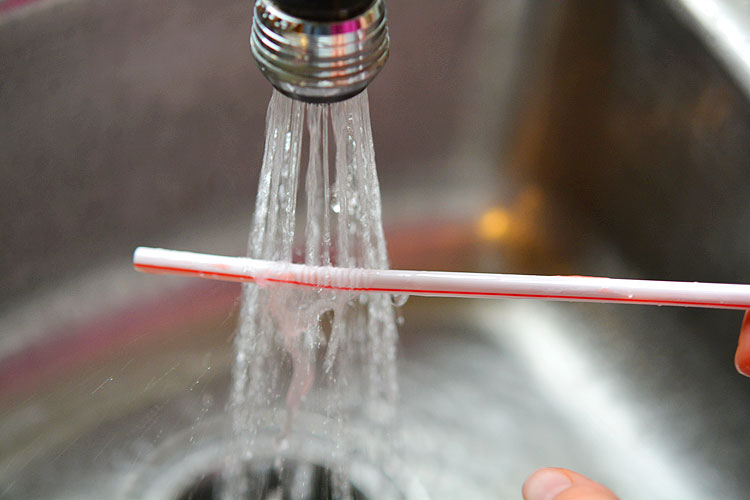
Run the straw under hot water for a few seconds. I ran them under hot water until the leftover Jello gunk on the outside of the straws washed off. If you don’t do this part, you won’t be able to get them out of the straw.
In case you’re curious, I tried blowing them out with my mouth too. It didn’t work.
Starting at the top of the straw where it’s empty, pinch with your fingers to squeeze the straw closed, and then slide your fingers down the straw to squeeze out the worm.
You have to squeeze out Every. Single. Worm. Make sure you give yourself plenty of time for this step! You’ll be doing it at least 100 times.
I read that some people tried using a rolling pin to squeeze theirs out, but I didn’t try it myself. If you do try it, be sure to let me know if it works!
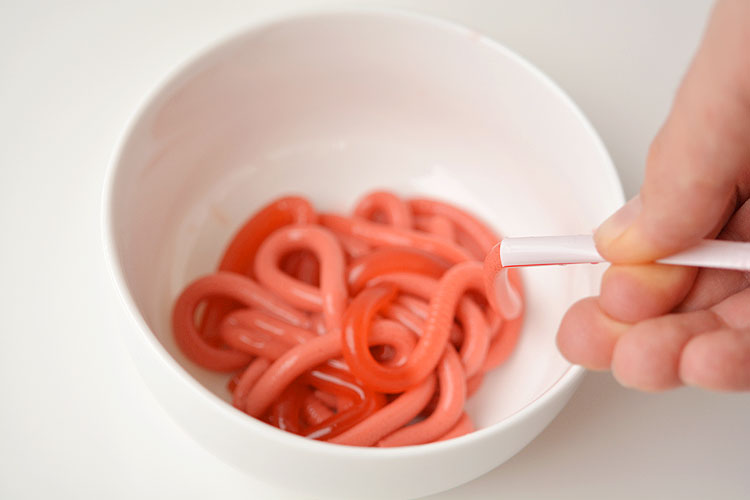
Now, if you’ll notice, part of the worms have clear Jello and part of the worms have opaque Jello. Don’t worry, you aren’t missing any steps, this will happen on it’s own without any effort from you.

See in the photo below how the bottom inch or so is clear Jello? It separates on it’s own. The straws on the inside of the jar seemed to have the longest bits of clear Jello. I’m not sure why some separated more than others, but it works for me.

I ran out of time to squeeze out all of the worms, so what you’re seeing is only about 1/3 of the straws that were in the jar. It was dinner time, and it was taking longer than I planned to get them all out. Sorry guys!
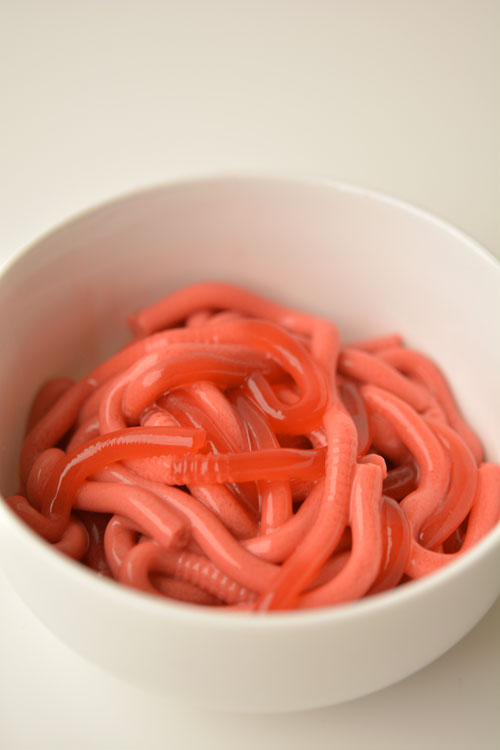
But I think you get the idea. Gross, right?!
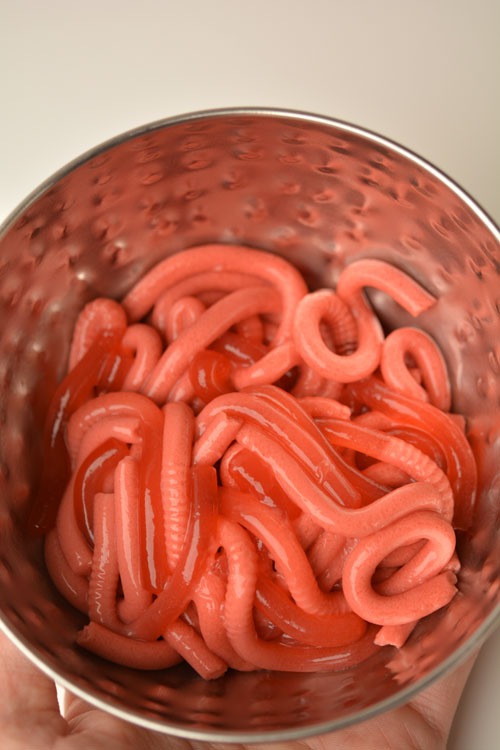
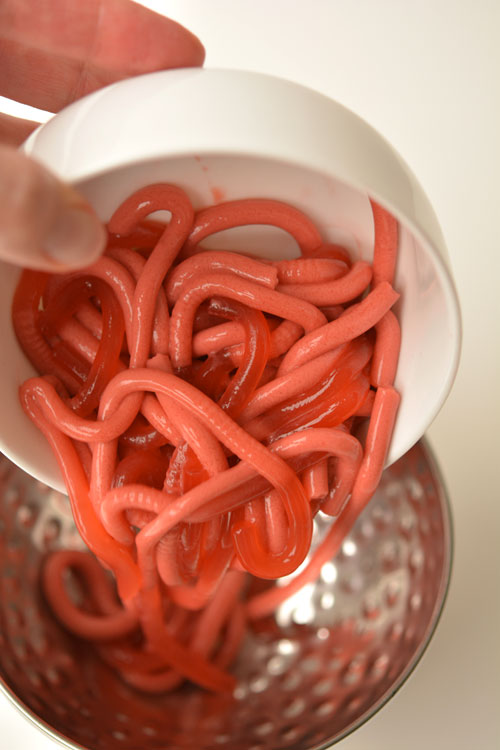
Pouring them into the other bowl gave me the heebie jeebies! Yuck! Don’t they look horrible!?
This recipe is AWESOME! It worked perfectly! I can’t guarantee anyone will actually want to eat them if you make them, but it will SO be worth it! Just imagine making an awesome dessert, and then putting these on top of it. haha… I think I might do that just for fun, since I still have 2/3’s of the worms left over in the fridge.
What would you do with these worms?
Jello Worms: How to make a Bowl Worms
Ingredients
- 1 package Raspberry Jello, the regular sized box, not the large box
- 3 packages Unflavoured Gelatin
- 3 cups Boiling Water
- 125 Flexible Straws
- 3/4 cup Whipping Cream
- 15 drops Green Food Colouring
- 1 Wide Mouth Mason Jar, 4 cup size or Round Cylindrical Glass Vase (the dollar store will have something)
Instructions
- In a large measuring cup, combine the Jello and the unflavoured gelatin.
- Add the boiling water and stir until the gelatin is completely dissolved.
- Chill in the fridge for 20 minutes or until lukewarm.
- Stretch each of the straws open to extend the flexible parts and then put the straws into the mason jar with the flexible side closer to the bottom.
- Add the green food colouring to the whipping cream and stir until combined. (Just stir it, don’t whip it).
- Pour the whipping cream mixture into the Jello mixture and stir until it’s well combined.
- Pour the mixture through the top of the straws until it fills the container. The straws will self level so don’t worry about filling each individual straw.
- Chill for at least 8 hours.
- Run each straw under hot water for a few seconds.
- Pinch the straw from the top down to squeeze out each worm.
- If you are making these in advance, squeeze the worms onto a waxed paper lined baking sheet and store, covered, in the fridge until you are ready to serve them.
- These can be made up to 2 days in advance.
Notes

These Jello worms are amazingly disgusting. Just try to eat them without cringing. I dare you. : )
Wait! Before you go, be sure to check out some of our other popular posts and save them to your Pinterest boards!
How to Make Your Own Puffy Paint:


Leave a Reply