


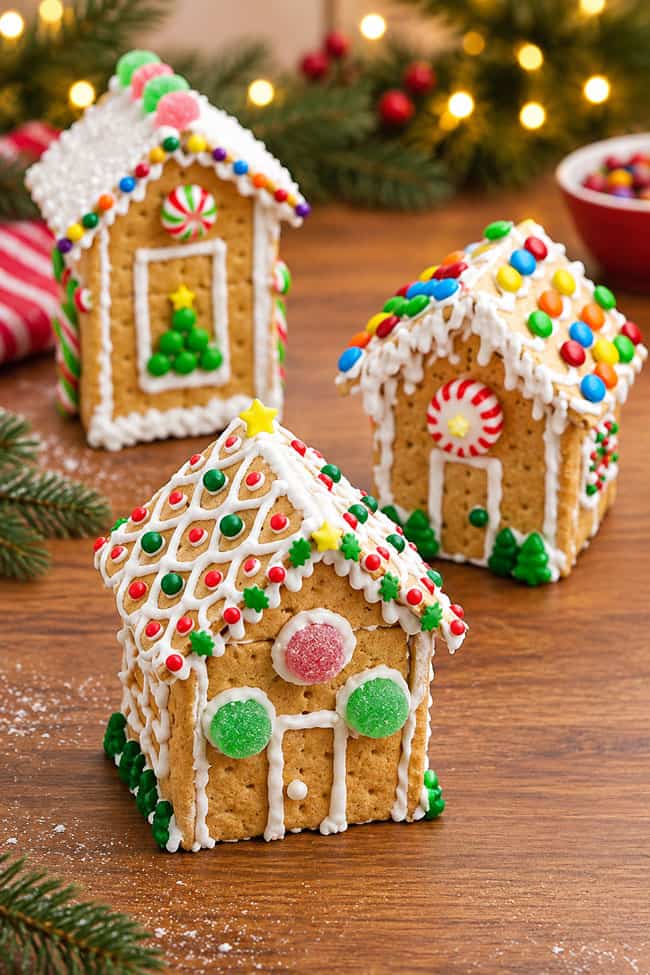
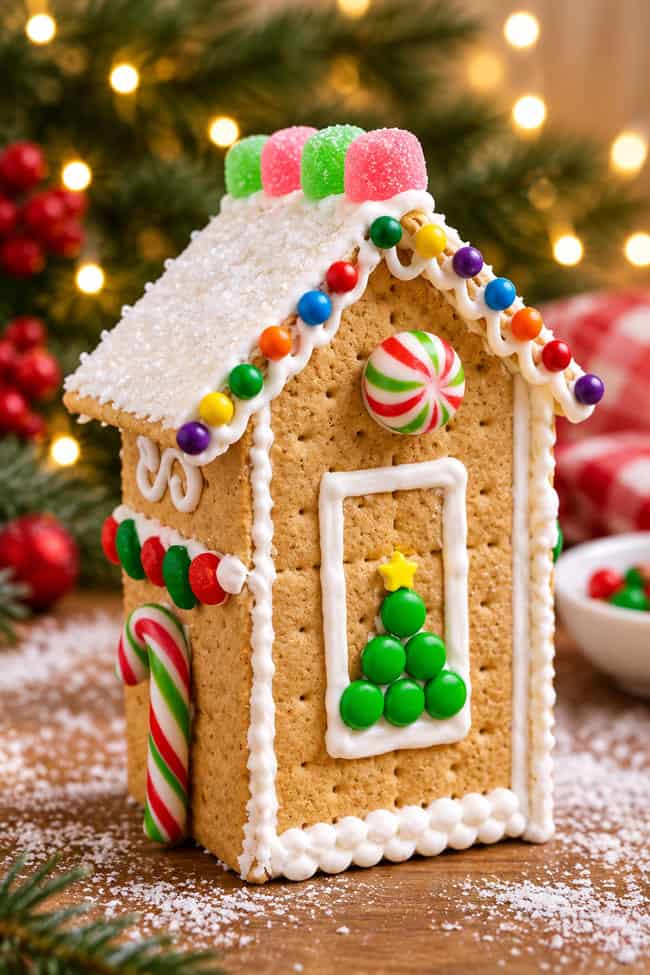
Making a graham cracker gingerbread house is such a fun Christmas tradition! There’s something magical about turning a few simple crackers into a cute little Christmas village, complete with snowy frosting rooftops, colourful candy decorations, and tiny gumdrop trees. It’s a sweet holiday activity that lets everyone get creative, and the decorating possibilities are endless!
The best part? You don’t need to bake anything! Graham crackers make building gingerbread houses so much easier, and you can use your favourite candies to make each house completely unique. Make one little cottage or build an entire gingerbread village with the family. It’s a fun Christmas activity for kids and adults alike!
This post contains affiliate links. If you use these links to buy something, we may earn a small commission at no extra cost to you. This helps support our website and allows us to keep creating fun, free content.
How to Make a Graham Cracker Gingerbread House
Materials:
Equipment:
- Piping bag and tip (or Ziploc bag)
Instructions:
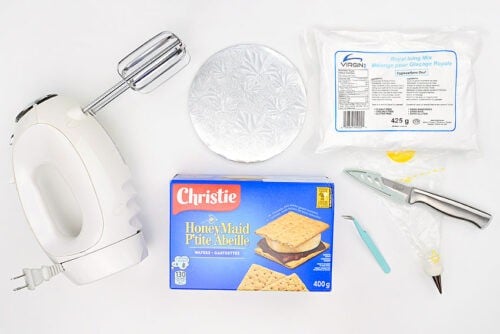
Step 1: Find what you need
- Gather your supplies and materials.

- Then have fun selecting candy to decorate your gingerbread house! These graham cracker houses are smaller than a regular gingerbread house, so you’ll want to grab all the small sprinkles and mini candy you can find.

Step 2: Cut the pieces
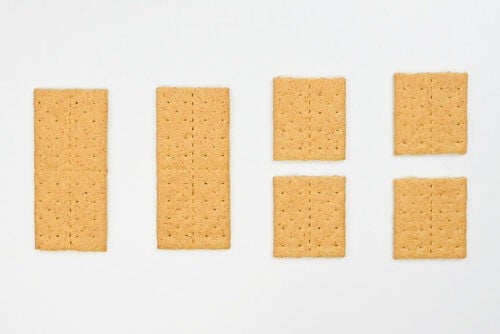
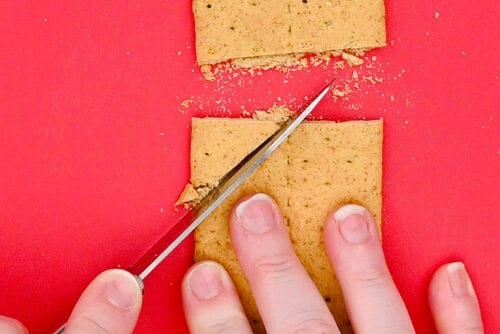
- To make your “gingerbread” house you’ll need 4 graham crackers. 2 full crackers and 2 broken in half.
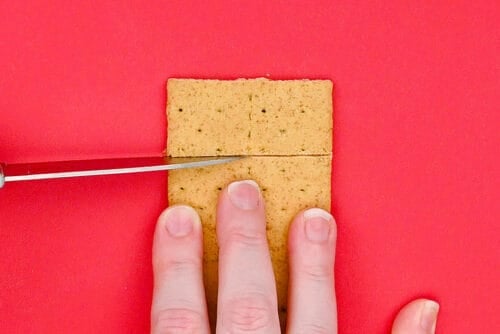
- Begin by cutting a bit off the top of one of the full graham crackers. You can measure it or use the dots on the crackers to guide you.To cut cleanly through the graham cracker you’ll want to gently “saw” back and forth with a paring knife. Continue until the cracker separates.
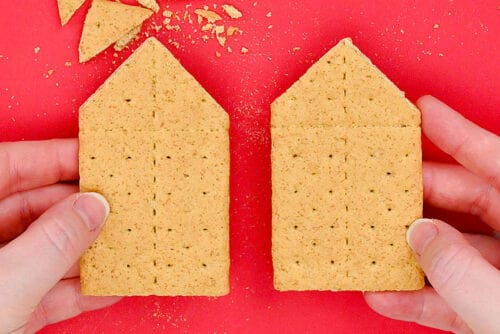
- Then cut down on an angle from the top center of the cracker to create the roof line.
- Match the cut on the opposite side. Then repeat with a second cracker so you have the front and back of your house.
Step 3: Make the icing
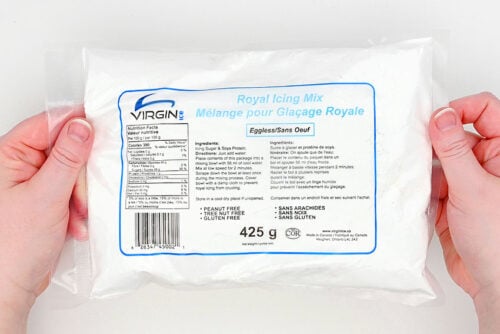
- To “glue” the house together you’ll want to use chocolate melts or royal icing. We chose to use a package of royal icing mix where you only have to add water.
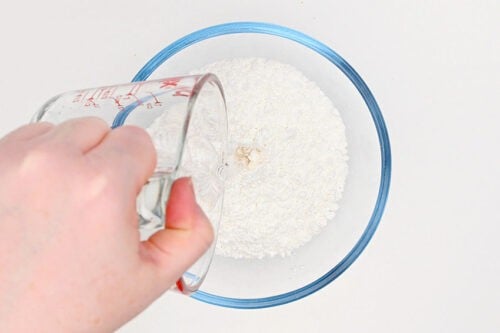
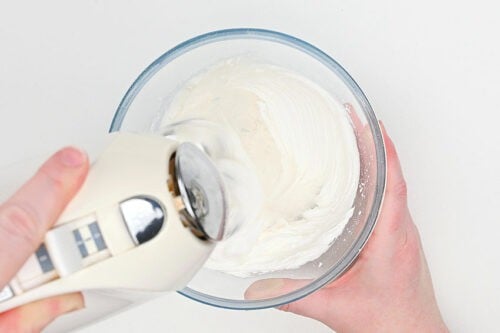
- Put the icing mix in a bowl and add the required amount of water.Note: We divided our package in half. Each half made about 4 houses.

- Follow the package instructions and use a hand mixer to mix up the royal icing. It should be thick like toothpaste.
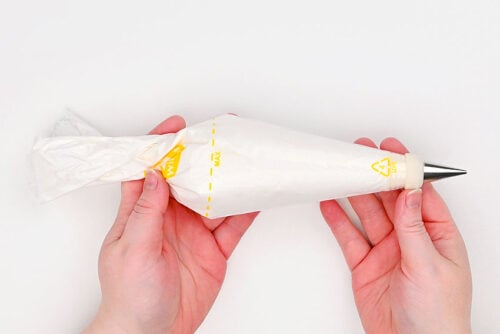
- To decorate the house we found it best to put the royal icing in a piping bag. Choose a tip that’s large enough for the royal icing to come out easily.
Step 4: Put the house together
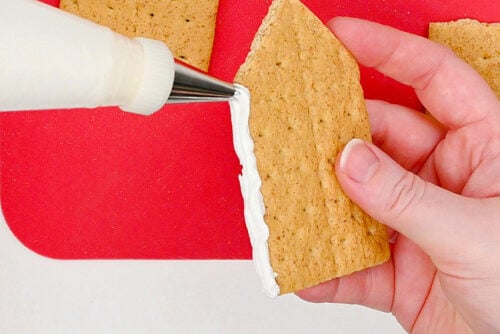
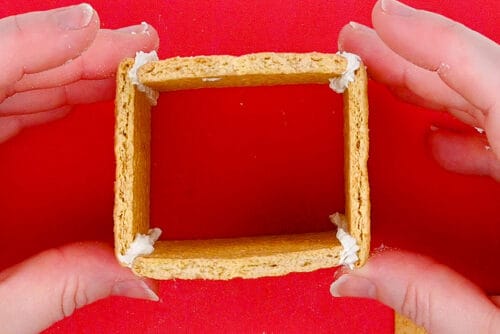
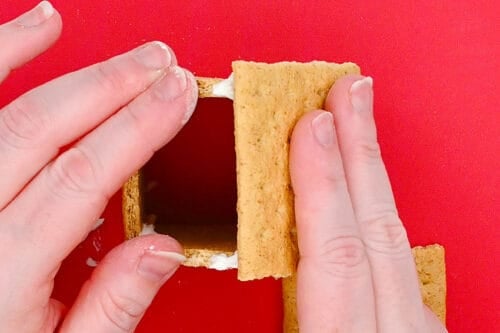
- Begin by adding frosting to the side of one of the pointed pieces.For this part you can pipe it on or simply use a knife to spread it.
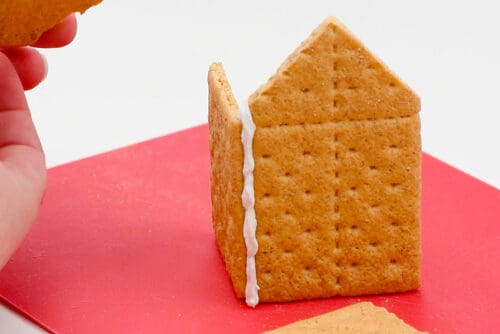
- Then connect one of the half crackers perpendicular to the front, to create the side of the house.It should be placed with the shorter sides at the top and bottom.
- Repeat with the other two pieces, creating a square with the 2 pointed crackers across from each other.
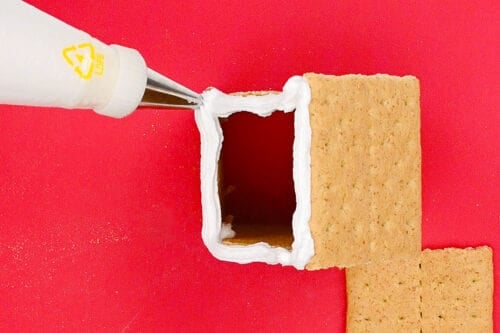
- To make the roof add icing to the sloped sides. Then place one of the half crackers with the long side at the top of the roof.
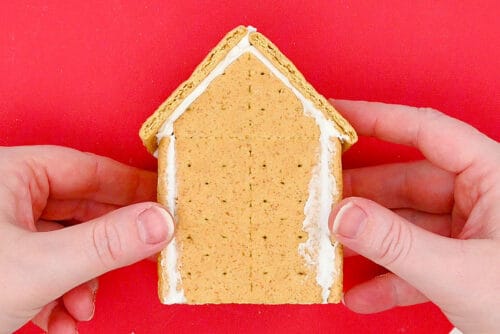
- Then add icing to the other half, as well as the top of the cracker you’ve just added.
- Set the other half of the roof in place.The base of your house is complete! Now you can have fun decorating.NOTE: We waited to place our house on its base until after it was decorated, but it might be easier to “glue” it in place first.
Step 5: Decorate the house
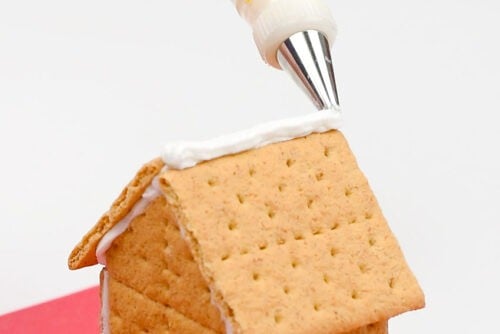
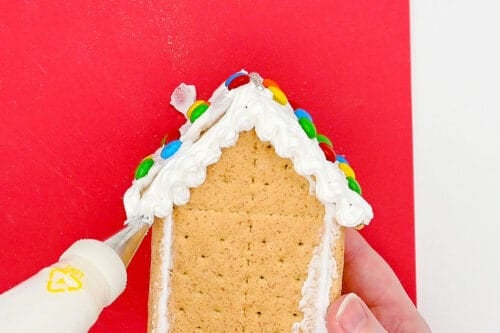
- You can start wherever you’d like when decorating the house. We chose to begin by adding a line of frosting to the peak of the roof.
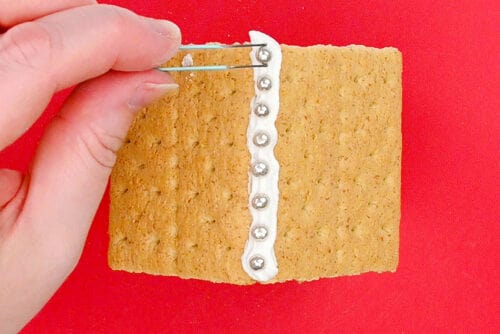
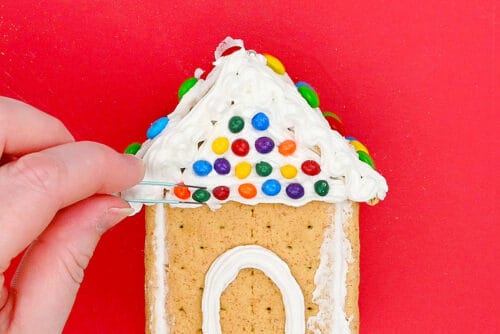
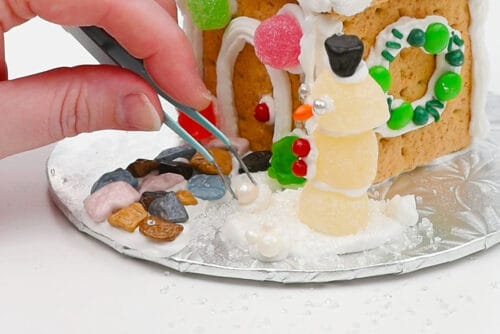
- Add candy into the icing.Hint: For small candy or sprinkles, like these silver dragees, it helps to place them with curved precision tweezers. That way they go where you want them, and you don’t get icing all over your fingers.
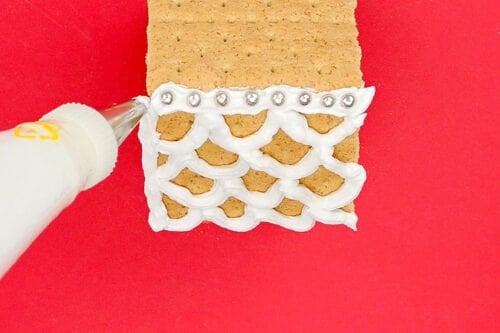
- You can also use the icing to create a decorative or shingles pattern on the roof.
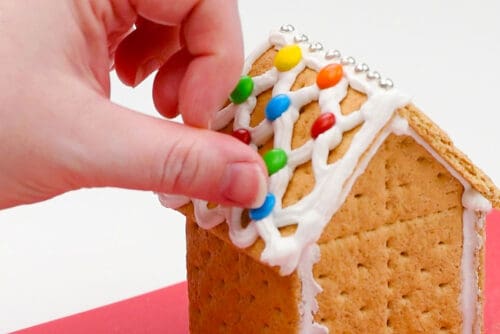
- Cover the whole roof with your favourite candy, or add in mini M&Ms to the places where your pattern meets.
- You can use the piping bag to add “snow” along the side of the roof, or even icicles if your decorating tip is small enough.
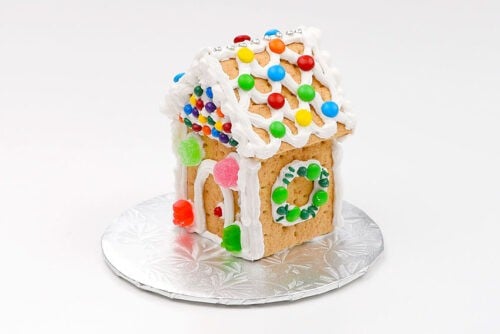
- Here we covered the top part of the house with icing and decorated it with mini rainbow chocolate chips. We also added a curved front door.
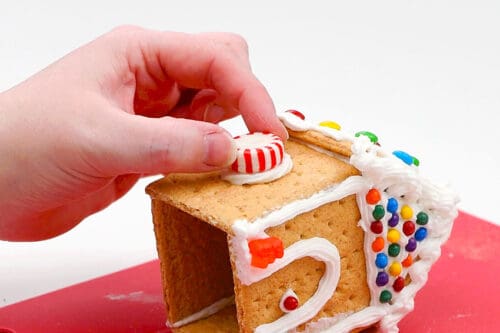
- Peppermint candies make a good decoration for these houses. You can use them as windows and decorate around them with sprinkles.
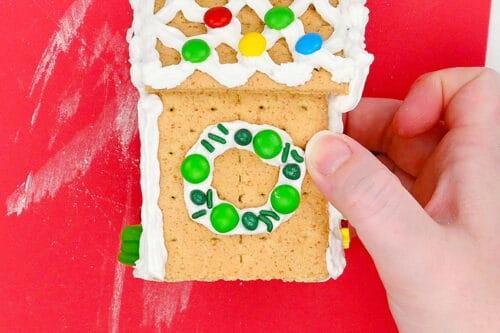
- On this house we also made a holiday wreath using green mini M&Ms and sprinkles.Continue decorating the house until you’re happy with each side. You may need to wait a bit in-between sides for the icing to harden so you don’t smush it as you work your way around.
Step 6: Create a holiday scene
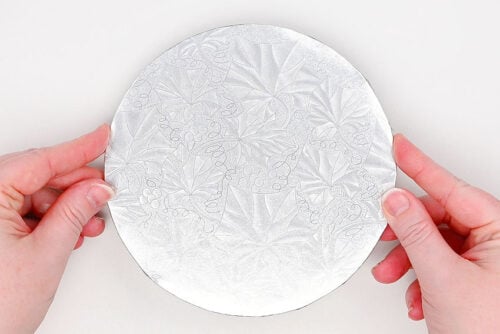
- You’ll probably want to make a scene for your gingerbread house, so you’ll need a base for it. We’re using a small cake board, but you can also use a paper plate or cover a piece of cardboard with aluminum foil.
- “Glue” the house to the board with icing so it’ll sit nicely in place without moving.
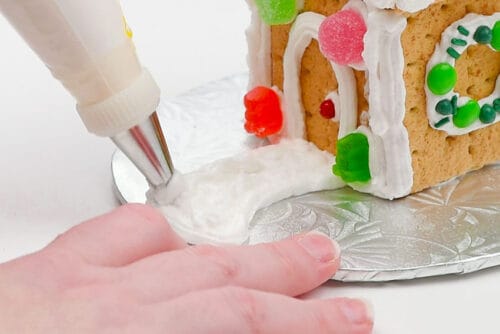
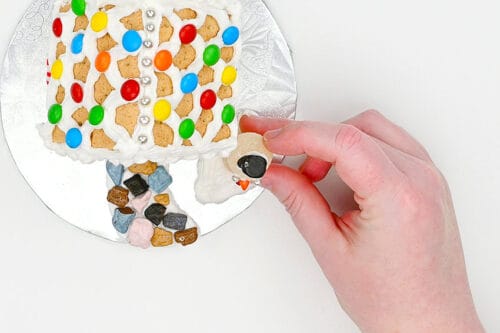
- Add icing to the cake board to create a path from the front door.
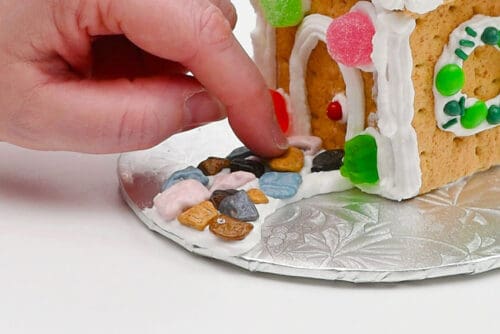
- We used chocolate rocks to create the front path, but you can also use sprinkles, sanding sugar, or even M&Ms.
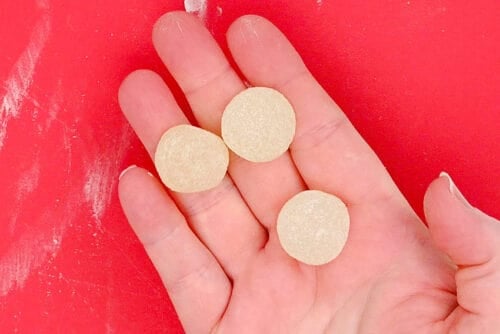
- If you want to create a whole scene for your gingerbread house you can make a snowman with white gumdrops.
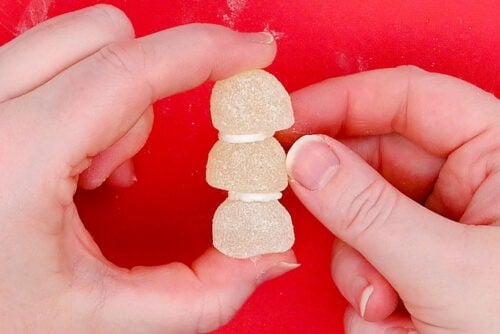
- Use the icing to stack the 3 gumdrops. You’ll need to let it sit for a little bit for the icing to harden.
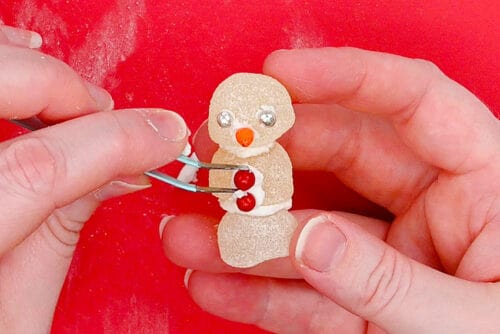
- Then add sprinkles or other nonpareils for the eyes and buttons. We also used an orange rainbow chip for the carrot nose.For the snowman’s hat you can use a mini rolo or a black chocolate rock.
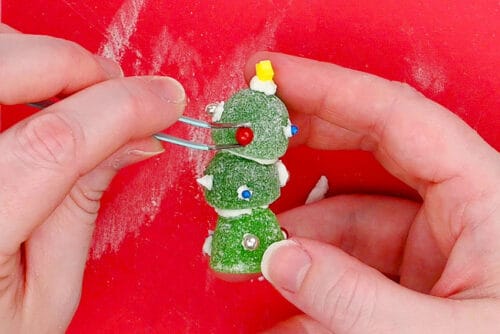
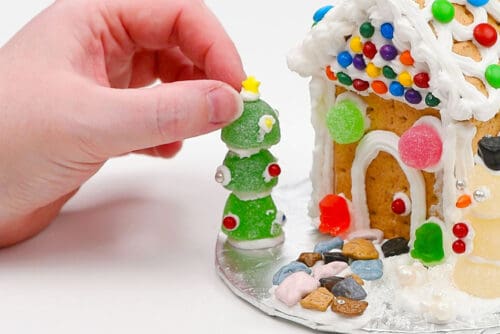
- You can also make a Christmas tree in the same way. Stack green gumdrops, add a star sprinkle on top, and use nonpareils as ornaments.
- Add a nice snow patch of icing for your snowman to sit in and then set it in place.
- We added white sanding sugar on top to look like icy snow, and then added round white sprinkles as snowballs.
- Then add the tree wherever it looks best and make any final adjustments to your gingerbread neighbourhood.
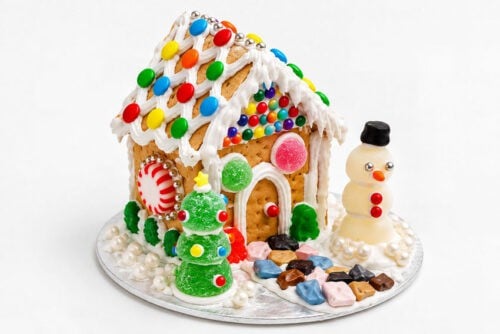
- Your graham cracker gingerbread house is complete!
Helpful Tips:
- Don’t worry if your graham crackers are already broken in half. You can still make a gingerbread house! Simply cut the angled roofline into one cracker half, then use icing to “glue” it to another half to create the front or back wall of your house.
- Get creative with your decorations! Use colourful candies, sprinkles, and frosting to turn your graham cracker gingerbread house into a whole Christmas village scene. Add candy trees, snowmen, pathways, and snowy yards to bring your little village to life!
- Build the houses ahead of time for younger kids. Assemble the graham cracker houses in advance and let the icing harden completely before decorating. This gives kids a sturdy structure to work with, so they can focus on adding candy decorations without worrying about the house falling apart.

What can I use as a base for my graham cracker gingerbread house?
A cake board is a great option for displaying your gingerbread house, especially if you’re planning to create a whole Christmas village! You can also use a sturdy piece of cardboard wrapped in aluminum foil for an inexpensive DIY base. Or use a paper plate for smaller houses. Just make sure your base is strong enough to support the house and all its candy decorations.
How do you cut graham crackers without breaking them?
The trick is to use a gentle sawing motion instead of pressing straight down with your knife. Slowly move a serrated knife back and forth along your cutting line, creating a visible groove in the cracker. Continue sawing until the groove is deep enough that you can carefully press down and snap the cracker along the line. Work slowly and avoid applying too much pressure, since graham crackers can crumble easily.

What supplies do I need to make a graham cracker gingerbread house?
You only need a few simple supplies to make your own mini gingerbread house!
- Graham crackers: These make up the walls and roof of your house.
- Royal icing: Use a royal icing mix to hold the house together and add snowy details. Melted white candy melts or white chocolate can also be used to attach the crackers.
- Candy decorations: Mini M&M’s, sprinkles, sanding sugar, small gumdrops, peppermints, and other tiny candies are perfect for decorating. The smaller the candies, the easier they’ll fit on your little house!
How can I keep my graham cracker gingerbread house from falling apart?
The key is to use a thick, sturdy icing and give it enough time to set! Royal icing works especially well because it dries hard, creating strong connections between the graham crackers. Hold each piece in place briefly as you assemble the house, and let the walls become firm before attaching the roof. Once the entire structure has hardened, you can start decorating without worrying as much about pieces shifting or collapsing.
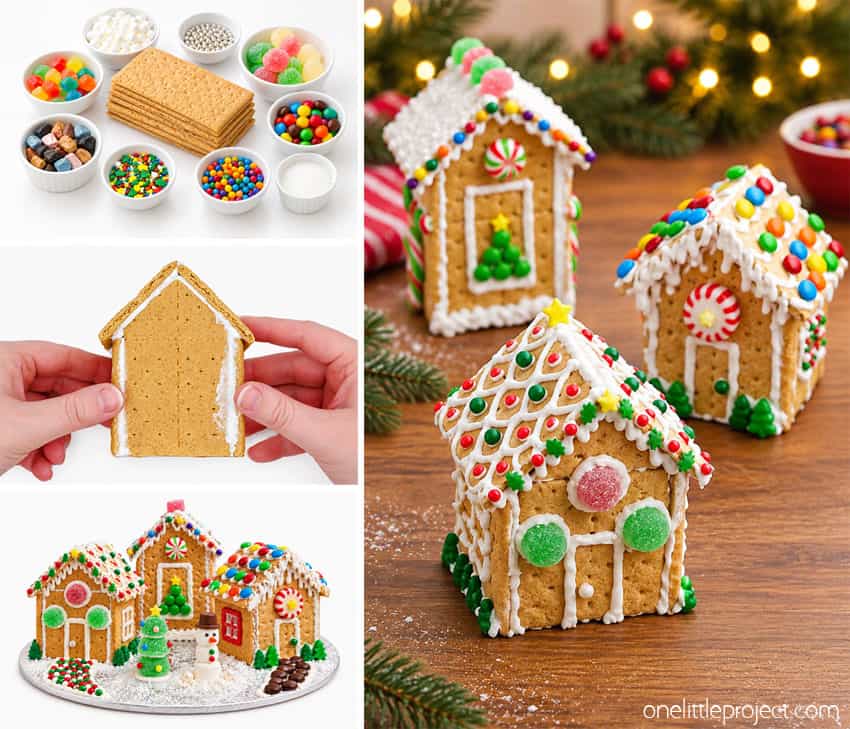
These graham cracker gingerbread houses are almost too cute to eat! From candy-covered rooftops to tiny snowmen and Christmas trees, it’s so much fun to see all the little details come together. And there’s no right or wrong way to decorate them, so every house ends up with its own personality!
Make it an annual Christmas tradition and see what new designs you can dream up each year. You might even find that building your own little gingerbread village becomes one of your favourite parts of the holiday season!
Here’s even more Christmas craft ideas:
Ping Pong Ball Snowman Tealights


Now available
Low-Mess Crafts for Kids Book
72 cute and fun crafts that kids and parents alike can enjoy. All with as little mess as possible!
Where to buy:
You can purchase Low-Mess Crafts for Kids from Amazon, or wherever books are sold:
Amazon | Barnes and Noble | Books-A-Million | Indiebound | Amazon Canada








Leave a Reply