Hello everyone, it’s Megan from Homemade Ginger and I’m excited to share this easy garden craft with you all today! These seed bombs are so sweet and would make great gifts for Mother’s Day or favors for a spring party!
A few years ago, I decided to plant a vegetable garden. I had never grown a veggie in my life, but I figured it couldn’t be that difficult! I did my best at tilling up a random patch of soil in the back yard and bought a bunch of seeds. After doing some quick Google searches on how to plant various vegetables, I got to work at planting all of my seeds. Of course, I had to plant about every variety of vegetable that I could find – this was going to be an amazing garden! I was picturing a summer full of bountiful produce right in my backyard. What actually happened, was quite pathetic. Weeds overtook the soil and I was terrible at pulling them. I eventually gave up and after all of my work and hundreds of seeds, I did not harvest one single vegetable! Needless to say, I haven’t attempted a garden since!
Although I haven’t had success in the vegetable department, I do love to plant flowers that are low maintenance. My kids LOVE getting involved in planting seeds and watching their sprouts grow over the summer. These little seed bombs are so easy to make and so much fun for kids to plant. Kids can get involved in every step of the process of this fun craft and you will be able to enjoy those beautiful flowers all summer!

You could make these seed bombs any shape or color you’d like. They would be perfect packaged up and given as a Mother’s Day or end of the year teacher gift. I was inspired by these seed bombs and wanted to try some heart shaped ones for Mother’s Day!
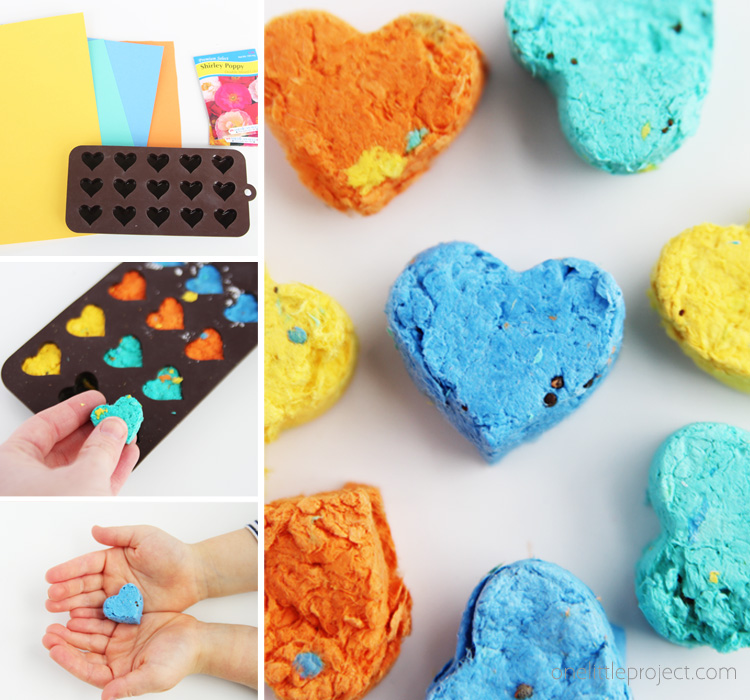
DIY Seed Bombs
The full instructions are at the bottom of this post, but here is what you will need:
- Silicone Mold
- Colorful Paper
- Small Seeds
- Blender
You can plant these cute little bombs right away or place them in some pretty packaging to give away as gifts.

These little seed bombs are so pretty, you almost won’t want to plant them at all!

DIY Seed Bombs
Materials:
- 1 packet seeds
- 1 sheet colorful paper
- 1 silicone mold
Equipment:
- Blender
Instructions:
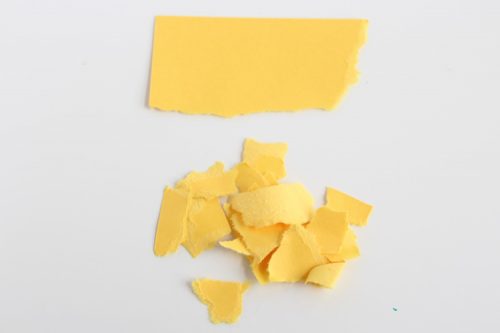
- Begin by tearing the coloured paper into small pieces.

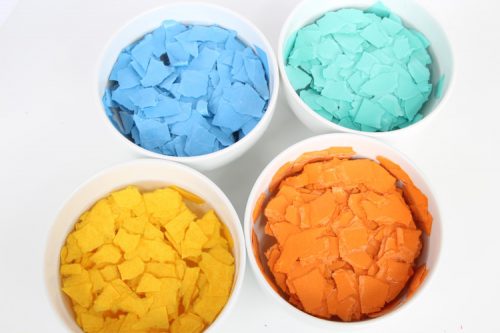
- After all of the paper is torn, place the pieces in a bowl and cover it with water. Soak the paper for about 15-20 minutes.
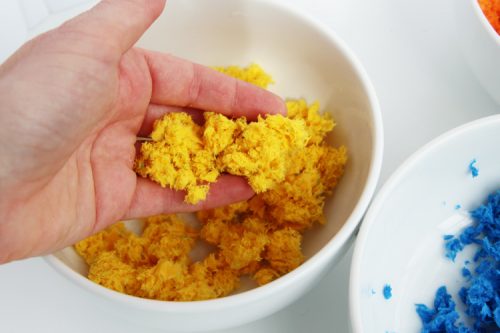
- Squeeze the water out of the paper and place it in a blender. Blend until into a pulp consistency. Squeeze any excess water out of the pulp.
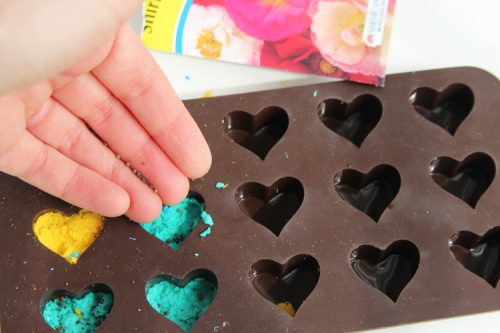
- Fill the molds up half way with pulp, pressing down firmly.
- Sprinkle seeds on top of the pulp and fill the rest of the way.
- Leave the bombs in the mold and let dry, about 2-3 days. Remove from mold once completely dry.
- Your batch of seed bombs is complete!


These adorable little seed bombs are so easy to make and would make a lovely Mother’s Day or teacher gift! Kids of all ages will love helping with this DIY garden craft!


Leave a Reply