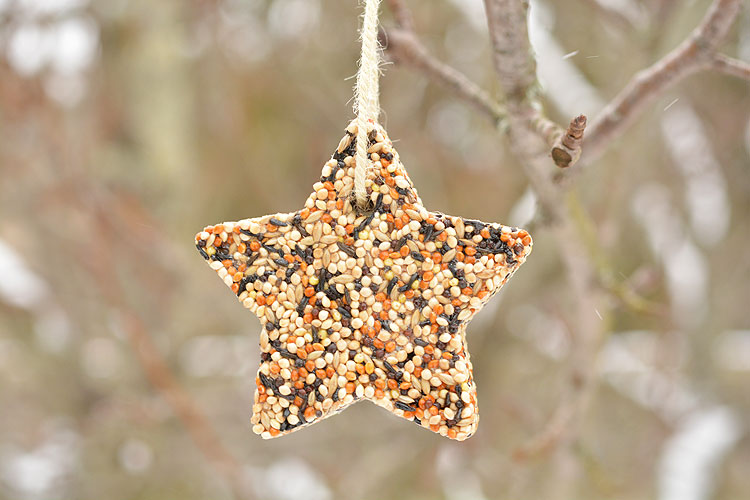
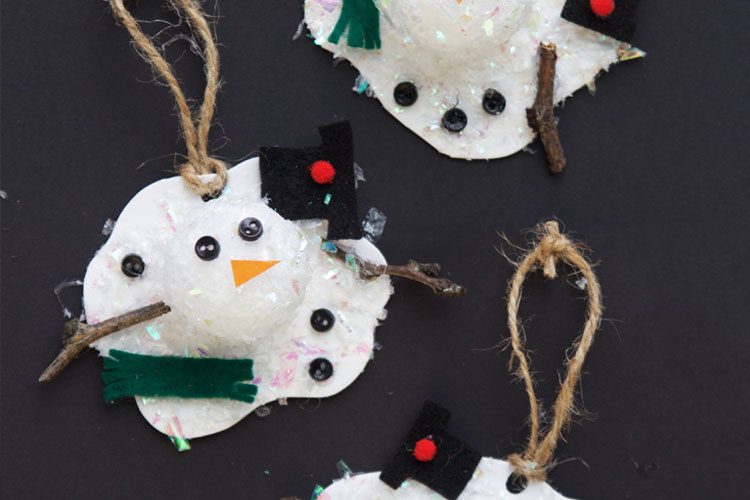
These birdseed ornaments are really easy to make! They look amazing and they might even look complicated, but don’t let it fool you – They’re super simple! I ended up calling them “bird cookies” with the kids because it’s kind of what they look and feel like. So when our birdseed ornaments were done, we went outside and hung our “bird cookies” on the trees and bushes in the backyard. The kids had a blast!
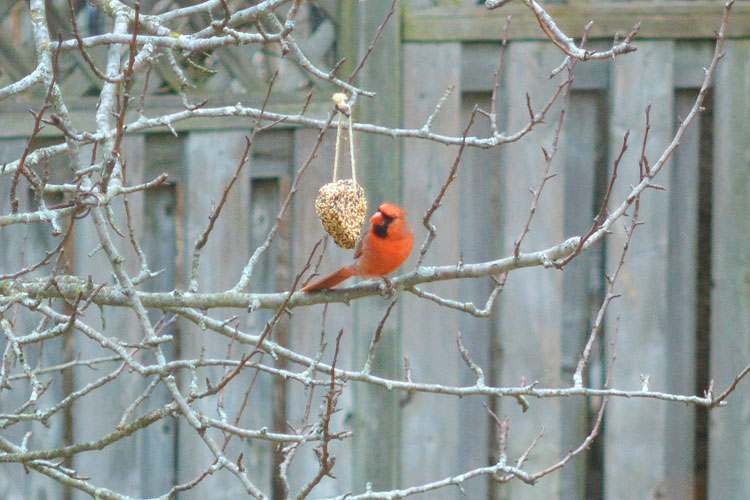
I don’t know why, but I get a little giddy when I see birds in the backyard eating the birdseed that I put out for them. Maybe it’s a maternal instinct to feed others? I have no idea? But when I see birds, I call the kids over shouting, “LOOK! LOOK! There’s a bird on the birdfeeder!” And then they come running to the window and they get really excited too. And wow, when there’s a bright red cardinal perched on the ledge of our little wooden bird house, it just makes our whole day!

We’ve had a bit of a temperature swing where we live the last week or so. I made these birdseed ornaments when it was around 1ºC (34ºF) outside, which I considered perfect weather for them to hold their shape. But then it warmed up to 13ºC (55ºF) outside with bright sunshine for a few days. I was worried the mild temperatures would melt the gelatin, but the ornaments are still holding up perfectly well!
It’s supposed to rain this afternoon, so I’m guessing that will probably melt them away, but if your weather is a little on the mild side, don’t worry about them falling apart from the warmer temperatures. You can still make them, at least up to 13ºC (55ºF), maybe even warmer?
Check out our video for How to Make Bird Seed Ornaments:
If you’re looking for more fun outdoor craft ideas, here’s a few of our favourites:
How to Make Birdseed Ornaments
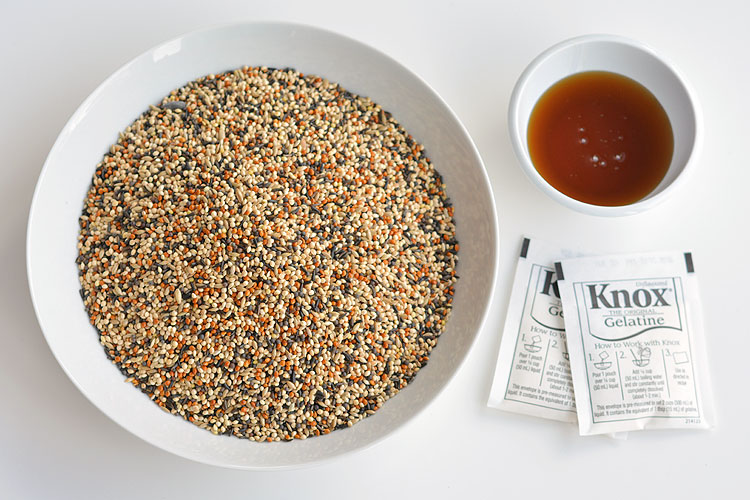
The full printable recipe is at the end of this post, but here’s what you’ll need:
- Birdseed
- Unflavoured Gelatin
- Corn Syrup
- Water
- Cookie Cutters
- Drinking Straws
- Twine
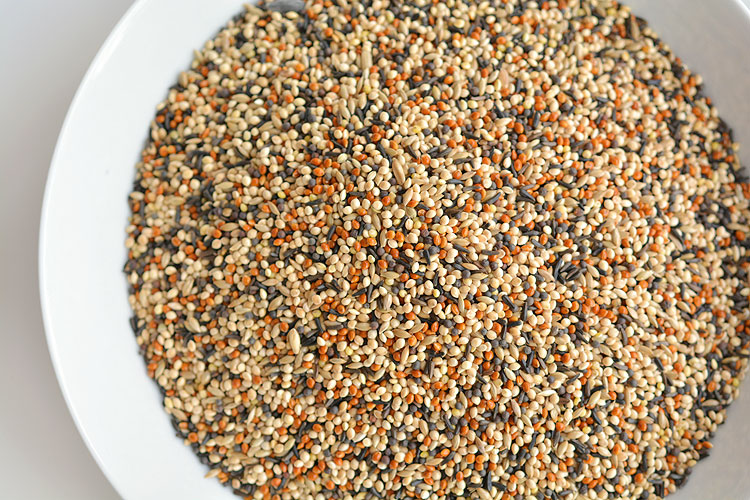
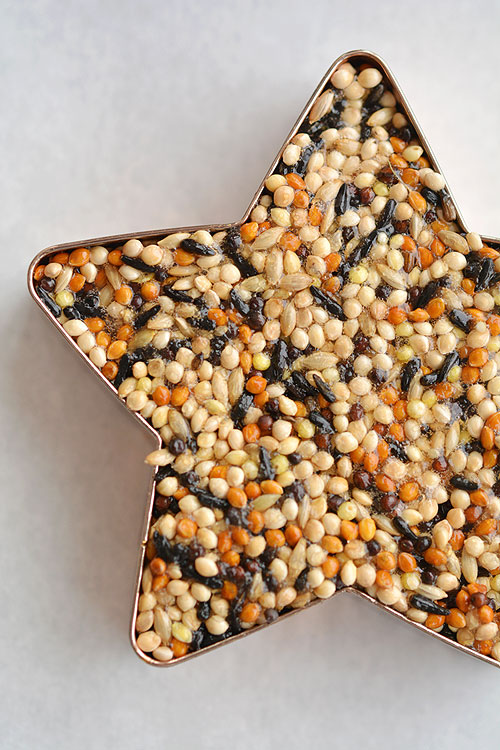
The birdseed I used was called “Outdoor Songbird Mix” and I got it from the bulk store. You can probably use birdseed that has sunflower seeds in it if that’s what’s available. I was worried it wouldn’t stick together as well, so I opted for a birdseed without the larger seed pieces in it.
There are quite a few recipes for birdseed ornaments floating around on Pinterest – some having loads of ingredients, and some having only the birdseed and gelatin. I found the corn syrup worked really well to keep things stuck together. The gelatin did it’s job to hold the cookie cutter shapes, and the corn syrup helped keep the birdseed pieces from flaking off.
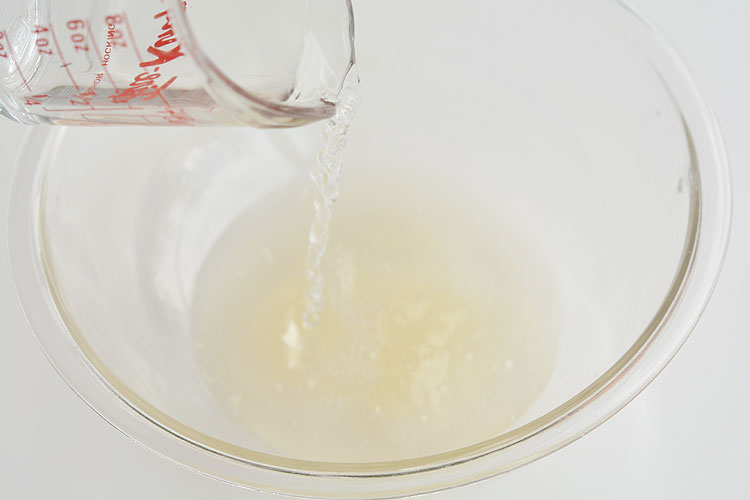
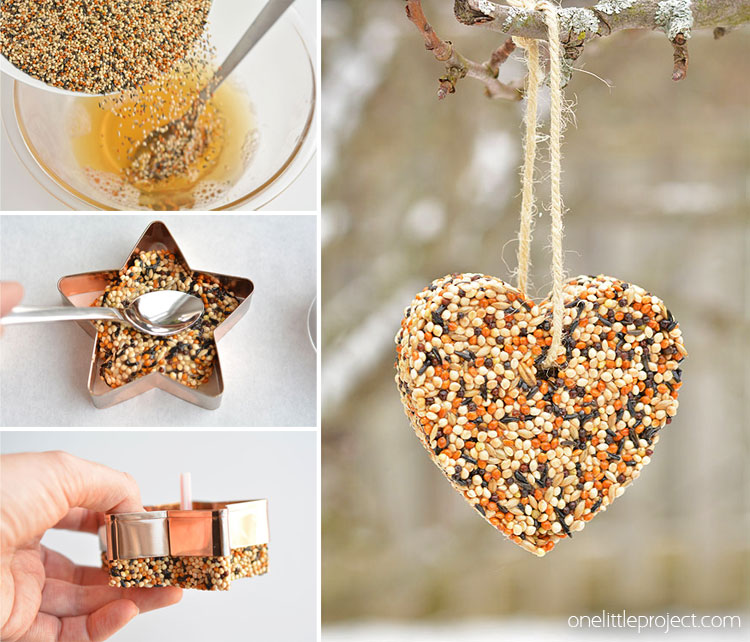
First I followed the instructions on the packet of Gelatin. Since I used two packets of gelatin, I added 1/2 cup of cold water into a bowl, then I poured the two packets of gelatin on top of the water.

Next I added 1/2 cup of boiling water to the mixture and stirred it until it was dissolved.
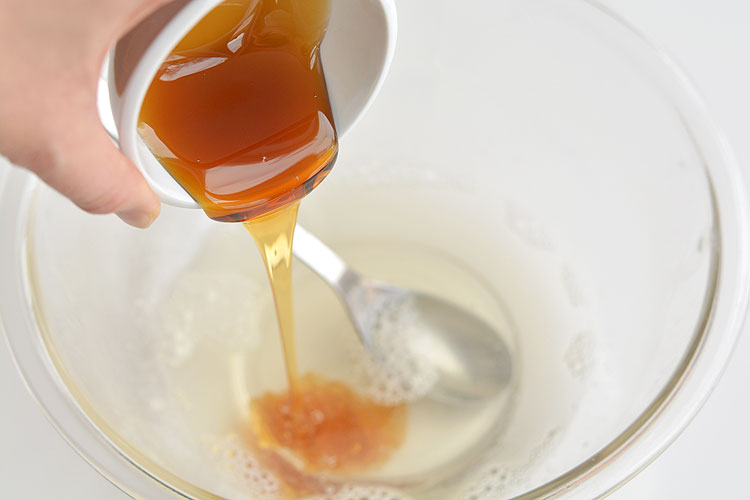
Once the gelatin was dissolved I added the corn syrup and stirred until it was dissolved as well.
Finally, I added the birdseed to the gelatin mixture.
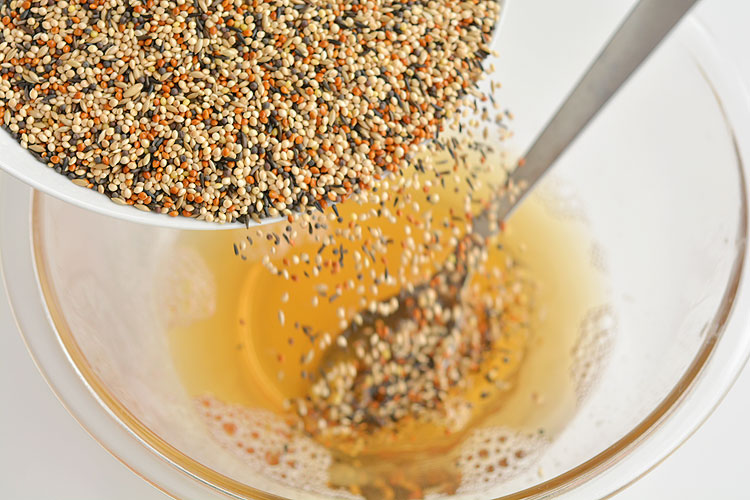
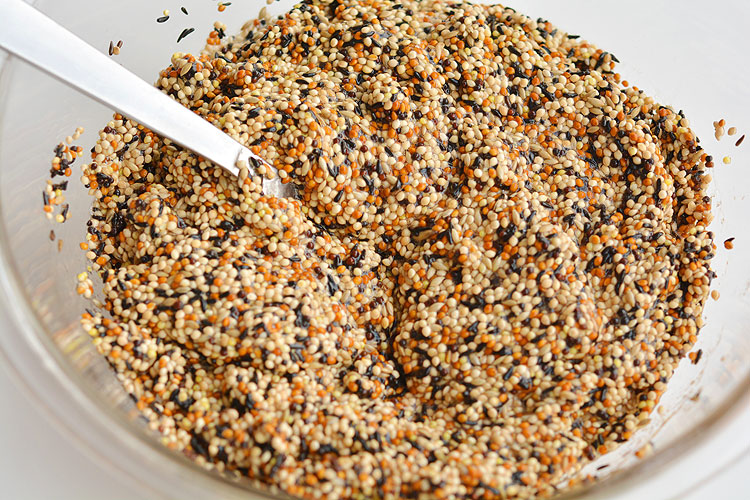
It’s a little watery at first so you’ll need to place the bowl in the refrigerator for about 10 minutes or so, or until it firms up enough that the liquid won’t seep out from under the cookie cutters.
The photo below was taken after 10 minutes in the fridge and you can kind of see the mixture is starting to hold its shape.
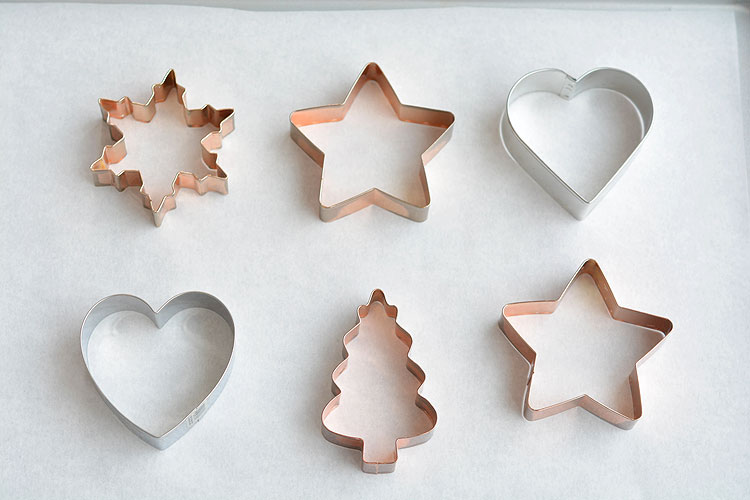
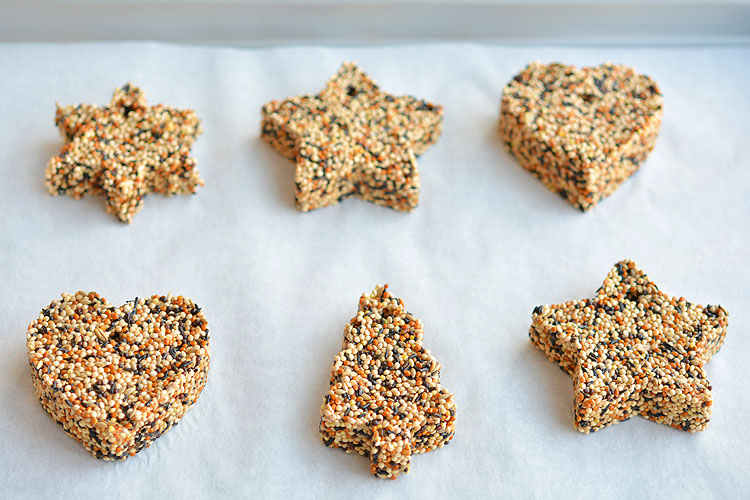
Set your cookie cutters out onto a parchment lined baking sheet.
Then spoon the mixture into each of the cookie cutters, and press it down firmly so that the cookie cutter is completely filled.
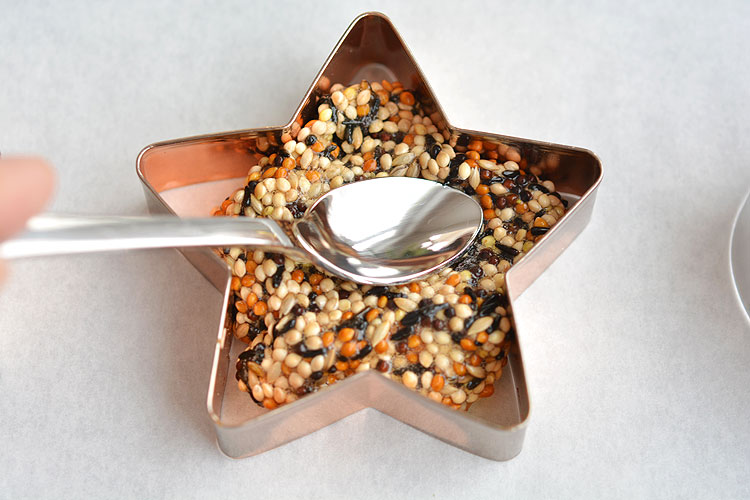
I filled my cookie cutters right to the very top with the birdseed mixture.
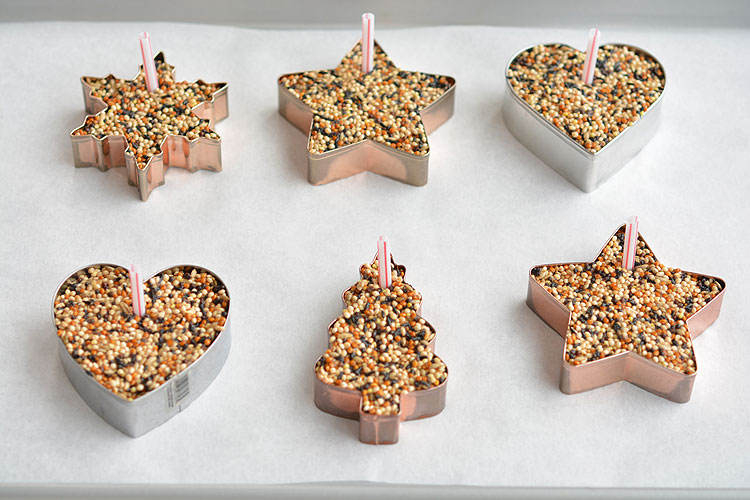
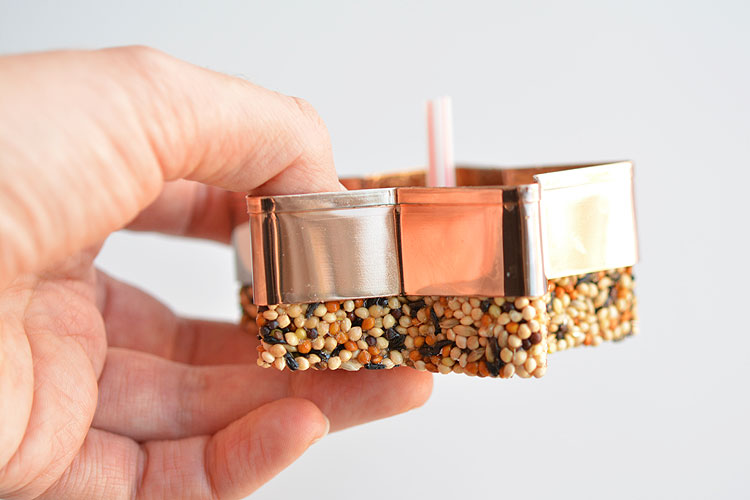
Next, you’ll want to take some drinking straws and cut them into 2″ long pieces.
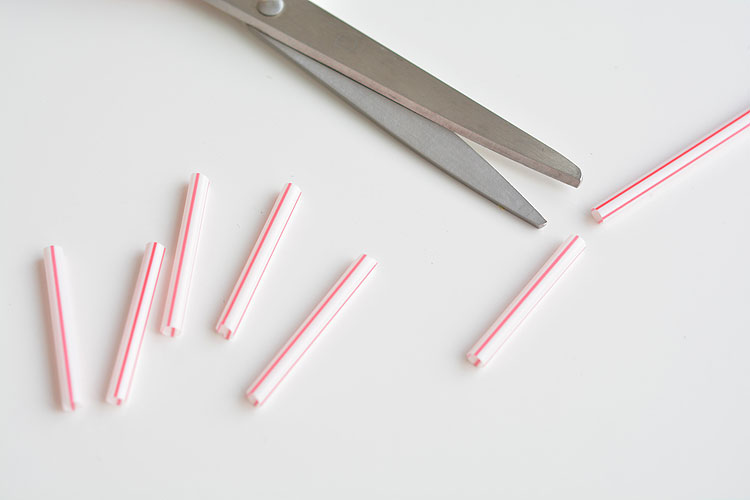
Press a straw into the birdseed (before it’s set) so that you have a nice neat hole for the twine to go through afterwards.
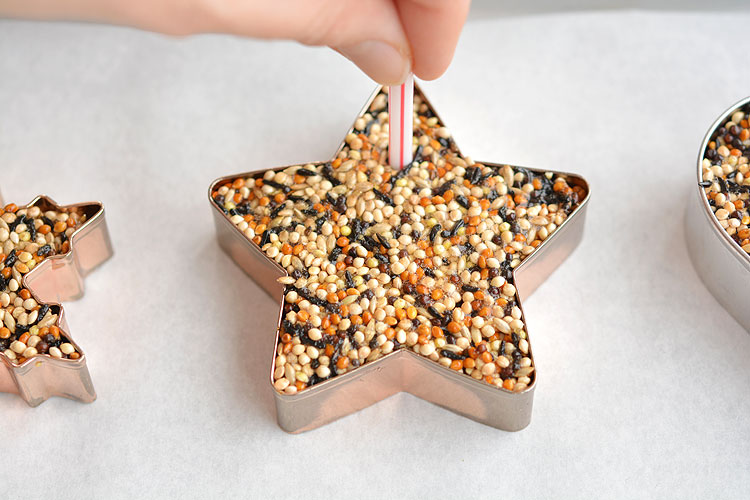
Don’t place the straws too close to the edge of the cookie cutters. I made about 12 ornaments and two of them broke (the snowflake and the tree) when I went to hang them because it was just too much weight and not enough space between the hole and the edge of the shape.
The ornaments where the hole was a good 1/2″ from the edge seemed to be much stronger, and even with strong winds, they still stayed in one piece.
Once you’ve added the straws, place the ornaments in the refrigerator overnight to solidify. Gently pull the edges of the cookie cutter away from the shape to help separate things. And then gently push out the shape.
The cookie cutters weren’t greased at all and each one came out perfectly!
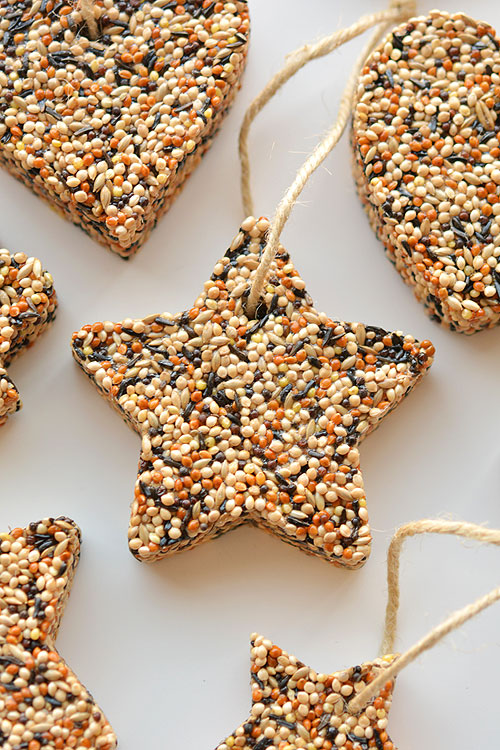
Remove the straws, thread some twine through the holes and tie a knot.
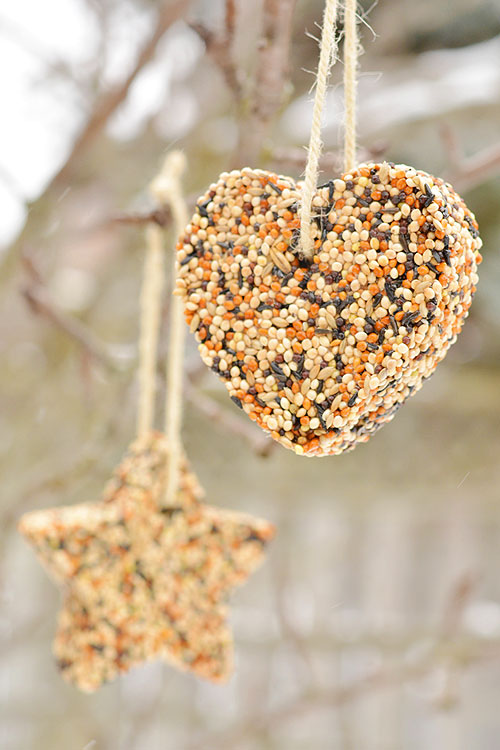
Then hang them from your trees and shrubs and wait for the birds to come!
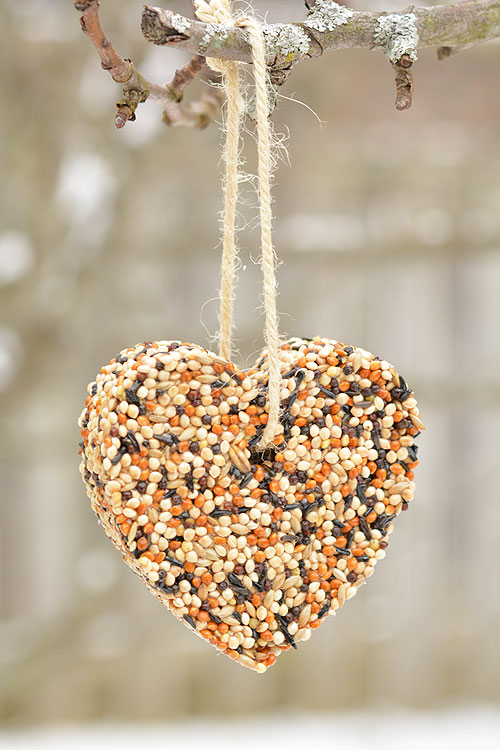
Try to hang them in a way that they are close to other branches so that the birds have somewhere to perch while they are eating.
At first we hung ours from the trees outside like Christmas ornaments, but since there was no where for the birds to sit, they kind of just ignored them.
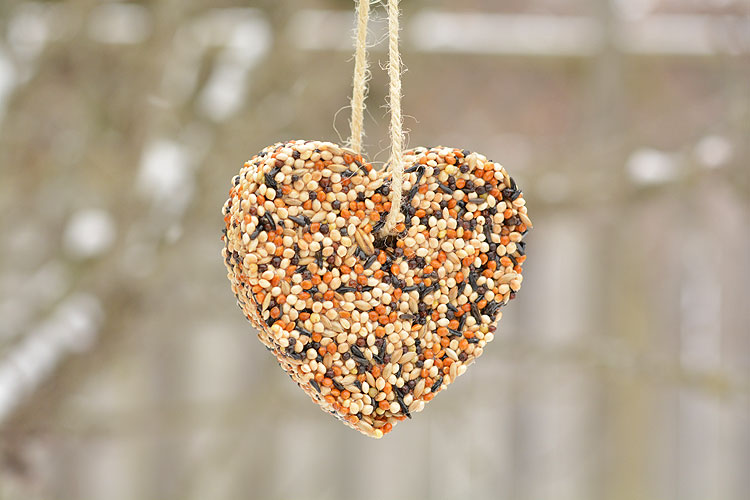
Aren’t they beautiful though!? And they’re so easy to make! We didn’t have any issues with the shapes crumbling or breaking apart. They held up wonderfully!
Birdseed Ornaments
Materials:
- 2.5 cups Birdseed I used “Outdoor Songbird Mix”
- 2 Packages Unflavoured Gelatin 2 Tablespoons total
- 2 Tablespoons Corn Syrup
- 1 cup Water
- 12 Cookie Cutters
- 3 Drinking straws cut into 2″ long pieces
- Twine
Instructions:
- Add 1/2 cup cold water to a large bowl.
- Pour the 2 packages of unflavoured gelatin on top of the water.
- Add 1/2 cup boiling water to the gelatin mixture and stir until the gelatin is completely dissolved.
- Add the corn syrup and stir until combined.
- Add the birdseed and mix well.
- Place the bowl in the refrigerator for about 10 minutes until the liquid firms up enough that it won’t leak out from under the cookie cutters.
- Set your cookie cutters onto a parchment lined baking sheet and fill them with spoonfuls of the birdseed mixture. Using the back of the spoon, press down the birdseed mixture firmly to fill in all the gaps. Fill the cookie cutters to the top.
- Press the drinking straws into each of the shapes leaving at least 1/2″ of space between the hole and the edge of the shape.
- Place the ornaments in the refrigerator overnight.
- To remove the cookie cutters, gently pull the metal away from the edges on all side then gently push the birdseed ornaments out of the cookie cutters. Gently pull the straws out.
- Thread a piece of twine through the hole and tie the ends in a knot.
- Hang the birdseed ornaments from tree branches, leaving room nearby for the birds to perch on while eating.
These birdseed ornaments are SO EASY to make and they look gorgeous on the trees outside! They hold their shape perfectly and only need 4 ingredients! So pretty! They are ideal for temperatures all the way up to 13ºC (55ºF). What a fun little project for the backyard!
[EDIT March 9, 2017] – If you can believe it, this last little heart ornament lasted for WEEKS before the birds finally finished it. It survived temperatures up to 18ºC (65ºF), torrential downpours and big snowfalls. I was so excited to finally snap a photo of a beautiful cardinal nibbling away at it from the kitchen window!
If you’re looking for more crafty ideas to try in the backyard, check out our list of the 20 Best Crafts for the Garden. So many fun and creative ideas!


Leave a Reply