Make a Perler bead flower using our free, downloadable flower Perler bead patterns. These flowers, made from melty beads, are SO PRETTY and easy to make!
Choose from 6 different designs and make flowers with petals of all different sizes and shapes. Or create a 3D flower that stands up on its own! It’s such a fun and easy craft, perfect for celebrating the beauty of spring and summer flowers!

This post contains affiliate links. If you use these links to buy something we may earn a small commission which helps us run this website.
How to Make a Perler Bead Flower
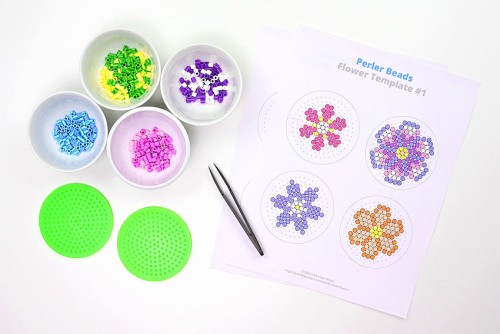
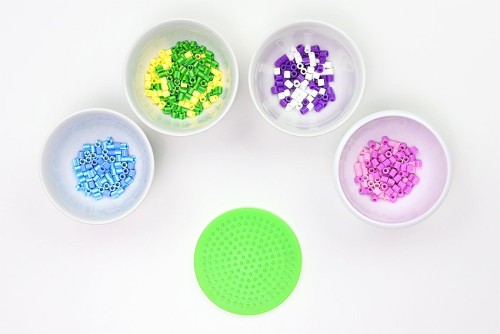
Materials:
- Perler beads (multiple colours)
- Perler beads pegboard (small round)
Equipment:
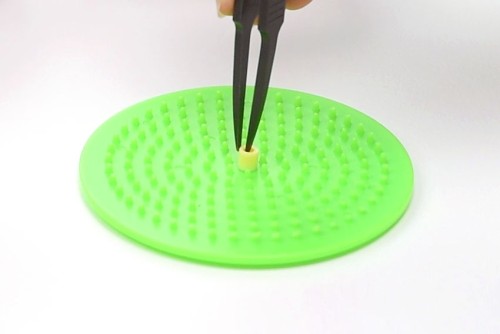
- Tweezers (optional)
Watch the step-by-step video tutorial:
Instructions:
Step 1: Find what you need
- Gather your supplies and materials.

Step 2: Follow the template to make a flower
- To make a Perler bead flower you will use a round pegboard.We also found it helpful to separate and set out the colours of Perler beads we wanted to use.
- Optional: Use tweezers to add the Perler beads to the pegboard. Little fingers probably don’t need to do this, but it makes it a lot easier for adults!
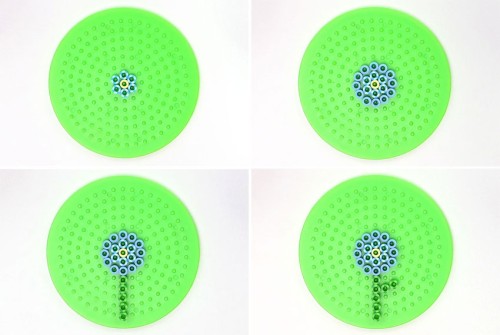
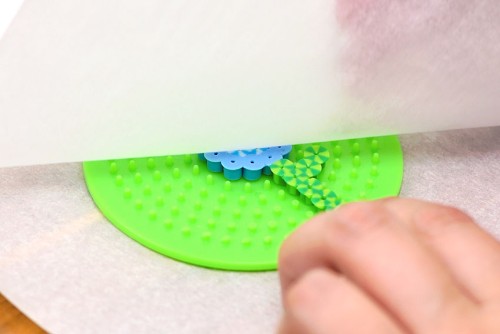
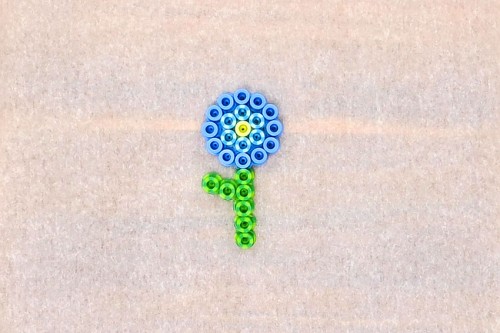
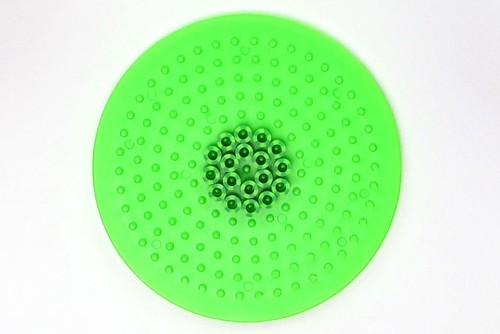
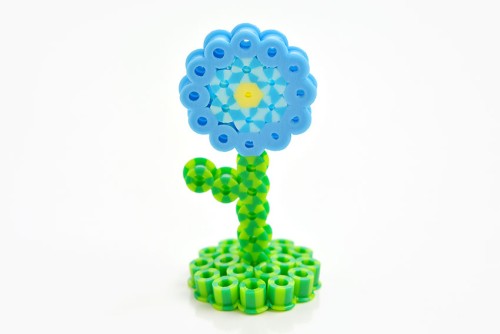
- Start by adding a yellow bead to the center of the pegboard, and then form two circles of beads around it. We used two complimentary shades of blue Perler beads.Then follow the template to add a stem and a leaf, connected to the flower.

Step 3: Iron the flower
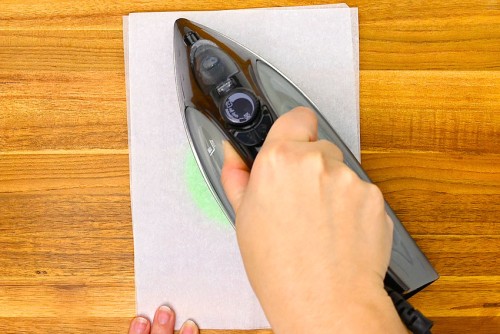
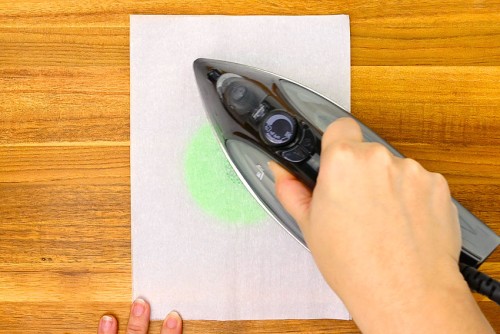
- Put the pegboard on an ironing board or a wood cutting board. Place a piece of parchment paper over top of the Perler bead design.Heat the iron to medium temperature, no steam. Place the iron on the parchment paper and move it around in circular motions for at least 15 – 20 seconds.
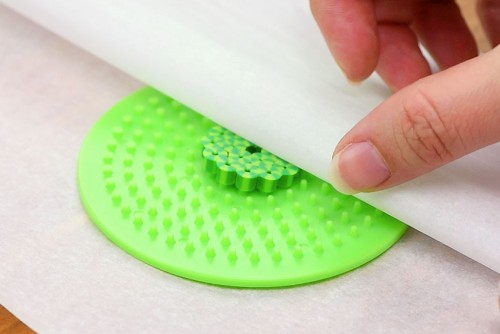
- Check the beads to see if they’re melted together. Continue to iron for another 10 – 20 seconds, if needed.The beads should be melted correctly when the parchment paper sticks to the beads and needs to be peeled away from them.
- Once the flower is cool enough to touch, remove it from the pegboard and flip it over.

- Iron the second side of the flower, making sure that it is melted, but not too melted – otherwise it won’t fit in the base.
Step 4: Create and iron the flower’s base
- To create the flower’s base, make two circles around the center of the board with green Perler beads. Follow the template and be sure to leave the center peg empty.
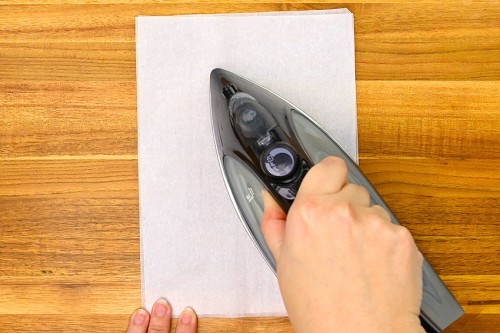
- Iron the base following the instructions above.
- Again, the beads will be melted correctly when the parchment paper sticks to the beads and needs to be peeled away from them.You only need to iron one side of the flower’s base, but you can do both sides if you’d like.
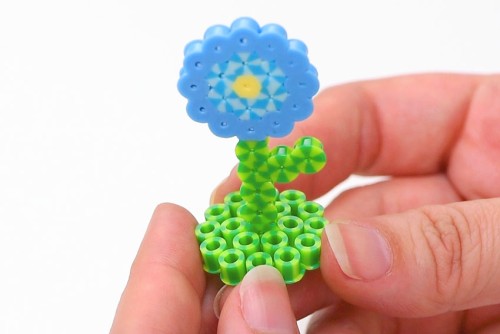
Step 5: Put the flower together
- Once both parts of the flower are cooled, insert the stem of the flower into the center of the base.This can sometimes be tricky to do, but they will fit together once you find the right angle. If you still have issues with them staying together, use glue to attach them.
- Your Perler bead flower is complete!
Helpful Tips:
- We find it easiest to start from the center of the template when making our Perler bead flowers.
- Ironing both sides of the 3D flower will help it stand up straight in its base!
- Leave the larger, flat Perler bead flowers on the pegboard until they’re cool to the touch. This will prevent the beads from melting together in the center.

Download our free Perler bead flower templates:
Click on the links below to download our free, printable Perler bead flower templates! The PDF files will open in a new window.
Then simply follow along with the pattern on your device’s screen, or print the templates in colour on 8.5 x 11 (letter size) printer paper.
>>> Perler Bead Flower Template #1 <<<

>>> Perler Bead Flower Template #2 <<<

What are Perler beads?
Perler beads are small, cylindrical plastic beads with a hole in the center. They’re also known as “melty beads”, “fuse beads”, or “Hama beads” (another brand name).
Perler beads are designed to be arranged into different patterns (like flowers!) on a plastic pegboard. The beads are then ironed until they melt, or fuse, together.

Can you use a hair dryer on Perler beads?
If you don’t have an iron, there are a couple alternative ways for you to melt your Perler beads. Cover the pegboard with parchment paper like usual and hold a hairdryer several inches above to melt the beads.
Make sure air doesn’t blow the design off the pegboard, and move the dryer around in a circular motion, checking the progress every 10 – 20 seconds.
Or, add parchment paper to a baking tray and make a Perler bead flower directly on the tray, without using a pegboard. Then place the beads in a 300F oven or toaster oven and check the melting progress after a couple minutes. Continue to monitor the beads carefully until they’re melted as much as you’d like.

What can I do with my Perler bead flowers?
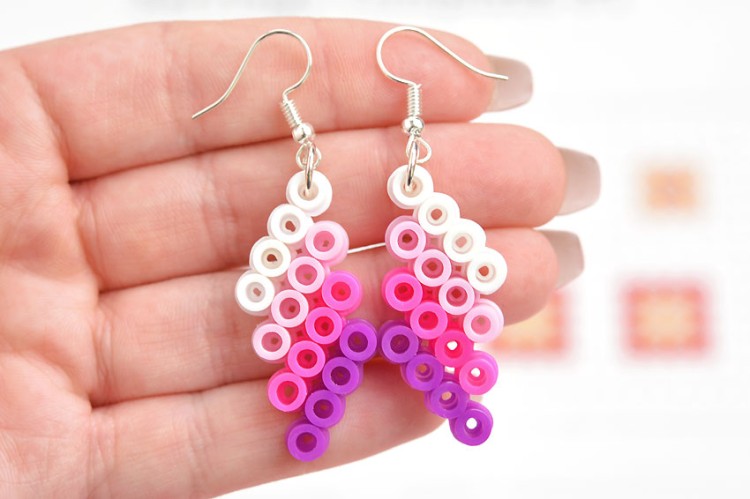
Use the 3D standing flowers as fun DIY decorations, and turn the larger, flat flowers into coasters, magnets, or keychains. Check out our Perler bead earrings post for advice on attaching jump rings to Perler beads!

Use the colours in our templates, or experiment and design your own Perler bead flower! It’s such a fun and creative craft, perfect for spring or summer break, summer camp, sleepovers, or Scouts.

Here’s even more bead craft ideas:


Our book Low-Mess Crafts for Kids is loaded with 72 fun and simple craft ideas for kids! The projects are fun, easy and most importantly low-mess, so the clean up is simple!

Where to buy:
You can purchase Low-Mess Crafts for Kids from Amazon, or wherever books are sold:
Amazon | Barnes and Noble | Books-A-Million | Indiebound | Amazon Canada


Leave a Reply