


These felt gingerbread house ornaments are as sweet as can be! With their snowy rooftops, colourful candy-inspired decorations, and adorable little doors and windows, they look just like miniature gingerbread houses straight out of a Christmas storybook. And the best part? You can enjoy these festive little houses year after year, without having to bake a single cookie!
Make your own little gingerbread village using our free printable pattern and a few pieces of felt. They’re so much fun to decorate, with endless possibilities for adding your own creative touches! Hang them on the Christmas tree, attach them to gifts, or make a whole collection to give as handmade Christmas presents.

This post contains affiliate links. If you use these links to buy something, we may earn a small commission at no extra cost to you. This helps support our website and allows us to keep creating fun, free content.
How to Make Felt Gingerbread House Ornaments
Materials:
- FREE Printable Felt Gingerbread House Pattern
- Felt (brown, white, red)
- Embroidery floss (or sewing thread)
- Seed beads (red)
- Metallic baker’s twine
- Polyester fiber fill
Equipment:
Instructions:
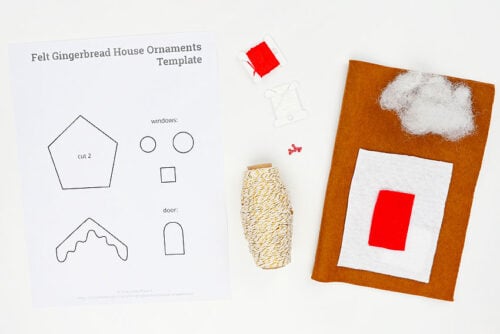
Step 1: Find what you need
- Gather your supplies and materials.
Step 2: Cut out the pieces
- Print our free gingerbread house ornament template and cut out the pieces.You can find the link to the PDF in the materials list above, with more details below the tutorial.
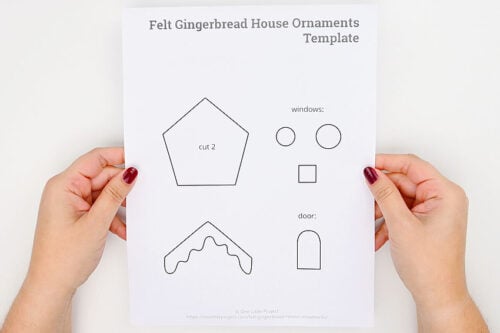
- Cut the template pieces from felt.Use gingerbread brown for the 2 house pieces and white for the snowy roof. Choose colours for the windows and door. We chose white for the door and circular window, and red for 2 square windows.
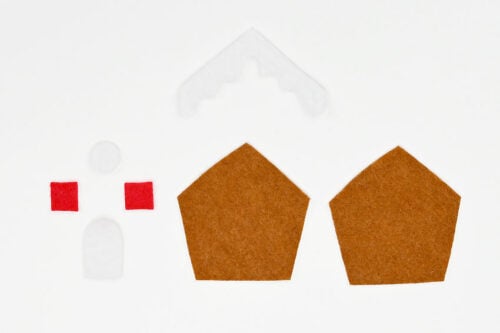
Step 3: Attach the door
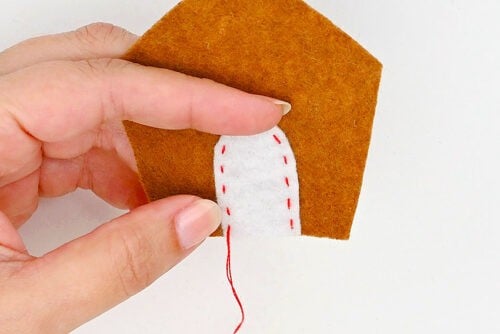
- Begin by placing the door at the center bottom of a house piece.
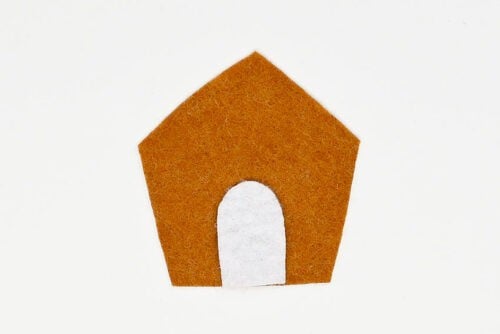
- Choose a thread colour for attaching the door. You can use a white matching thread, or a nice Christmassy red like we did here.Sew the door to the house using a running stitch.
- Sew a little red seed bead to the door for a door knob.
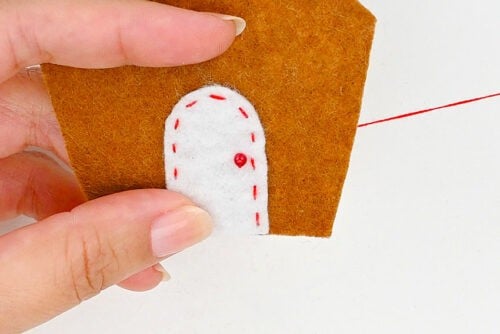
- Tie the thread ends together in a double knot to secure the stitches.
Step 4: Attach the windows
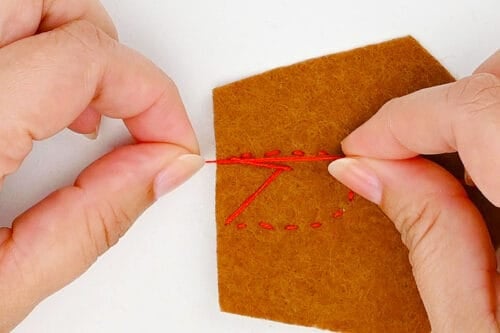
- Place the circular window above the door. Use a backstitch to attach it with a cross shape, creating 4 little windowpanes.
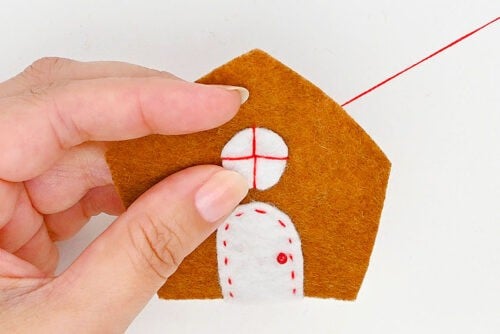
- Repeat, attaching the square windows on either side of the door. We switched to white thread here, so it would also have a contrast.
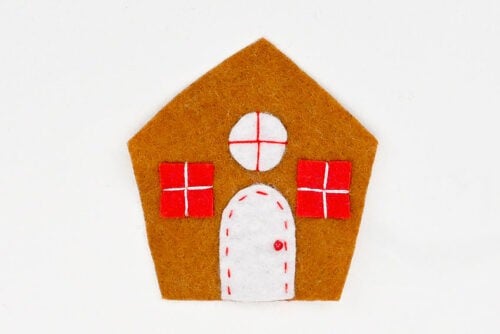
Step 5: Put the house together
- Now that the front of the house is decorated we’ll be connecting the front and back of the house.
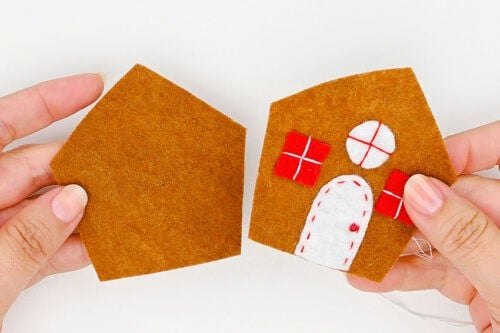
- Line up the pieces nicely and sew the edges together with a blanket stitch. Start at the bottom of the house on one side and stop when you reach the point of the roof.
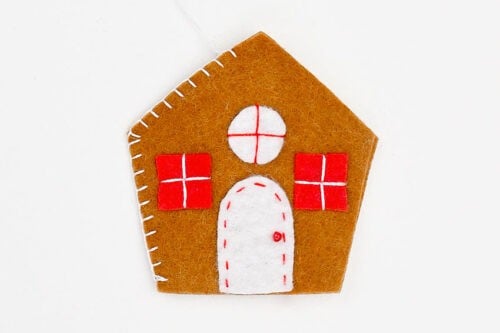
- Cut a piece of cotton twine about 6 to 8 inches long.
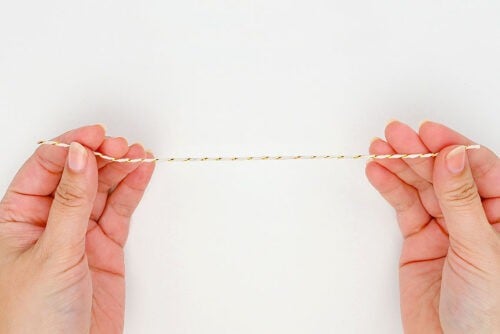
- Fold the twine in half and tie a knot to create a looped ornament hanger.
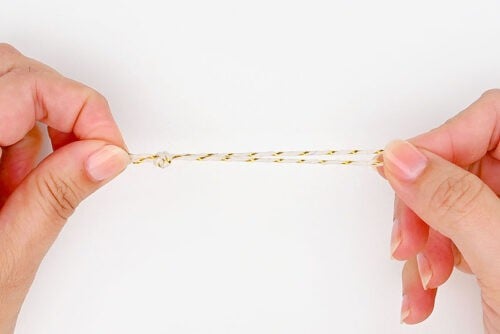
- Place the knot of the ornament hanger between the 2 layers of felt at the top point of the roof.
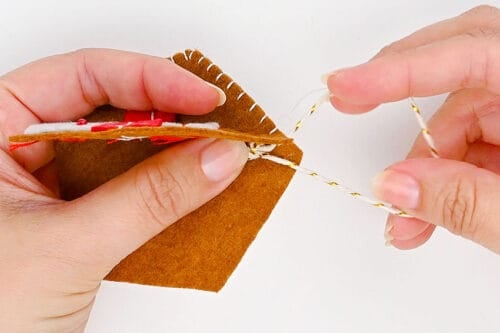
- Continue making blanket stitches around the outside of the house, making sure to put a couple of stitches through the ornament hanger to keep it in place.
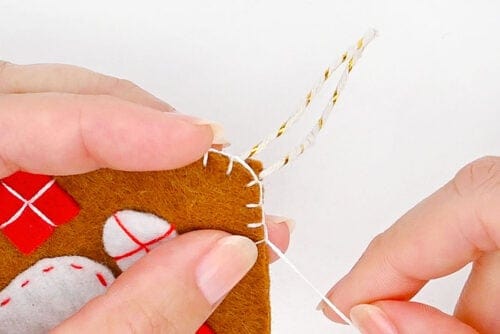
- Repeat the blanket stitches all the way down to the bottom of the house (opposite where you started stitching).
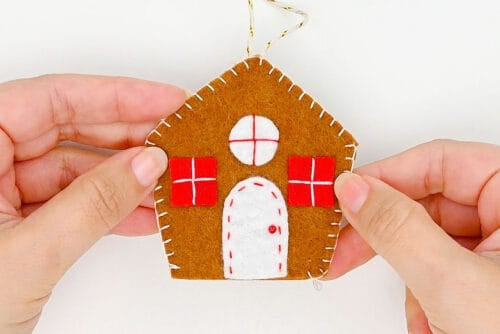
- Add poly-fill stuffing into the ornament until you’re happy with how it feels.
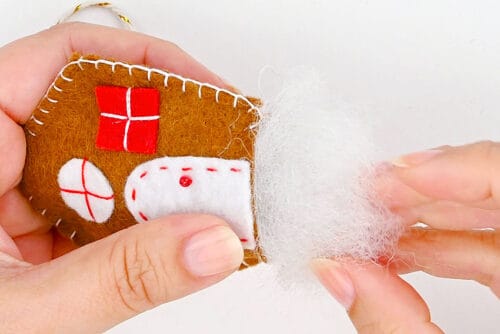
- Close off the bottom of the house with more blanket stitches. Tie off the thread ends and hide them inside the ornament.
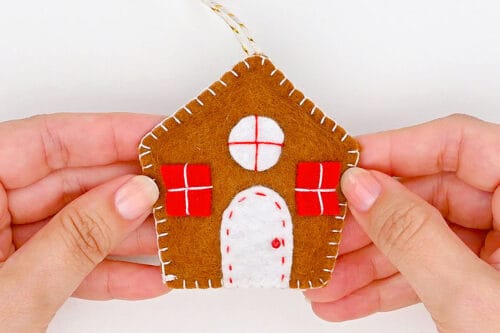
Step 6: Decorate and add the snowy roof
- Sew a seed bead onto the snowy roof piece. Do this by bringing your needle up from the bottom of the felt, putting the bead on the needle, and then putting your needle back down through the felt right next to where it came up.You can do red beads to match the colour scheme, white beads to make the snowy roof glisten with ice, or multi-coloured beads to represent Christmas lights.
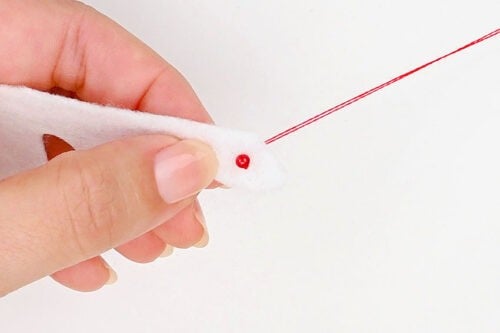
- Repeat, sewing beads across the roof, spacing them evenly.
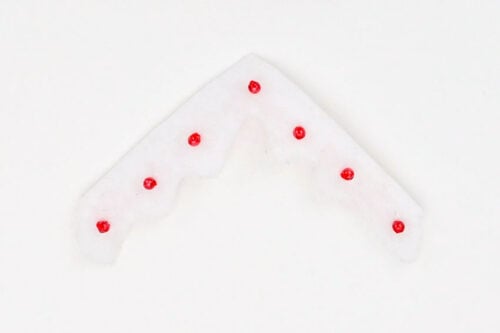
- Add a line of hot glue to the back of the roof decor piece.
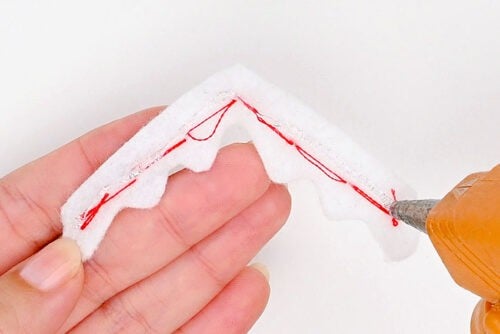
- Place the snowy roof onto the ornament, lining it up carefully.We found gluing the roof easier, so the front of the ornament has a clean front, but you can also stitch it in place with white thread.
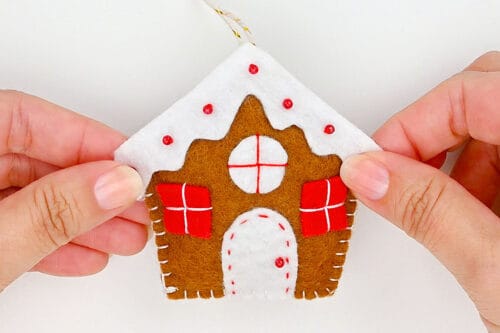
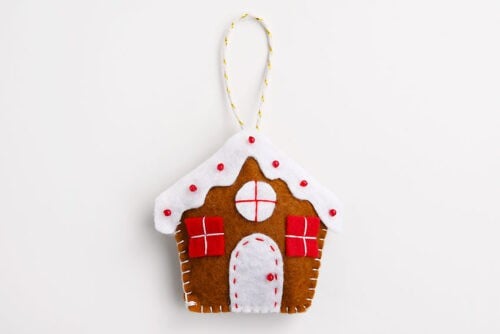
- Your felt gingerbread house ornament is complete!
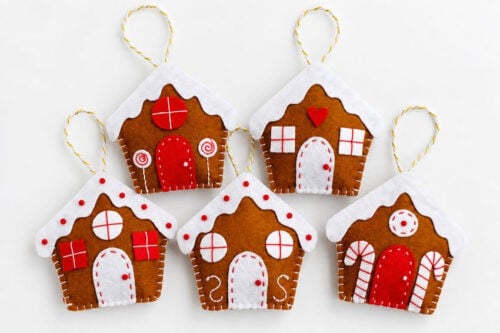
- Have fun making different designs on your gingerbread houses, arranging the windows differently or adding other festive touches.
Helpful Tips:
- Plan your design before sewing: Arrange the door, windows, and other decorations on your gingerbread house before attaching anything. This helps you make sure everything fits nicely and gives you a chance to experiment with different layouts.
- Make a matching set or mix things up! Use a similar colour palette for all your ornaments, like we did, or give each house its own personality with colourful doors, windows, and candy-inspired decorations.
- Use sharp scissors for cutting the felt: Small, sharp scissors are especially helpful for cutting the scalloped edges of the snowy roof and other little details. Take your time cutting around the pattern pieces to get nice, clean shapes.

Download our free felt gingerbread house ornament pattern:
Click on the link below to download our free, printable felt gingerbread house template! The PDF file will open in a new window. Then simply print the template on 8.5 x 11 (letter size) printer paper or cardstock.
>> Felt Gingerbread House Ornaments Pattern <<
How do I cut out the felt pieces for my gingerbread house ornaments?
There are a few easy ways to cut out your felt pieces! You can pin the paper pattern directly to the felt and cut around it, or trace the shapes using a fabric marker, gel pen, or chalk pencil before cutting. If you’re comfortable cutting freehand, you can also simply hold the pattern in place as you cut.
For small, detailed shapes, try using a little piece of tape to hold the pattern in place. Sharp detail scissors are especially helpful for cutting the curved edges of the snowy roof!
If you’re tracing the shapes, make sure that any leftover marks are put to the back or inside so they don’t show on your finished ornament.

Can I make these felt gingerbread house ornaments without sewing?
Yes! You can turn this into an easy no-sew Christmas craft by using hot glue to attach the felt pieces instead of stitching them together.
When connecting the front and back pieces of the house, work in small sections, carefully lining up the edges as you go. This will help keep the house evenly shaped and prevent the glue from drying before you’ve positioned the felt.
You can also use small pieces of felt or fabric paint for details that would otherwise be embroidered.

How can I decorate my felt gingerbread house ornaments?
There are so many fun ways to decorate these little houses! Try adding:
- A small felt heart or star near the peak of the roof.
- Candy canes, peppermint candies, or colourful gumdrop shapes made from felt.
- Tiny buttons, Christmas shaped buttons, beads, rhinestones, or sequins as decorations.
- Embroidered details, like a string of Christmas lights along the roofline, windowpanes, or decorative stitching around the door.
- Small red beads along the snowy roof to look like Christmas berries or candy.
You can even personalize each ornament with an initial or make the houses look like miniature versions of your own home!
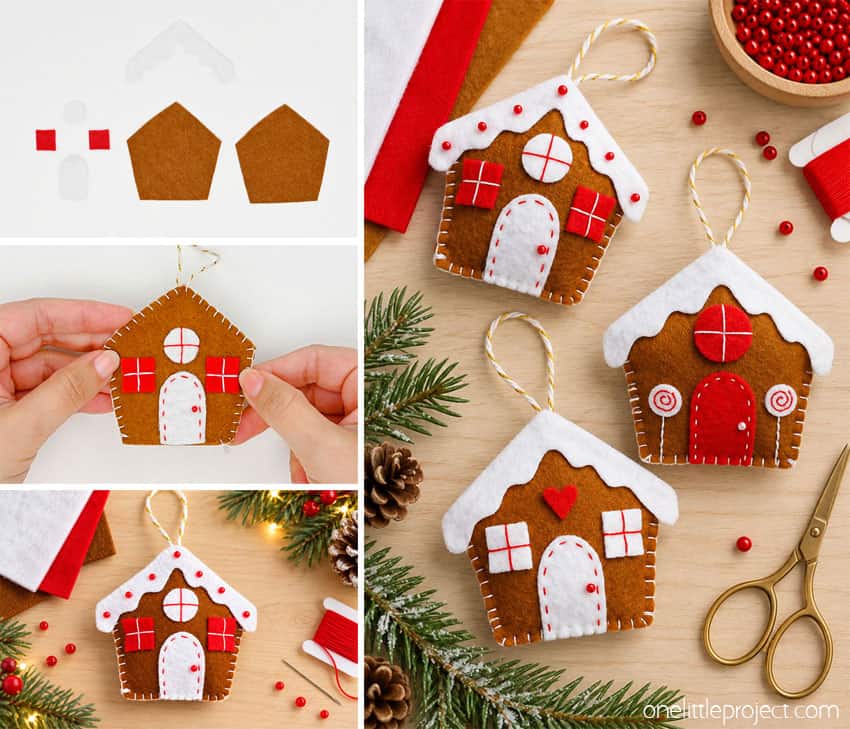
These adorable felt gingerbread house ornaments are such a fun way to add a little handmade charm to your Christmas tree! They’re a wonderful keepsake to bring out year after year, and each little house can be completely unique.
Turn on your favourite Christmas movie, gather your felt and embroidery thread, and enjoy a cozy afternoon of holiday crafting. Before you know it, you’ll have a whole neighbourhood of sweet little gingerbread houses ready to hang on the tree!
Here’s even more felt Christmas craft ideas:



Now available
Low-Mess Crafts for Kids Book
72 cute and fun crafts that kids and parents alike can enjoy. All with as little mess as possible!
Where to buy:
You can purchase Low-Mess Crafts for Kids from Amazon, or wherever books are sold:
Amazon | Barnes and Noble | Books-A-Million | Indiebound | Amazon Canada






Leave a Reply