
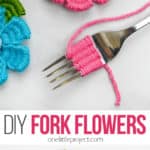
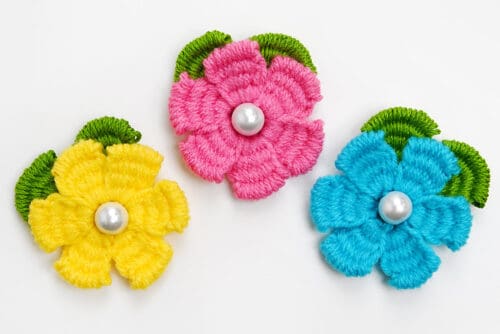
These fork flowers are such a fun little craft! It’s amazing that you can use a simple fork to transform yarn into bright, fluffy flowers with just a few easy wraps. They’re cute, colourful, and have that satisfying “wait… you made that with a fork?!” charm that makes them extra fun to try.
These yarn flowers are the perfect choice for a spring or summer crafting session, and they’re great for older kids, teens, and adults. Use your fork flowers to add a handmade touch to cards, gifts, wreaths, hair accessories, and more. Once you make one, it’s hard to stop. You’ll want to try them in every colour!

This post contains affiliate links. If you use these links to buy something, we may earn a small commission at no extra cost to you. This helps support our website and allows us to keep creating fun, free content.
How to Make Fork Flowers
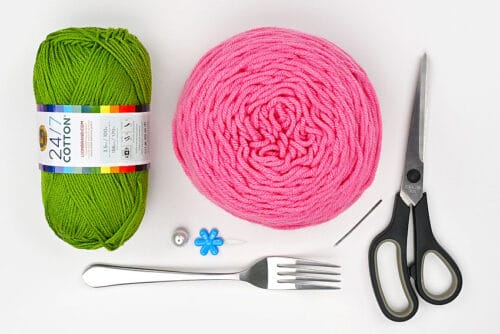
Materials:
- Worsted weight yarn (flower colour and green)
- Pearl bead(s) (10mm)
Equipment:
- Needle threader (optional)
See the craft in action:
Instructions:
Step 1: Find what you need
- Gather your supplies and materials.

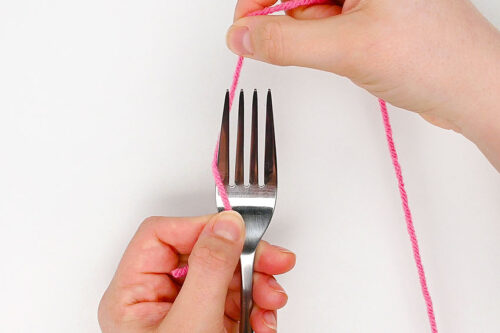
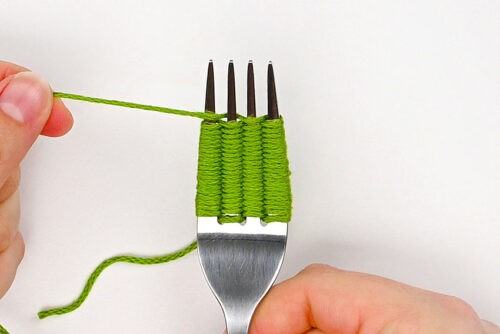
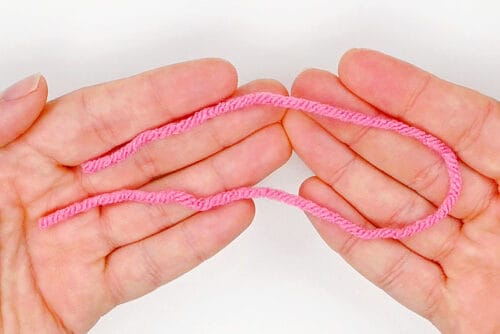
Step 2: Loop yarn around the fork
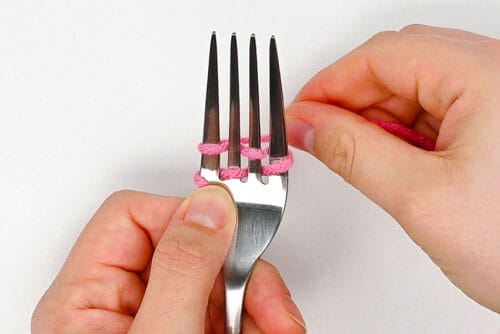
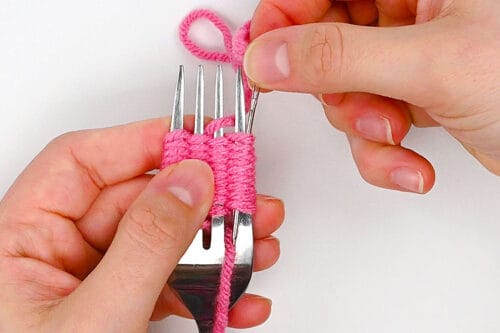
- Start by holding the fork and yarn in your non-dominant hand. Hold the yarn end with your thumb on the front of the fork, leaving an inch or 2 extra at the start.

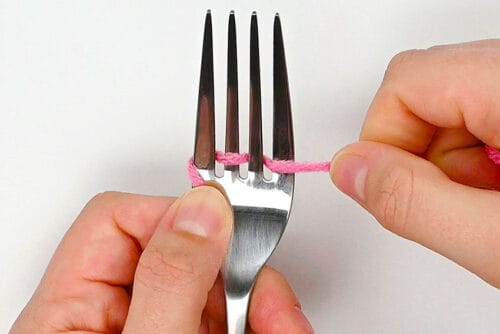
- Wrap the yarn behind the first tine, in front of the 2nd, behind the 3rd, ending with the yarn in front of the 4th tine.
- Wrap the yarn to the back of the fork and repeat the same actions back in the opposite direction — bringing the yarn in front, then behind, and ending in front.If you push these wraps down next to the first ones you’ll see that every tine is wrapped on the front now.
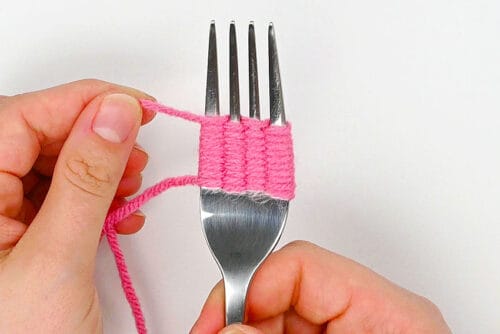
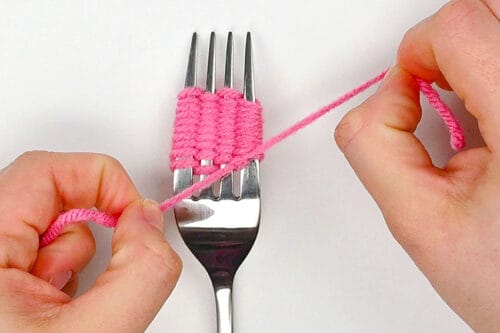
- Repeat these steps, going back and forth between the tines 20 times total.(It will look like 10 rows on the front of the fork.)
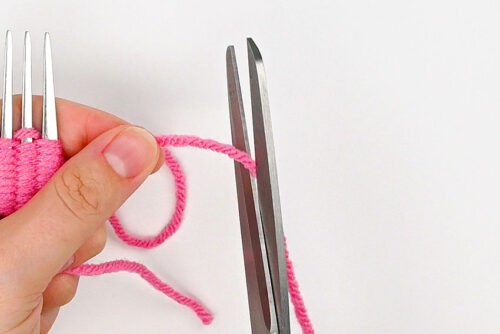
- Cut off the yarn, leaving a tail of about 8 inches.
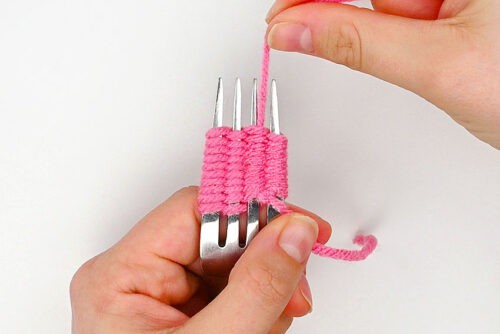
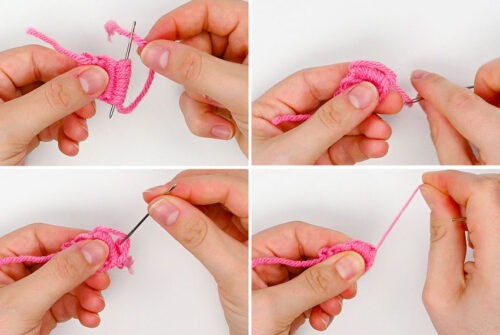
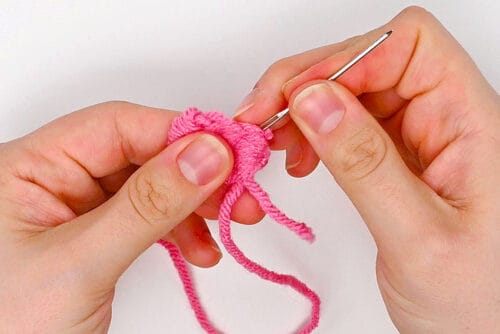
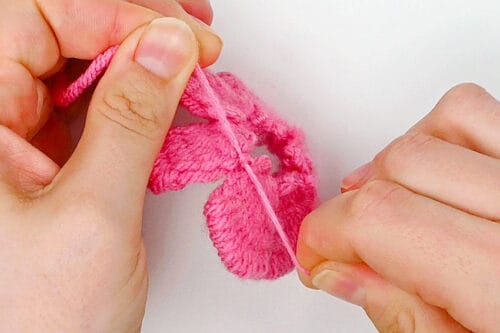
Step 3: Sew the petals
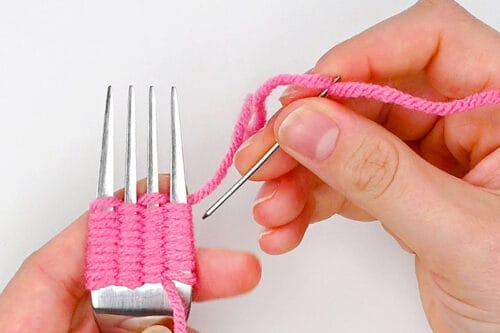
- Flip the fork over so you’re looking at the back and thread the yarn tail onto a yarn needle.
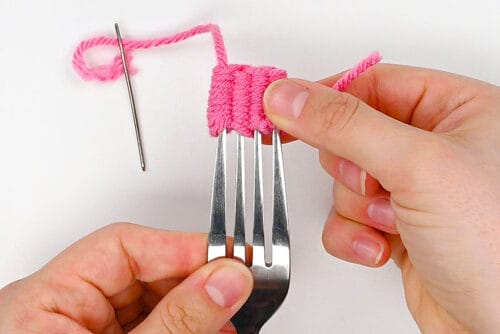
- Bring the needle down through the loops on the right tine. You might want to carefully push the loops up the fork a little bit so there’s more room for the needle to go through.
- Pull the yarn tail all the way down through the loops. Then tie the tail to the start of the yarn, securing them together in a double knot.
- Next, sew up through all the loops on the next tine.If the loops are tight and you’re having trouble getting through all the loops at once, you can sew through a few at a time. Just keep track of where your needle is coming out and go back under the next loop.
- Repeat this process for the next 2 tines (down through the loops on the next tine, up through the ones on the last). Then you can slide the yarn off of the fork.
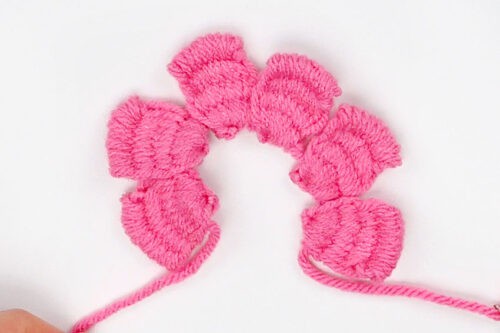
- Take the tail and bring it around the outside of the petal and back up through the last row of loops. Then slide the tail through the new loop on the outside, pulling it tight.

- Go through the outside loop again and create a knot to secure the tail. Then slide the needle down through the row of loops to hide it and cut off the excess that sticks out.
- Finish off the petal by pushing the shorter tail down into the loops closest to it. Again, cut off the excess tail.
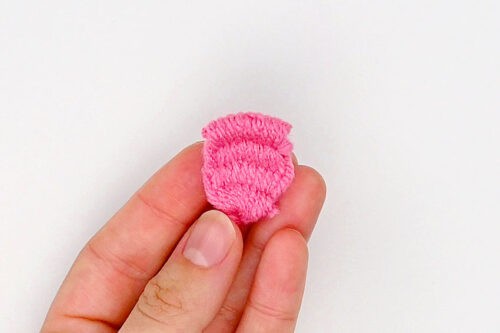
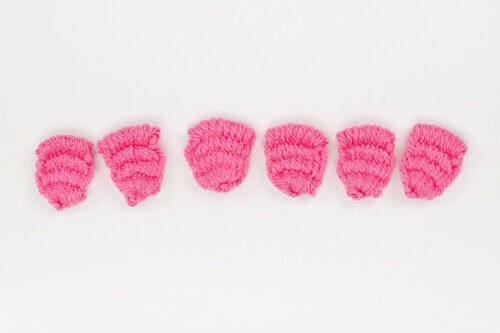
- Repeat all steps 5 more times to create 6 petals in the same colour.

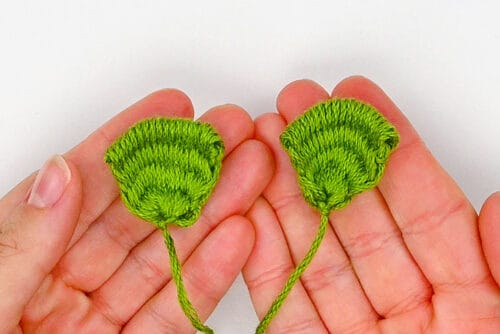
Step 4: Make leaves
- Repeat the same process with green yarn, but make 40 wraps this time.(It’ll look like 20 rows.)
- Finish off the petal in the same way, but leave the long tail attached.
Step 5: Assemble the flower
- Cut a 10 inch piece of flower petal coloured yarn.
- Attach it to your yarn needle and sew through the bottom loops of one of the petals. This should be the side where you gathered the long tail and tied it off.
- Then add the rest of the petals in the same way.
- Go back through the bottoms of the petals again for a second round. This creates a rounded flower that keeps it shape better and looks nicer overall.
- Remove the needle and pull on the tails to tighten the flower petals together. Don’t pull so hard that they’re bunched up, but just enough that they’re nicely snug together.Tie the tails in a double knot.

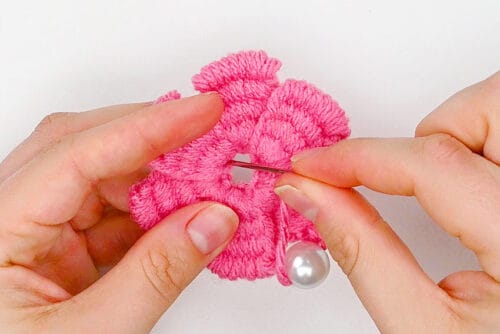
Step 6: Add a flower center
- Attach a pearl bead onto the longest tail. You may need to use a needle threader or add tape to the end of the yarn to get it through the bead.
- Sew through the opposite side from where the tail starts.
- Then tie the two tails together to secure the bead in the middle of the flower.

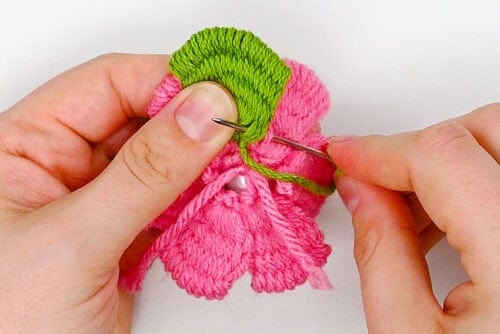
Step 7: Attach the leaves
- Set one of the leaves on the back of the flower so that it sticks out past the flower petals. Add the leaf tail onto your yarn needle and sew into the back of the flower before going up through the leaf.Repeat several times until the leaf is secure.
- Repeat, attaching the second leaf. Then tie the leaf tails together. Cut off all the excess tails.
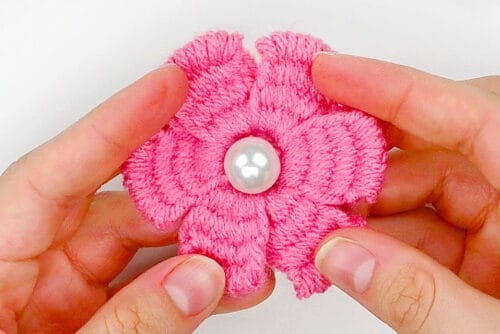
- Your fork flower is complete!
- Have fun making more yarn flowers in all your favourite colours!


Helpful Tips:
- Try not to pull the loops too tight when you’re wrapping the yarn around the fork. You need to be able to sew up under the loops later to make your flower petals.
- Place the leaves beside each other on the flower, space them out, or only add 1 leaf to create different looks for your flowers.

What type of yarn is best for making fork flowers?
Regular yarn (worsted weight, size 4) works best for making fork flowers. It wraps easily around the fork, yet still creates full and fluffy petals.
You can use thicker yarn to make chunkier flowers, but you might need to make them on a larger serving fork so the yarn will fit nicely around the tines.

What can I use for the center of my fork flower?
We added a 10mm pearl bead to the center of our fork flowers. We love the classic pearl vibes, and the contrast between the smooth pearl and the soft texture of the yarn.
You can also use a yellow bead to create a daisy-like center of the flower, or try a rhinestone covered bead for a sparkly, textured accent.

What can I do with these yarn flowers made with a fork?
These fork flowers can be used as a fun floral accent on lots of crafts and decorations. You can glue them onto cards, attach them to a headband or hair clip, or use them as a gift topper. You can even use your yarn flowers as a spring gift topper or as part of a floral summer wreath.

These fork flowers are such a fun way to turn a simple ball of yarn into something bright, cheerful, and full of charm. They’re easy to make and perfect for adding a soft handmade touch to gifts, decorations, and seasonal displays.
Once you get the hang of wrapping and tying them, it’s hard to stop at just one! Make a whole bouquet in different colours, add pearls or other beads to the centers, and enjoy creating your own pretty yarn flowers on a fork!
Here’s even more flower craft ideas:


Now available
Low-Mess Crafts for Kids Book
72 cute and fun crafts that kids and parents alike can enjoy. All with as little mess as possible!
Where to buy:
You can purchase Low-Mess Crafts for Kids from Amazon, or wherever books are sold:
Amazon | Barnes and Noble | Books-A-Million | Indiebound | Amazon Canada


Leave a Reply