
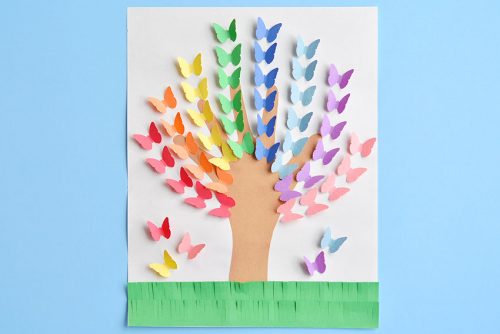
Rainbow Tree Craft
This rainbow tree craft made from construction paper, a handprint cutout and paper punched butterflies is a super fun kids craft for spring, summer or anytime!
Yield: 1 rainbow tree
Cost: $1
Materials
- Construction paper assorted colours
- Butterfly punch 1 inch
- Tacky white glue
- Pencil
- Scissors
Instructions
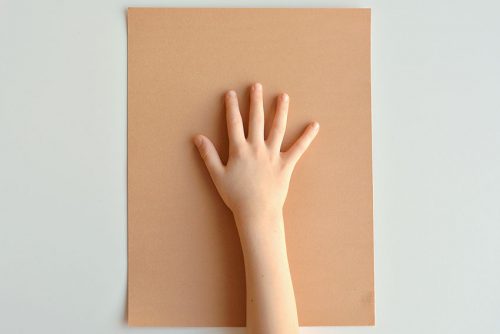
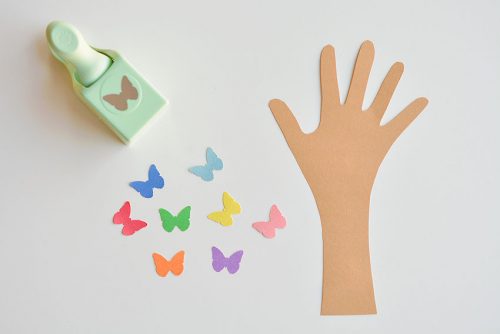
- Trace a handprint in the middle of a brown piece of paper. Then trace the arm down to the bottom edge of the paper to make the tree trunk. Cut out the handprint and tree trunk.
- With a 1 inch butterfly paper punch, punch out about 7 or 8 butterflies each in all the colours of the rainbow, (red, orange, yellow, green, blue, light blue, purple and pink.)
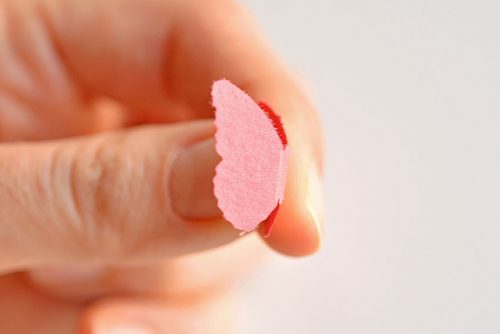
- Use your thumb nail to fold the butterflies in half. You can fold them in half with a single fold, or you can use your thumb nail to make two folds on either side of the butterfly’s body so it stands up on its own. Either will work.
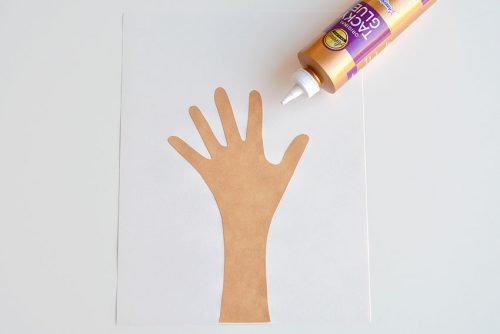
- Glue the handprint onto the middle of a white piece of construction paper so that the bottom of the tree trunk lines up with the bottom of the paper.
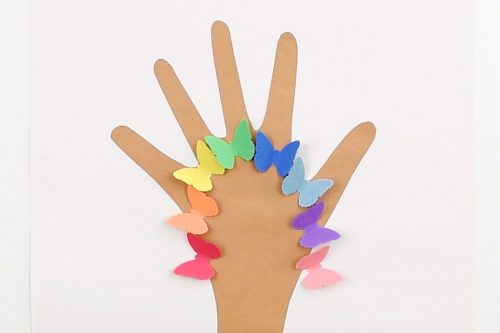
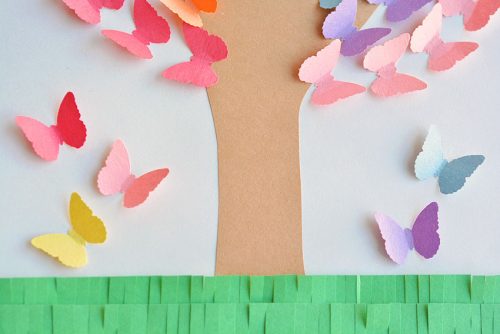
- Set out one butterfly of each colour on the hand print (don't glue them yet) just to make sure everything is centered and spaced properly. Start with the middle two colours (in my case green and blue), just below the middle finger. Then curve out with the other butterfly colours.
- Glue the butterflies to the paper. You can either add a small dot of glue to the crease on the bottom of the butterfly, or add a small dot of glue onto the paper where you plan to place it.
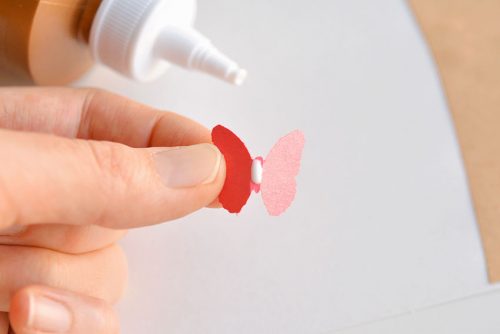
- Then use a mechanical pencil (with the lead pushed all the way back in) or a toothpick to push the butterfly down into the glue, onto the paper. Make sure you only press into the middle of the butterfly, not on the butterfly wings, since you want the wings to be raised.

- One by one, glue the butterflies onto the paper. Start with the two middle butterfly colours (in my case green and blue). This well help keep everything straight. If you start with the reds, your tree might look like it’s blowing in the wind by the time you get to the opposite side. (Or at least mine did!)
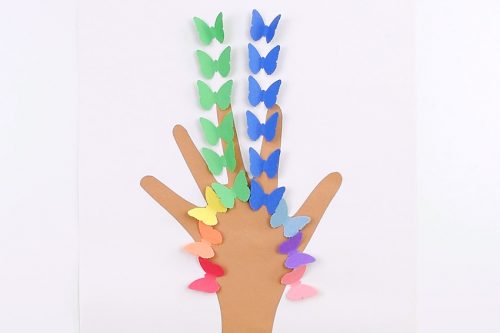
- After the middle two rows of butterflies, glue on the remaining butterflies, working your way outwards.
- Cut out two strips of green construction paper, the full width of your paper and about 1 inch wide. Then cut small slits along the long edge to make them look like grass. Bend the edges back and forth, here and there to make it “less perfect” and more grass-like.
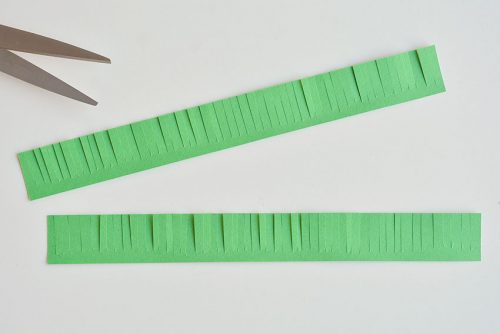
- Glue the grass onto the paper along the bottom edge, overlapping one on top of the other to give it some depth. Then, glue on a few stray butterflies under the tree.
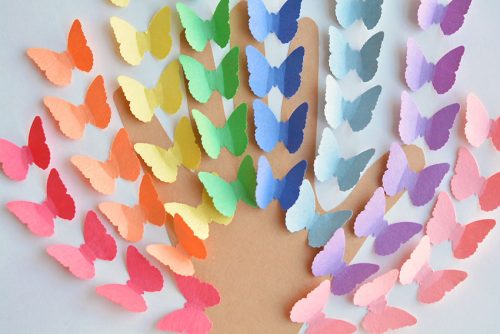
- Your rainbow tree is complete!
Video
Notes
Tip#1: Try to give the rows of outer butterflies (the reds and the pinks) a slight curve, to make them look more tree like. (A smart tip from my 7 year old!)
Tip #2: If your butterflies look a little flat after they dry, use the mechanical pencil (or toothpick) to bend the wings up again.