
How to Make Resin Jewelry
Use a silicone mold to make resin jewelry in whatever shape you'd like! Add a personal touch to your DIY jewelry by choosing your favourite colours and inclusions.
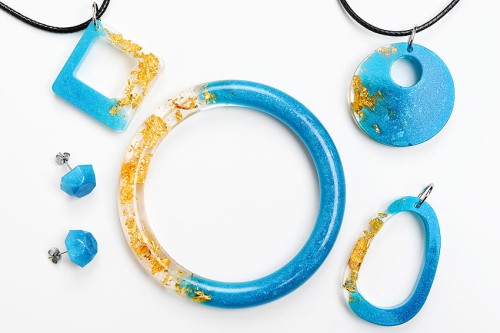
Yield: 9 resin jewelry pieces
Cost: $5
Equipment
- Popsicle sticks (or silicone stir sticks)
Instructions
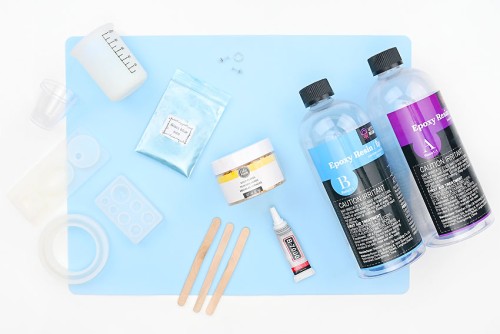
Step 1: Find what you need
- Gather your supplies and materials.
Step 2: Mix the resin
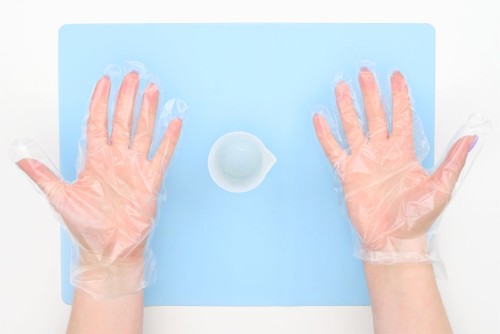
- Before working with resin, protect your working surface with a drop cloth and/or a silicone mat. Always wear protective nitrile gloves and eye protection.Work in a well-ventilated space and wear a respirator if your resin requires it. Read your resin's label for safety requirements.
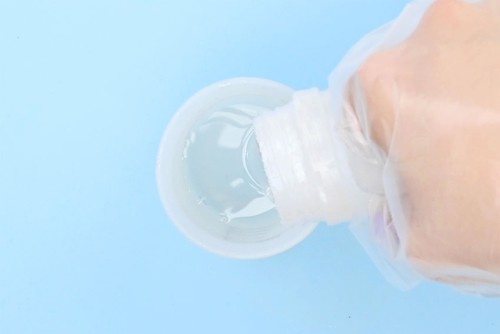
- Mix the amount of resin needed for the amount of jewelry you'd like to make. We mixed 40 ml of resin total, which made 5 pendants, 2 bracelets, and 2 pairs of earrings.Begin by adding 1 part of Part A to the silicone measuring cup. The amount of Part A should be half the total amount needed. (In our case, 20 ml.)Follow your specific resin's instructions for ratios, drying times, and curing times.
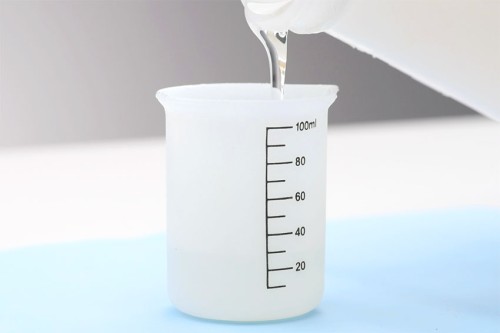
- Add an equal amount of the hardener (Part B) to the measuring cup, or whatever ratio your brand of resin suggests. (In our case, 20 ml.)
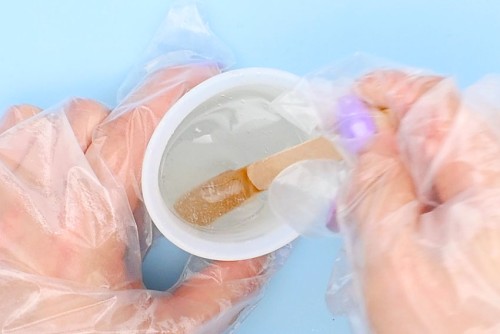
- Mix the resin and hardener together with a popsicle stick or a reusable resin stir stick.Stir slowly, scraping down the sides and bottom of the measuring cup. Continue mixing for 3 minutes or until the mixture is clear (streak free).
Step 3: Add colour and gold flakes
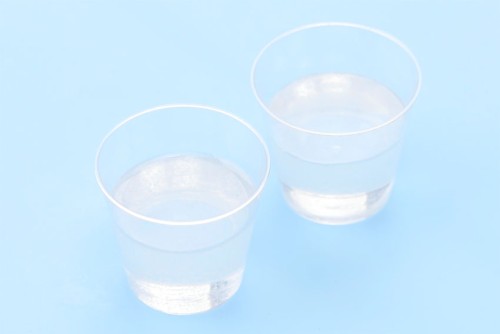
- Pour the resin into separate plastic mixing cups, 1 for adding colour and 1 for gold flakes.
- Add coloured mica powder into one of the cups. Start with a small amount and continue to add pigment until the resin is opaque.It's recommended that your pigment is less than 6% of the volume of your resin.
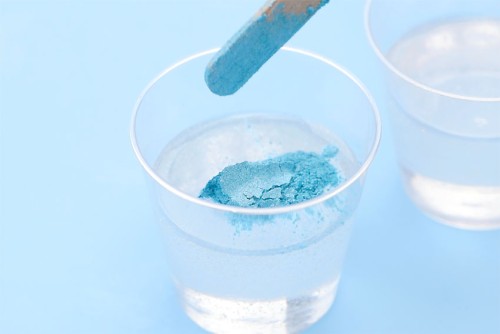
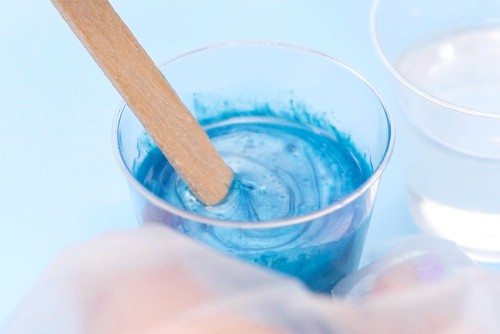
- Stir, combining the resin and pigment until it's well mixed with no clumps.
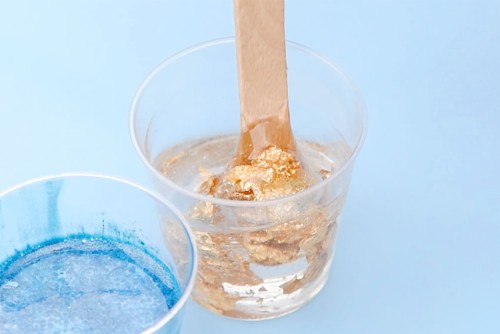
- Add gold foil flakes into the second cup of clear resin. Use a clean popsicle stick to mix the flakes into the resin, separating and breaking apart the larger pieces.The gold flakes have a tendency to clump up in the resin, so do your best to separate them.
Step 4: Pour the resin into silicone molds
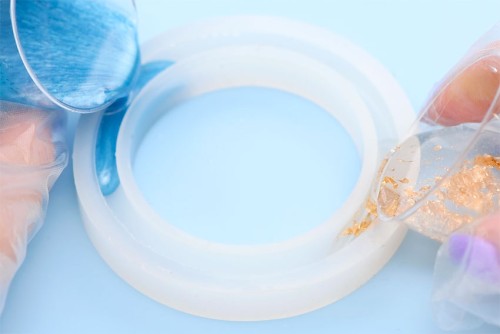
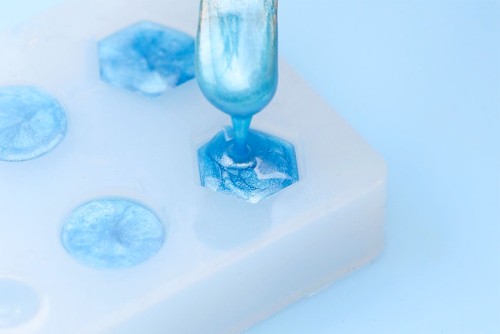
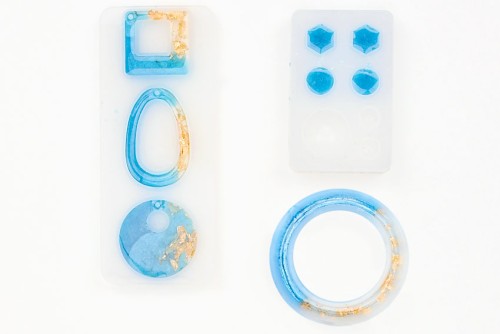
- Set your pendant silicone mold on the silicone mat.Hold 1 resin cup in each hand. Pour into the mold from both cups at the same time, holding the cups on different sides.For example, hold the coloured resin on the left and the gold leaf resin on the right. Slowly pour from both at the same time until the resin meets in the middle and the mold is full.
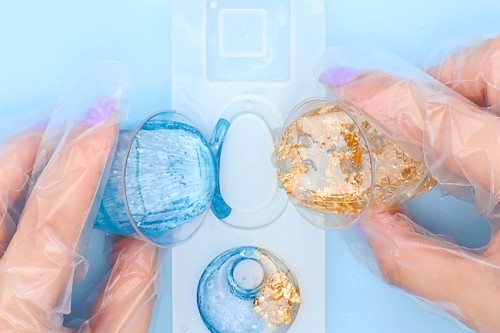
- Break up and separate any large clumps of foil that remain, adjusting them across the pendant as needed.
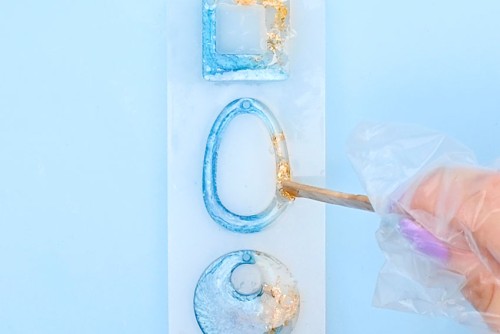
- Repeat the same pour in your bangle bracelet mold.
- Use the popsicle stick to carefully scoop the coloured resin into the earring molds.Don't overfill the mold, as you'll need a flat back to attach the earring post later.
- Let the jewelry sit, untouched, for the recommended dry (or demold) time.Our resin's dry time is 12 to 18 hours, but we recommend waiting 24 hours so that the jewelry is hard enough to handle without warping.
Step 5: Demold and attach jewelry findings
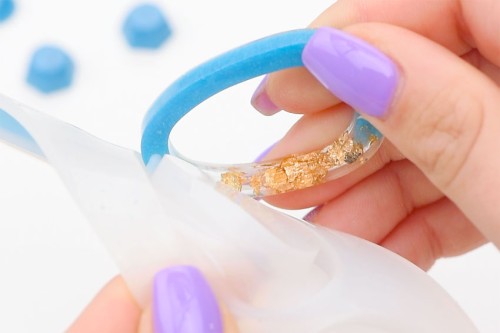
- Once your resin jewelry is dry you can demold it. Push from the bottom of the mold and stretch it a bit as you pull the jewelry out.
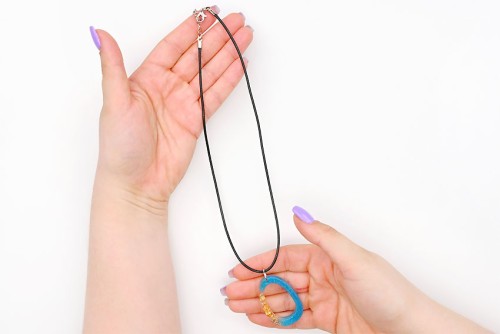
- Attach a jump ring through the hole in the pendant.If your mold doesn't have a hole you can use an electric drill or hand drill to make one.
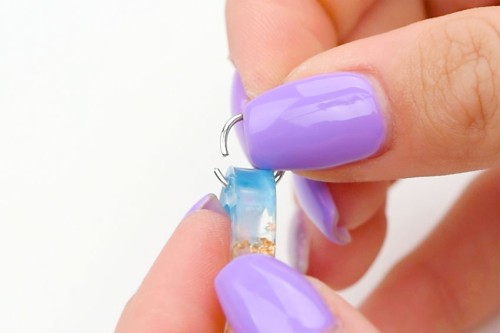
- Use pliers to close the jump ring and add your cord necklace or chain to complete the pendant necklace.
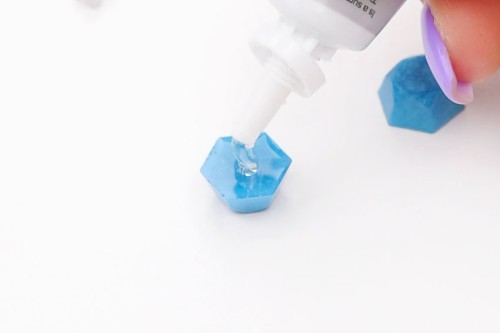
- Add a dot of jewelry glue, or a craft glue like E6000, to the flat back of the resin earrings.
- Set the flat part of the earring post into the glue.
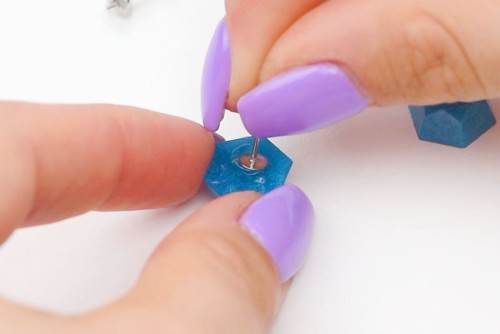
- Repeat with the matching earring and allow the glue to dry and cure for the time recommended on the package.
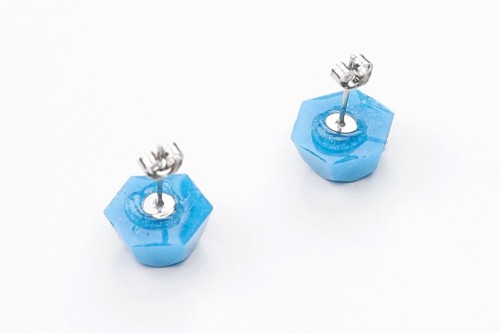
- Your resin jewelry is complete!Once your resin jewelry has completely cured (72 hours for our resin) you can sand any rough edges off the back.
Video
Notes
Looking for more DIY jewelry tutorials? Here's a few of our favourites:
How to Make Polymer Clay Earrings
DIY Wire Wrapped Pendant
DIY Macrame Necklace