
How to Make Pine Cone Bunnies
These pine cone bunnies are a truly adorable Easter craft! Use a pine cone for the bunny's body and fluffy pom poms for it's face and arms. Pipe cleaner ears and a ribbon bow finish off the cute Easter bunny look. Follow our easy steps to make your own!
Yield: 1 pinecone bunny
Cost: $1
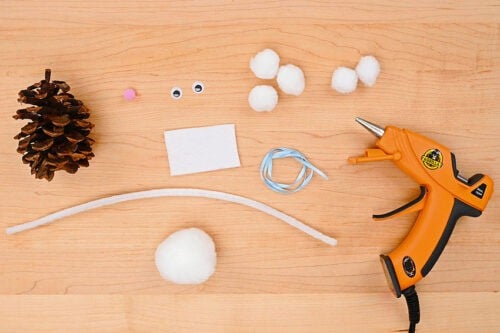
Materials
- Large white pom pom(s) (2 inch)
- White pom pom(s) (3 x 30mm, 2 x 20mm)
- Mini pom pom(s) (5mm; pink)
- Googly eyes (6mm)
- White pipe cleaner(s)
- Pinecone
- White felt
- Thin ribbon
Instructions
Step 1: Find what you need
- Gather your supplies and materials.
Step 2: Make the bunny's head
- To make your bunny's face you'll need a 2 inch pom pom for the head and 2 pom poms about 3/4 inch.
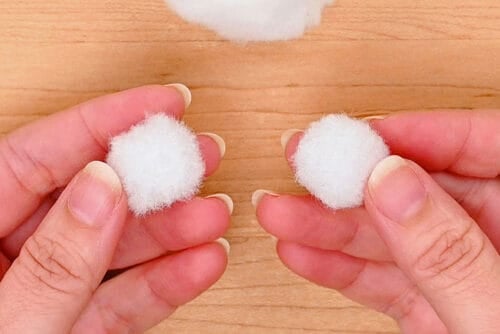
- Add hot glue to one of the small pom poms.

- Then connect the 2 small pom poms together. These will be the bunny's cheeks.

- Add a generous amount of glue to each of these pom poms on one side. Then connect them to the bottom half of the head pom pom.

- Then glue a 5 mm pink pom pom to the top of where the cheek pom poms meet, creating the nose.

- Then glue googly eyes above, and to either side, of the nose.

Step 3: Add ears and connect the pine cone
- To make the bunny's ears, cut a white pipe cleaner in half.

- Gently bend the pipe cleaner section in half, keeping the fold rounded. Twist the ends together. Repeat to make a second ear.

- Separate the "fur" on the top of the bunny's head, creating a little trench. Add a dot of glue and attach the ear to the top of the head. Push the fur back around the ear. Repeat with the second ear.

- Add a generous amount of hot glue to the bottom of the bunny's head.

- Attach it to the top center of a pine cone and hold it in place while the glue hardens.You may need to add a bit more glue to keep the head nicely centered and straight.

Step 4: Glue on feet, hands, and a tail
- Cut 2 ovals from white felt, about 1-1/4 inches long, for the bunny's feet.

- Line up the feet and add a dot of hot glue to one end of each.

- Set the bunny on top of the feet to connect them.

- Attach 1 inch pom poms to the front sides of the pine cone for arms.

- Then add another 1 inch pom pom to the bottom back of the pinecone for the bunny's tail.

- Cut an 8 to 10 inch piece of thin ribbon.

- Tie the ribbon around the bunny's neck and make a bow. Cut off any excess.

- Your pine cone bunny is complete!You can also make a "girl bunny" by adding a ribbon bow to the base of one ear!

Notes
Looking for more fun ways to use pine cones? Here's a few of our favourites:
Pinecone Owls
Pine Cone Angels
Pine Cone Spider Craft