
How to Make Perler Bead Fruit
Create Perler bead fruit patterns using our free printable templates and melty beads! Then turn them into fridge magnets or coasters. Read past the tutorial for even more ways to use them!
Yield: 1 fruit Perler bead design
Cost: $1
Equipment
Materials
Instructions
Step 1: Find what you need
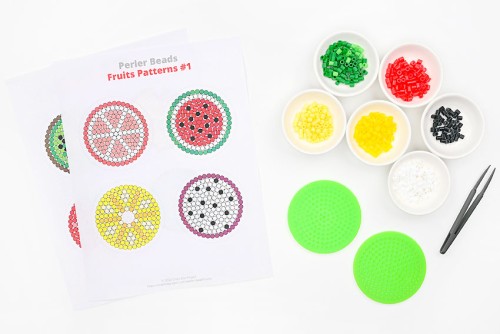
- Gather your supplies and materials.To make Perler bead fruit you'll need a small circle pegboard. We also find it helpful to sort the Perler bead colours we need and divide them into small bowls.
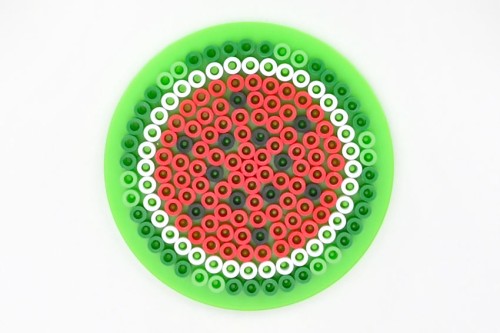
Step 2: Make your Perler bead design on the pegboard
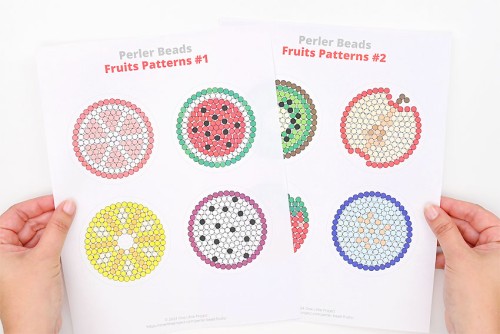
- Print our free Perler bead fruit patterns, or follow along with the template on your device's screen.Find the link to the patterns in the materials list above or scroll down below this tutorial.
- We find it easiest to start our fruit designs from the center, but you can choose whichever way works best for you!Optional: Use tweezers to place the Perler beads. It makes it easier to add a bead to a specific peg, especially for larger (adult) fingers.
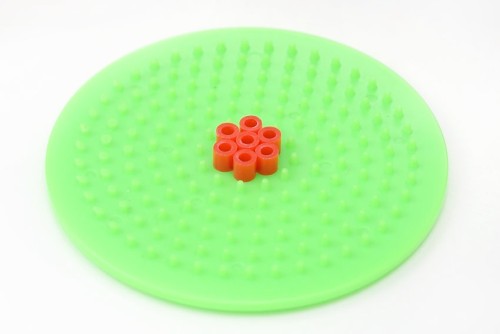
- After the first circle, work row by row towards the outside of the fruit, paying attention to the colour changes.
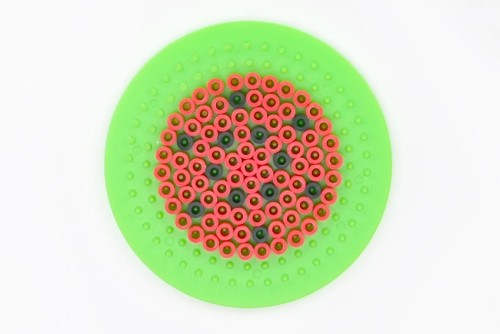
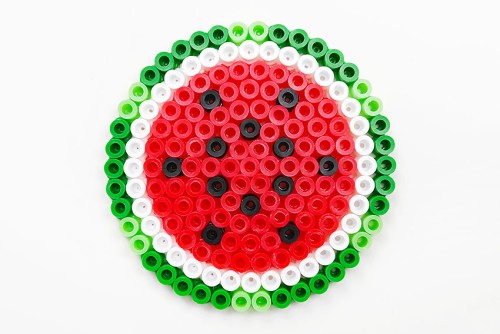
- Add a circle of white beads around the red, and then, for the outside row, add varying shades of green.Compare the watermelon (or other pattern) to the template one last time to make sure it's exactly how you want it to look.
Step 3: Iron your Perler beads
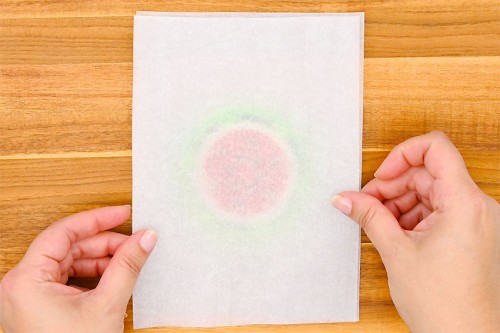
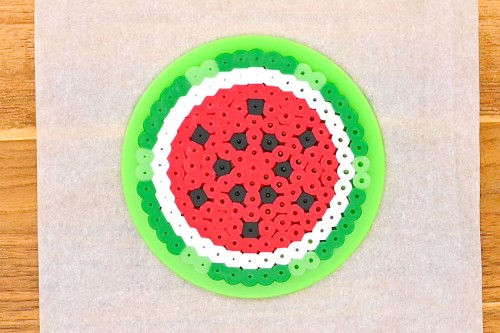
- Set the pegboard on an ironing board or a wooden cutting board. Place a piece of parchment paper over top of the Perler bead design.
- Heat your iron to medium temperature, no steam. Place the iron on the parchment paper and move it around in circular motions for at least 15 to 20 seconds.
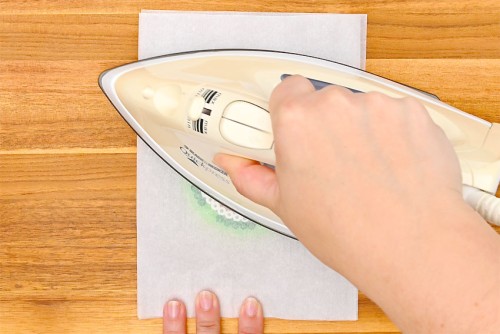
- Check the beads to see if they're melted together. Continue to iron for another 10 to 20 seconds, if necessary.The beads are melted correctly when the parchment paper sticks to the beads and needs to be peeled away from them.
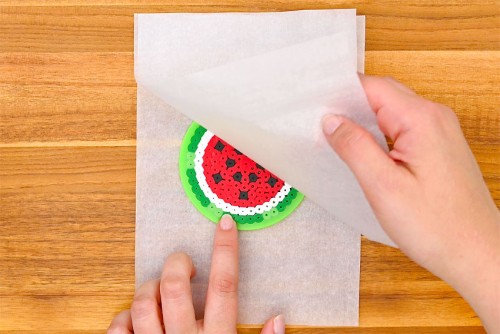
- Leave the fruit Perler design on the pegboard until it's cool to the touch.
- Your watermelon Perler bead fruit design is complete!
Video
Notes
Looking for more Perler bead crafts? Here's a few of our favourites:
Perler Bead Picture Frame
Dinosaur Perler Beads
Mushroom Perler Beads