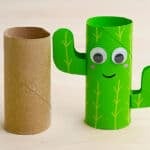
How to Make a Paper Roll Cactus
Have fun making this adorable paper roll cactus! This paper roll craft is fun for kids of all ages and you only need a few simple craft supplies.
Yield: 1 paper roll cactus
Cost: $1
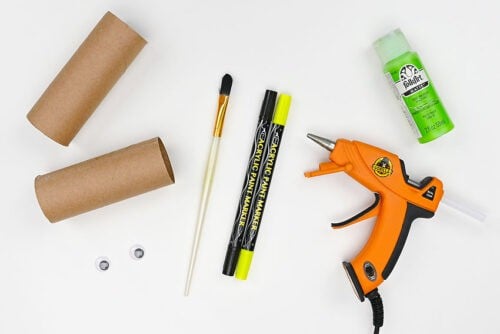
Equipment
Materials
- Toilet paper roll
- Acrylic paint (green)
- Large googly eyes
- Acrylic paint markers (black and green)
Instructions
Step 1: Find what you need
- Gather your supplies and materials.
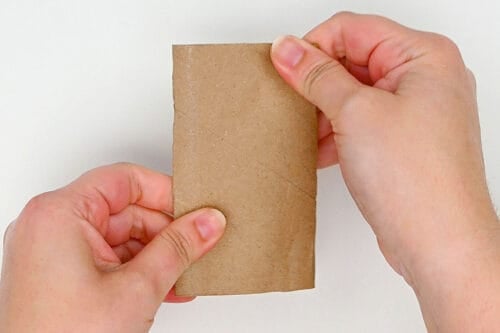
Step 2: Prepare the pieces of the cactus
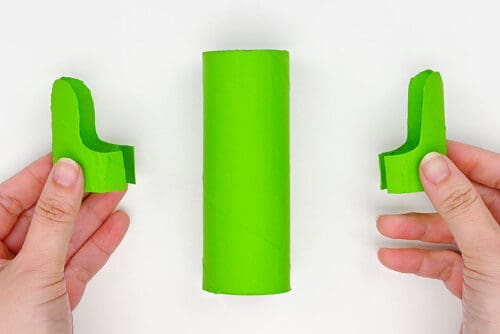
- To make your paper roll cactus you'll need 1 toilet paper roll to be the center base of the cactus.

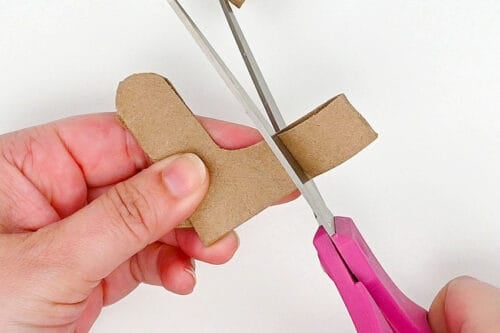
- You'll also need a 2nd roll for the arms. Flatten this roll down with your hands.
- Use a pencil to draw 2 arms for the cactus on the flattened paper roll. You want the raised (vertical) parts of the arms to be along the sides of the roll.
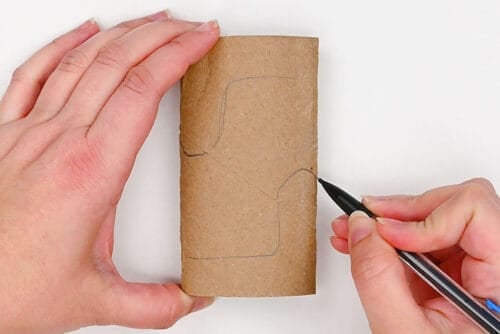
- Cut out the cactus arms and then trim the horizontal section of the arms down. This will open it up, so it's no longer connected on the one side.
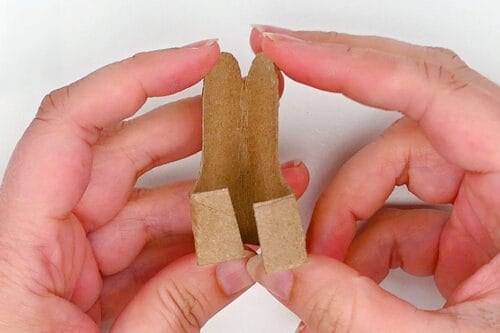
- Then fold in the horizontal pieces on both arms to create little tabs. This is where they'll connect to the cactus.
Step 3: Paint the cactus pieces
- Add a coat of green paint to the full paper roll.
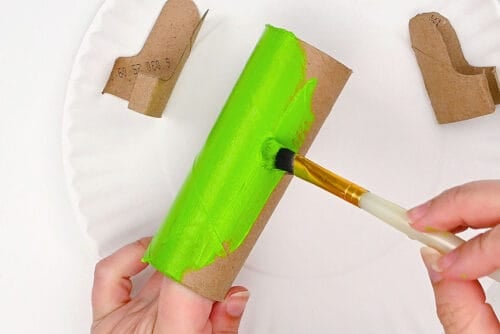
- Make sure you paint the top of the roll and a bit inside the top as well.
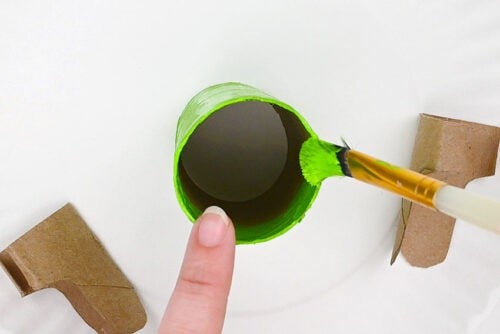
- Then add the same colour of paint to the outside of the cactus arms.
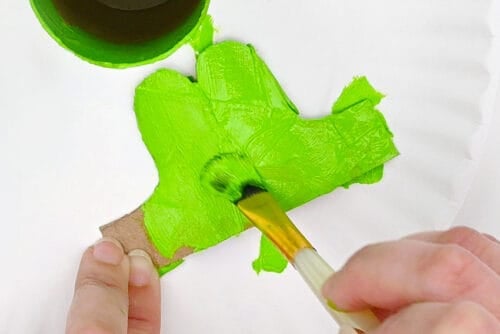
- Allow the paint to dry, and then paint the inside of the arms as well. Allow to dry again.You now have the main parts of your cactus ready!
Step 4: Put the cactus together
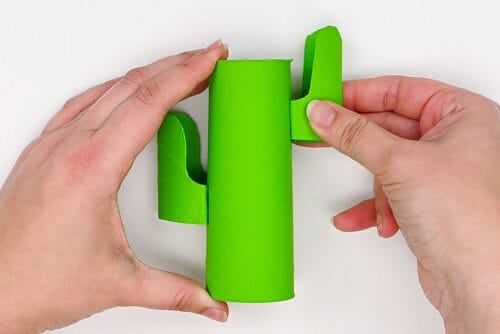
- Add hot glue to both tabs on one of the cactus arms.
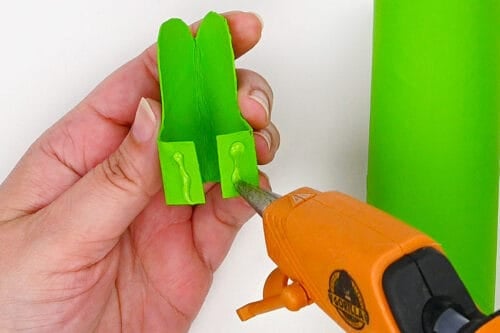
- Attach the arm to the side of the cactus. Hold it in place for a minute to allow the glue to dry.Then repeat with the second arm, attaching it at a different height on the opposite side.
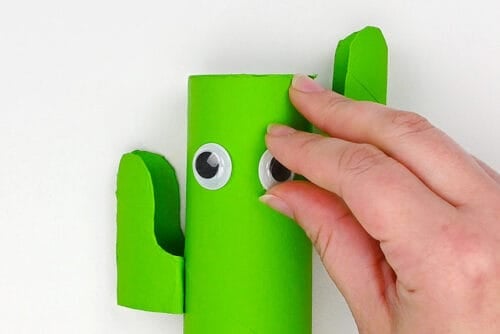
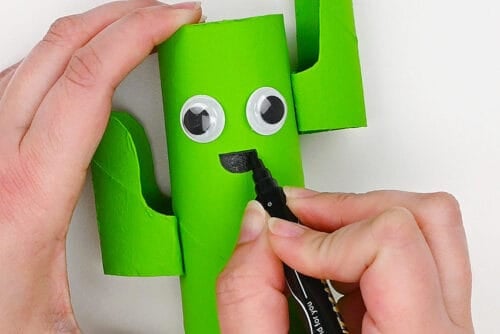
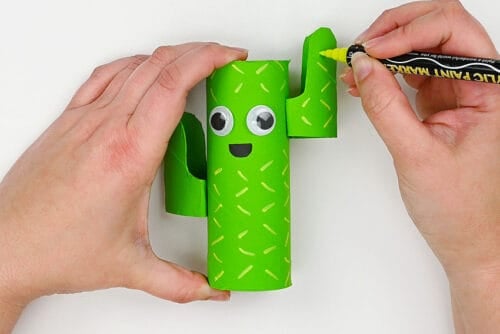
Step 5: Add the details
- Use hot glue to attach googly eyes to the front of the cactus.
- Then use a black acrylic paint marker to draw a smiling mouth.
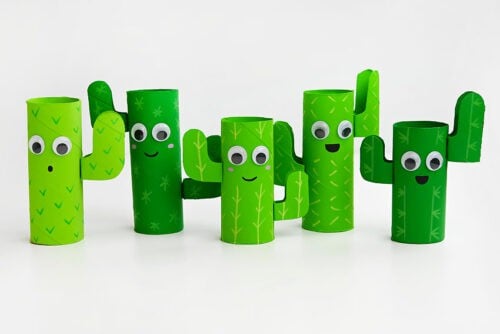
- Finally, use a yellow or light green paint marker to draw cactus spines all over the cactus body and arms.Here we drew alternating slanted lines, but you can also do little "Vs" or "Xs". Take a look at the picture below to get more ideas!
- Your paper roll cactus is complete!
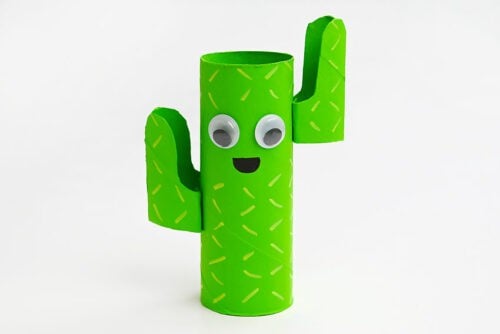
- Have fun making cacti in all different shapes and shades of green!
Video
Notes
Looking for more ways to craft with paper rolls? Here's a few of our favourites:
Paper Roll Butterfly
Toilet Paper Roll Tulips
Paper Roll Birds