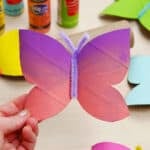
How to Make a Paper Roll Butterfly
This paper roll butterfly is cute, colourful, and so easy to make! Choose your favourite colours of paint and pipe cleaner and create this fun spring craft today, perfect for kids and classrooms.
Yield: 1 toilet paper roll butterfly
Cost: $1
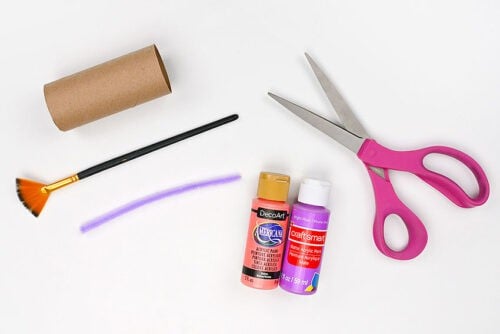
Equipment
Materials
- Acrylic paint (2 complementary colours)
- Pipe cleaner (to match paint)
Instructions
Step 1: Find what you need
- Gather your supplies and materials.
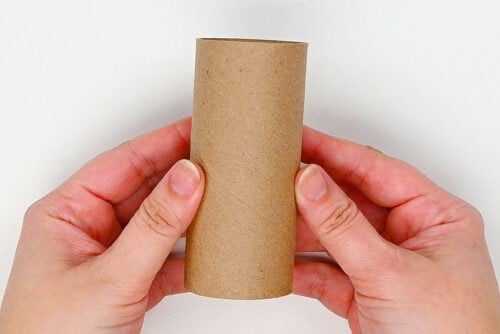
Step 2: Cut a paper roll into a butterfly shape
- To make your butterfly you'll need 1 toilet paper roll.
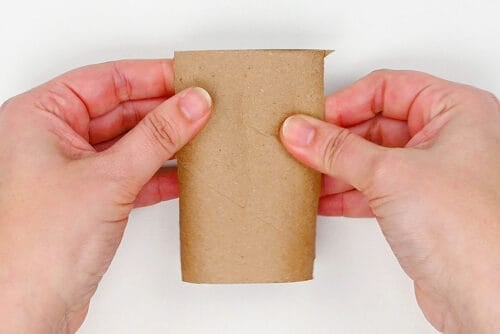
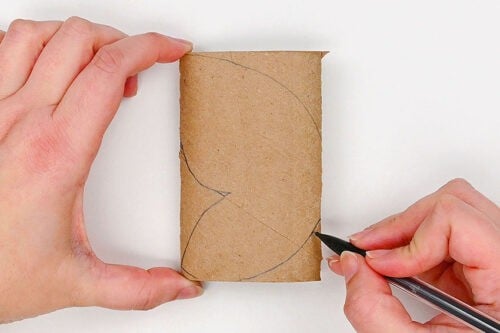
- Use your hands to flatten the paper roll.
- Draw a butterfly wing on the paper roll with the top section being a bit bigger and going to the edge of the paper roll.
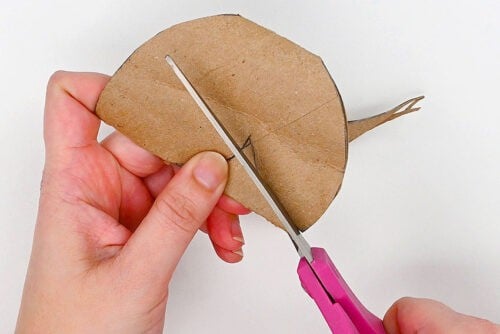
- Cut out the butterfly wing shape. Keep the center of the butterfly together (don't cut it).
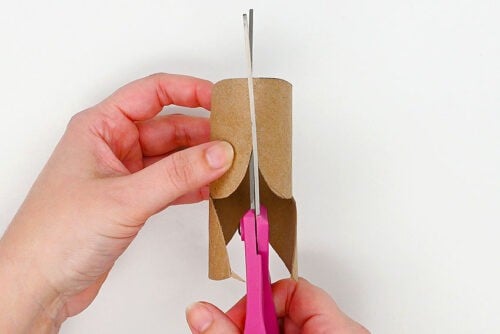
- If your wing went to the edge of the paper roll cut it apart so there are 2 separate wings.
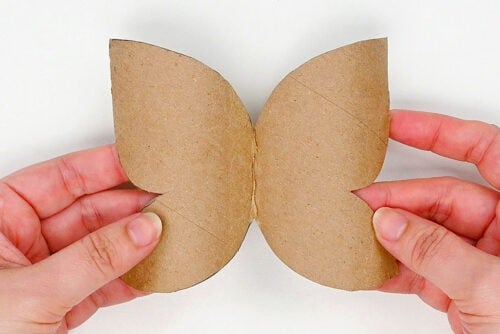
- Here's what your butterfly should look like. Fold the center of the butterfly down so the wings come up and out.
Step 3: Paint your butterfly
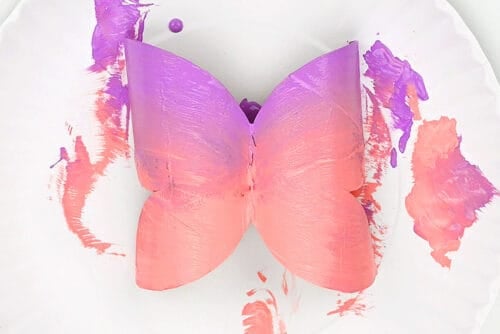
- We're adding an ombre look to our butterflies. To do this, add 2 shades or colours of paint to the butterfly, 1 at the top and 1 at the bottom.
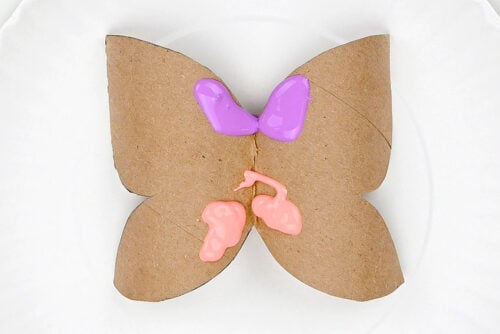
- Use a fan brush to spread the paint out from the center of the butterfly.
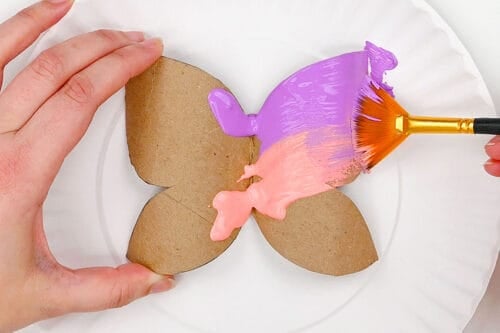
- Continue, brushing lightly so that the colours combine in the middle.You can always add a bit more of each colour to their respective parts of the butterfly to emphasize the colour difference.
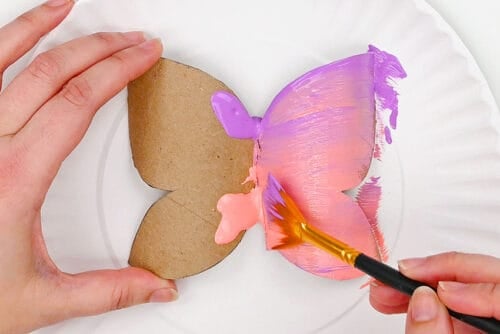
- Repeat on the other half of the butterfly and allow to dry.
Step 4: Add pipe cleaner antennae
- Cut a pipe cleaner in half so that you have a 6 inch piece. Then fold it in half.
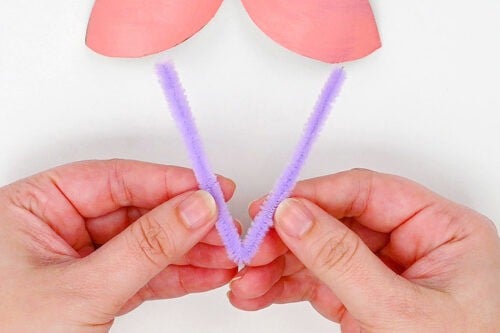
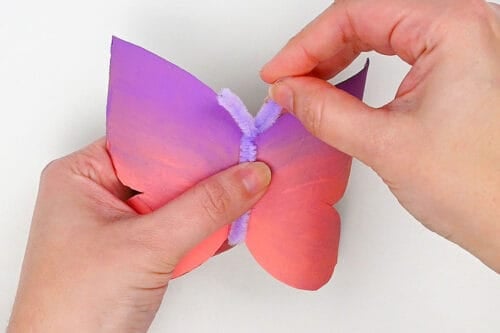
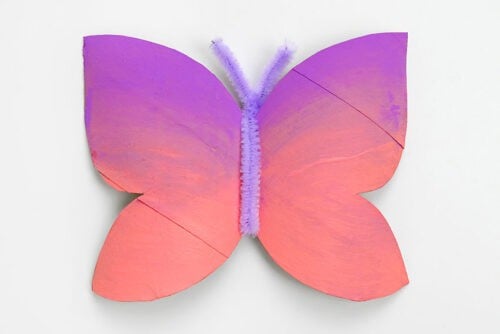
- Slide the pipe cleaner around the body so the fold is at the bottom. Twist the ends at the top to create the antennae.
- Your paper roll butterfly is complete!
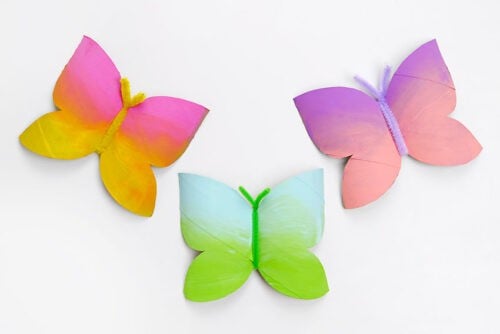
- Have fun making butterflies in all your favourite colour combinations. The bright colours are so cheerful, perfect for spring and summer!
Video
Notes
Have more paper rolls to get crafty with? Here are a few fun options:
Paper Roll Tulips
Paper Roll Birds
Fire Breathing Dragon Craft