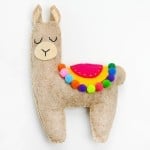
How to Make a Felt Llama
Calling all llama fans! This stuffed llama is SO EASY to make, using our free, printable pattern. Gather colourful pom poms and felt to decorate this adorable plush toy.
Yield: 1 felt llama
Cost: $2
Equipment
Materials
- Free Printable Felt Llama Template
- Felt (llama brown and 2 colours for blanket)
- Embroidery floss (black)
- Sewing thread (to match felt colours; or embroidery floss)
- Polyester fiber fill
- Mini pom pom(s)
Instructions
Step 1: Find what you need
- Gather your supplies and materials.

Step 2: Cut out the felt pieces
- Print our free felt llama pattern (find the link in the materials list above!) and cut out the shapes.

- Hold the pattern pieces on top of the felt to cut them out.Use a darker tan or brown for the llama's body and outer ears (make sure you cut out 2 pieces of each!). Cut the inner ears and snout from a lighter tan/beige. Then cut the 2 blanket/saddle pieces from complementary colours.You can pin the pattern to the felt to make it easier to cut, or trace around the template with chalk or a gel pen.

Step 3: Sew the llama together
- Grab one of the llama body pieces. Set the rest of the pieces to the side for now.Begin by using a backstitch to embroider 2 wide "U" shapes for the llama's eyes.

- Set the 2 llama body pieces together, one on top of the other.Line up the edges as best you can. You can pin the pieces of felt together, if you'd like.

- Begin sewing the edges of the llama together with a blanket stitch. Start at the side of the llama's head.Bring your needle up through both layers of felt, about 1/8 inch from the edge. Pull the thread almost all the way through and tie the front thread to the tail in a double knot.Tuck the excess thread between the two layers of felt and bring your needle back up about 1/4 inch away from the last stitch.Before you pull your needle all the way through, wrap the thread around the needle.

- Repeat the blanket stitch around the outside of the llama, stopping when only the top of the head is left open.

Step 4: Stuff the llama and add the ears
- Add stuffing to the llama, pushing it down. Use a pencil or a knitting needle to reach all of the points, if needed.Continue until the llama is evenly and firmly stuffed.

- Set the smaller inner ears on top of the outer ears, lining up the straight bottoms.Fold the ears in half at the bottom to give them a rounded, 3D look.

- Add a stitch through the bottoms of the ears to secure the folded shape.

- Set one of the llama's ears into the gap on the llama's head. Place it so that the folded part is pointing inwards.Continue the blanket stitch around the edge, making sure to secure the ear in place with a couple stitches. Repeat with the second ear, continuing around until the whole llama is sewn together.

Step 5: Add the snout
- Embroider a "Y" shape on the snout piece of felt.

- Add hot glue to the back of the snout.

- Set the snout in place on the llama's head, below the eyes.

Step 6: Add and decorate the blanket saddle
- Set the smaller blanket piece on top of the larger, lining up the straight edges.Connect them together with a running stitch, going back and forth through the fabric.

- Add lines of hot glue to the back and place the blanket saddle on the llama's body, lining up the top edges.

- Add a dot of hot glue to a small pom pom.

- Place the pom pom at the top edge of the blanket. Repeat, adding pom poms until you reach the other side.

- Your felt llama is complete!

Video
Notes
Looking for more free felt patterns? Here's a few of our favourites:
Felt Strawberry Pattern
Easy Felt Shamrocks
Felt Jellyfish Pattern