
DIY Wood Slice Pumpkins
These wood slice pumpkins are SO CUTE and easy to make! Paint and decorate a wood slice to look like a pumpkin. It's such a fun fall craft!
Yield: 1 wood slice pumpkin
Cost: $2
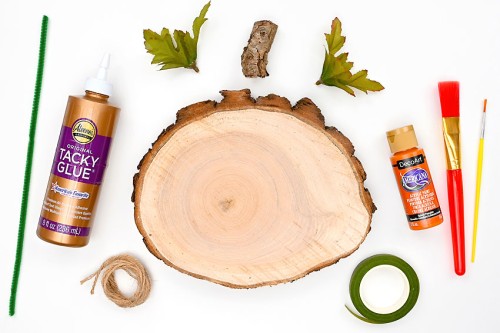
Equipment
- Paintbrushes (1 small, 1 large)
Materials
- Large wood slice (about 8 to 10 inches across)
- Orange acrylic paint
- Tacky glue
- Small branch (about 2 inches long)
- Pipe cleaner
- Floral tape (optional)
- Twine
- Fabric leaves (green, or fall colours)
Instructions
Step 1: Find what you need
- Gather your supplies and materials.
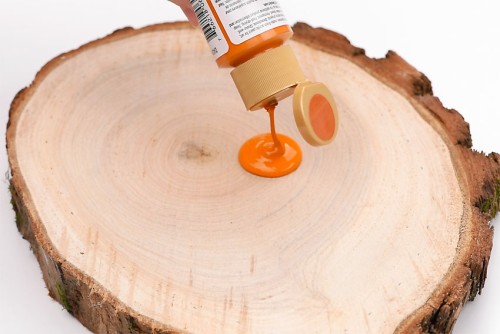
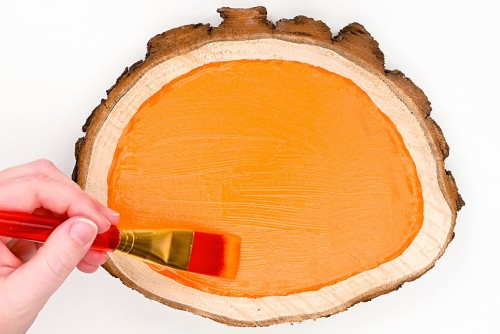
Step 2: Paint the wood slice
- Add a generous amount of paint to the center of your wood slice.
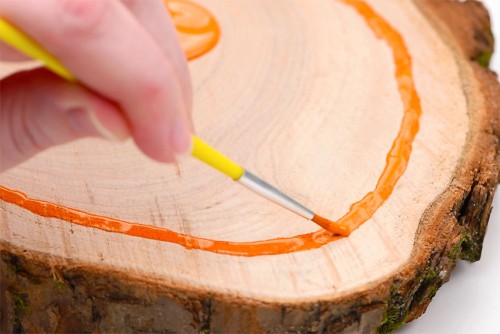
- Use a small paintbrush to paint a border 1/2 inch away from the edge of the wood slice.
- Use a larger brush to spread the paint across the wood slice, inside the border.
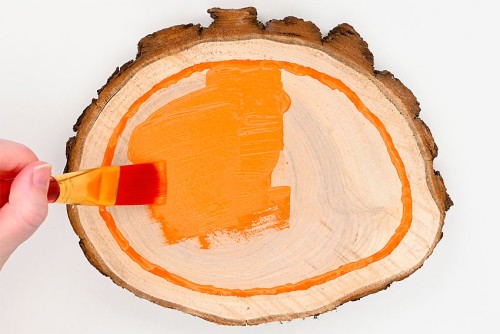
- Add more paint as needed until the wood slice is covered in a thin layer of paint.Allow to dry for about 45 minutes or until mostly dry to the touch.
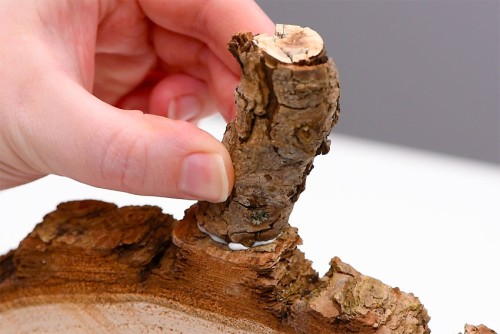
Step 3: Add the pumpkin stem
- Stand the wood slice up and find the top center. Add a generous amount of tacky glue to this spot on the bark.
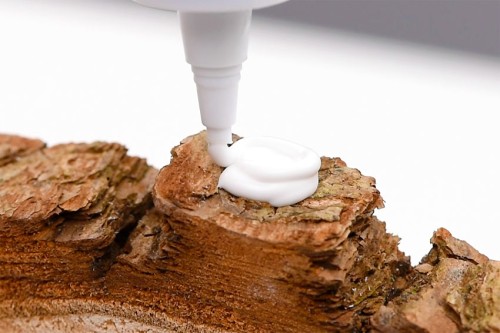
- Press the pumpkin stem (the small branch) into the glue and hold it in place for a few seconds, pressing it down to help it stand on its own.Allow the glue to dry for about 1 to 2 hours.
Step 4: Decorate the wood slice pumpkin
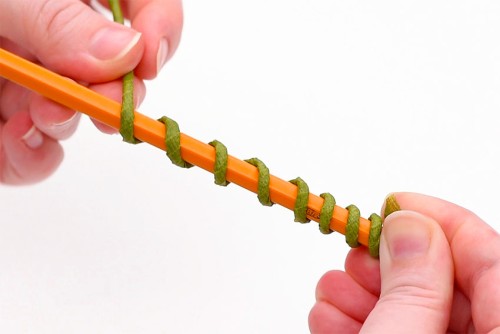
- Wind floral tape around the pipe cleaner.You can also leave the pipe cleaner as is, but we liked the colour and texture of the green tape.
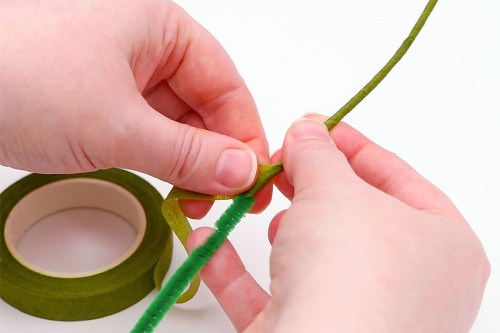
- Wind the covered pipe cleaner around a pencil, creating a coiled pumpkin tendril.
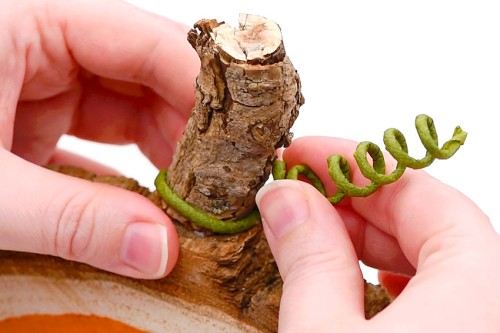
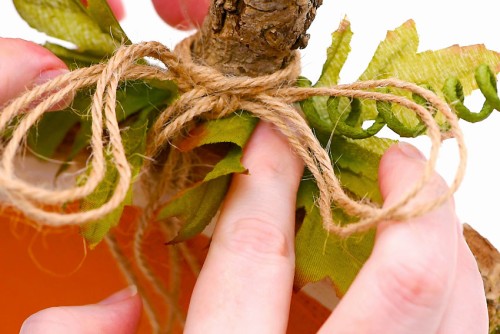
- Uncoil part of the tendril and wrap it around the pumpkin stem. Twist the pipe cleaner around itself to keep it in place.
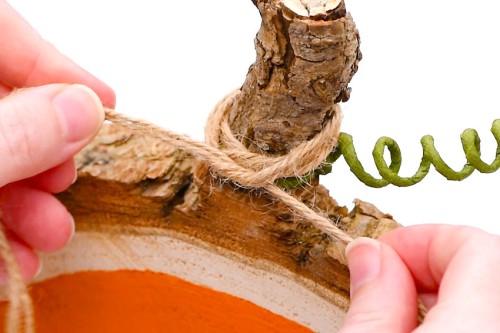
- Cut 2 lengths of twine about 44 inches long. Line up the two strands and find the center. Wrap the twine around the stem a couple times and then tie a bow.
- Add hot glue to the back of a fabric leaf.
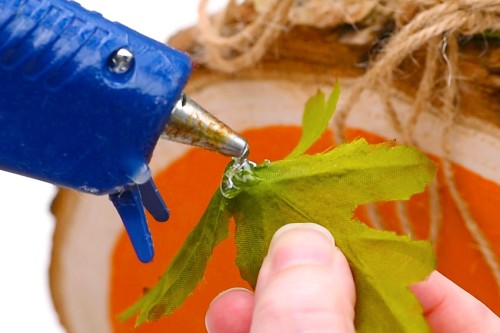
- Press the leaf into place on the side of the pumpkin stem. Attach the leaf to the wrapped pipe cleaner or the twine, because hot glue doesn't stick well to the bark.Add a second leaf to the other side if you'd like, or layer 2 leaves on one side.
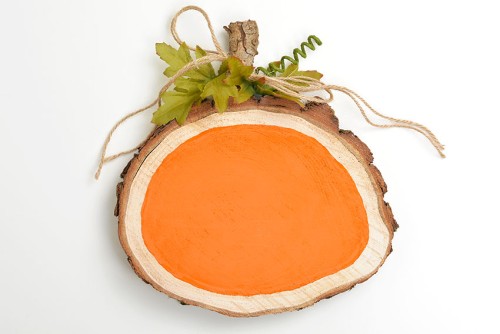
- Your wood slice pumpkin is complete!
Video
Notes
Looking for more pumpkin crafts? Here's a few of our favourites:
Tree Stump Pumpkins
Paper Mache Pumpkins
DIY Concrete Pumpkins