
How to Make a "Stained Glass" Snowflake Suncatcher
This winter craft for kids is such a cool combination of paper folding and colouring! Design a paper snowflake and then create a beautiful suncatcher with markers.
Yield: 1 snowflake suncatcher
Cost: $1
Equipment
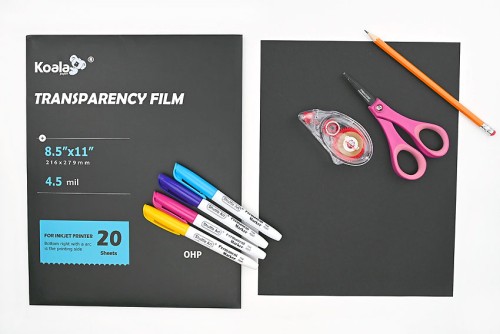
Materials
- Black paper (or colour of choice; 24 lb or less)
- Glue tape
- Transparency film
- Permanent markers (many colours)
Instructions
Step 1: Find what you need
- Gather your supplies and materials.
Step 2: Fold the paper snowflake
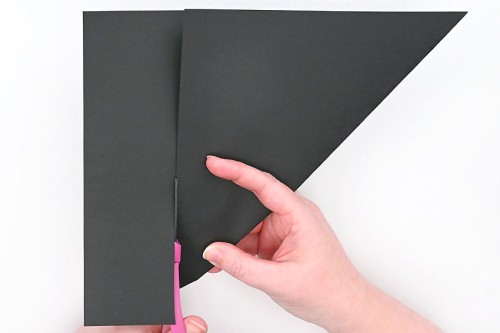
- Fold the bottom left corner of the paper up so that the bottom edge of the paper meets the right side.
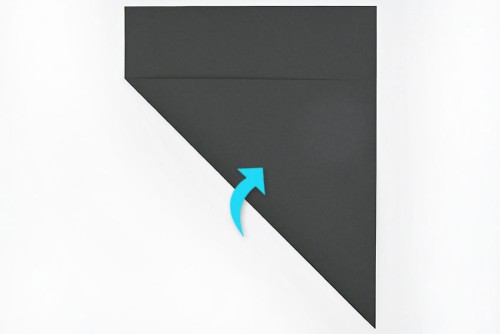
- Cut off the extra paper (the rectangular strip).
- Place the paper back in the same position, with the fold going up diagonally on the left.
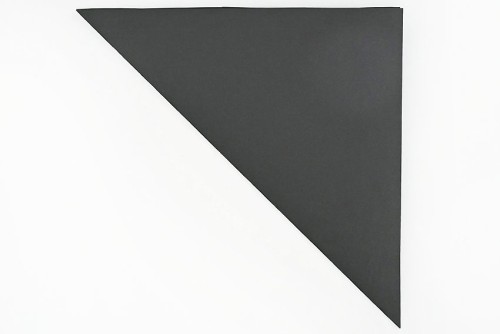
- Fold the bottom right corner up to meet the top left corner. You should have a triangle with the longest edge along the top.
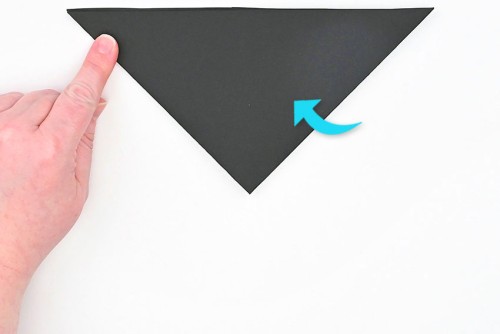
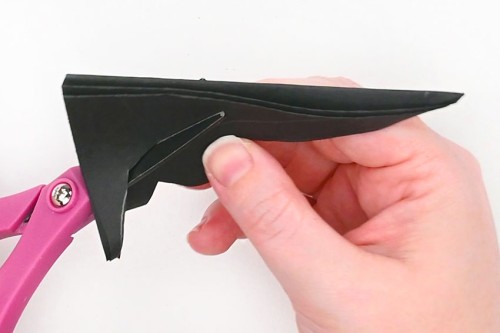
- Now fold the right third of the paper over to the left as shown in the photo below.Don't push the fold down completely, as you may need to adjust it to make perfect thirds that line up.
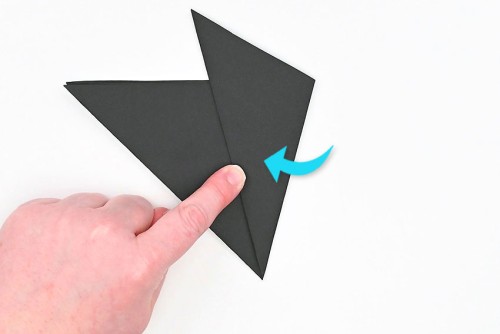
- Fold the left third over so that the left edge meets the right fold, again as shown in the photo below.At this point you may need to adjust the folds so that the edges line up nicely.
- Cut off the top points of the paper. You can flip the paper over and cut along the edge of the paper on the back.

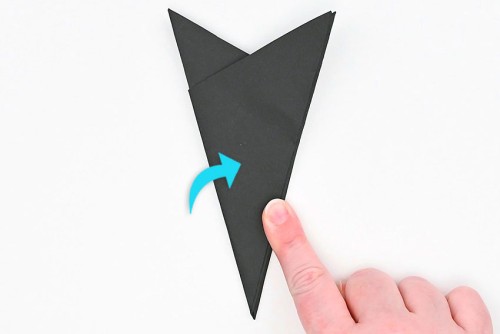
Step 3: Draw and cut the snowflake design
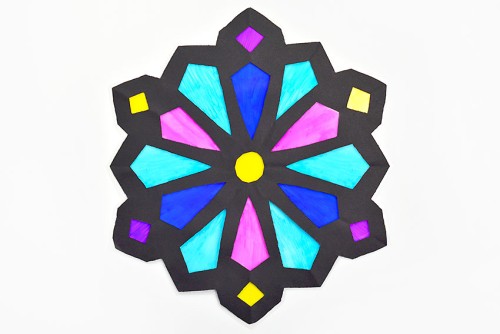
- Set the paper back down so that the top folded edge is on the left.Use your pencil to draw a snowflake pattern. Follow the pattern in the picture to make the same snowflake we did, or design your own snowflake.Visit our full guide on how to make paper snowflakes which includes tips on how to make them, design ideas and even folding templates.
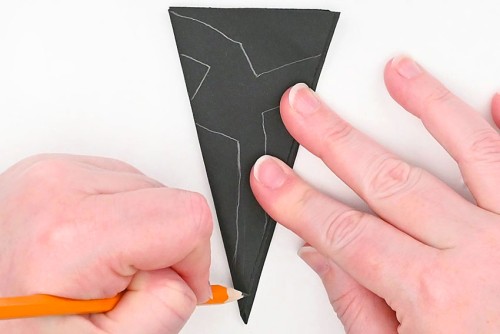
- Begin cutting out the snowflake along the pencil lines.Regular adult scissors will work but children's safety scissors are not sharp enough. We like using sharp detail scissors (link in the materials list above) if you have them.
- Continue until the snowflake pattern is completely cut out.
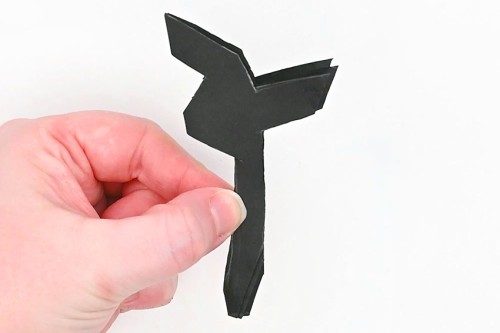
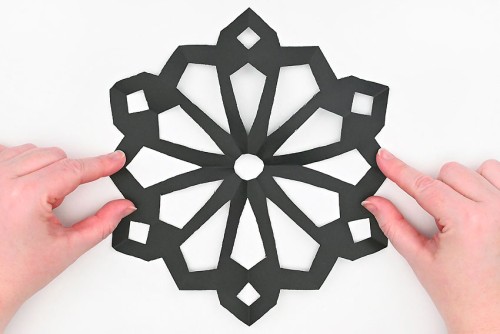
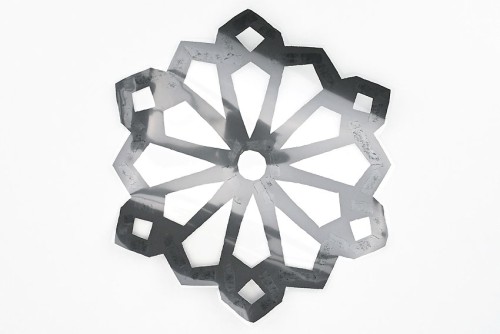
- Unfold the paper to reveal your beautiful snowflake!
Step 4: Add a plastic backing to the suncatcher
- Flip the snowflake over to hide any leftover pencil marks. Then add glue tape along the edges and center of the paper.
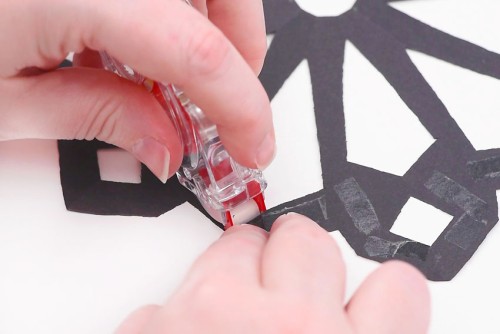
- Place a piece of transparency film on top of the snowflake, with the shiny side down.
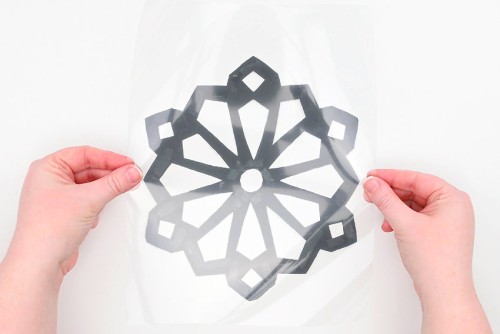
- Press and smooth the plastic sheet into place.
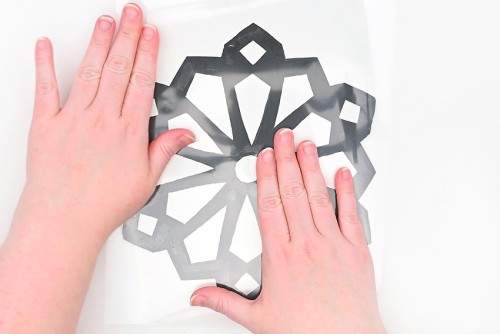
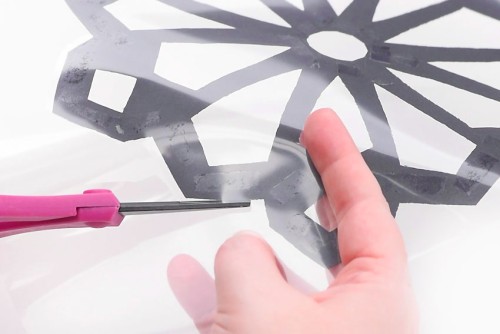
- Cut off the extra plastic around the outside of the snowflake.No need to be super precise -- you can leave a little border around the outside of the snowflake, because it's clear and won't show up once the suncatcher is hung in the window.
- Set down the snowflake with the paper side down. The top facing you should be only plastic.
Step 5: Colour your snowflake suncatcher
- Choose a colour of marker and fill in a section of the snowflake.Make sure the whole area is filled in. You can even go over the edge a bit, since when you flip the snowflake over it will be hidden behind the paper.
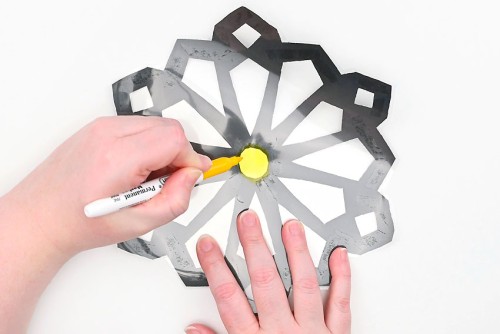
- Continue, filling in the rest of the sections with colour. You can make a pattern with the colours, like we did, or fill them in randomly.

- Your "stained glass" snowflake suncatcher is complete!
Video
Notes
Looking for more snowflake crafts? Here's a few of our favourites:
Coffee Filter Snowflakes
Perler Bead Snowflake
Beaded Pipe Cleaner Snowflakes