
DIY Glass Bead Christmas Ornaments
These glass bead Christmas ornaments look SO PRETTY shimmering on the Christmas tree! And all you need is glue, glass gems and a cookie cutter to make them!
Yield: 1 glass bead ornament
Cost: $1
Instructions
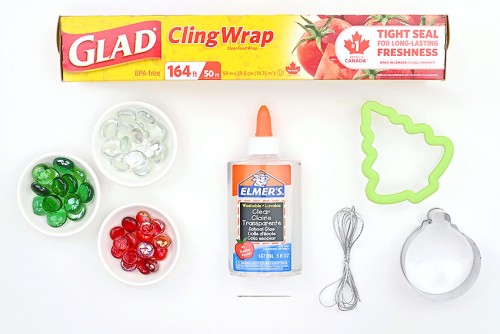
Step 1: Find what you need
- Gather your supplies and materials.
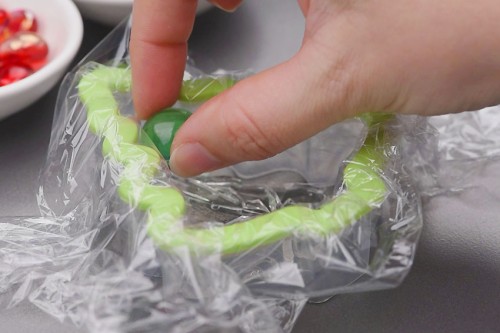
Step 2: Prepare your ornament mold
- We'll be using a cookie cutter to make our ornament shape. Set the cookie cutter on a tray, or on something else that will protect your working surface from glue.

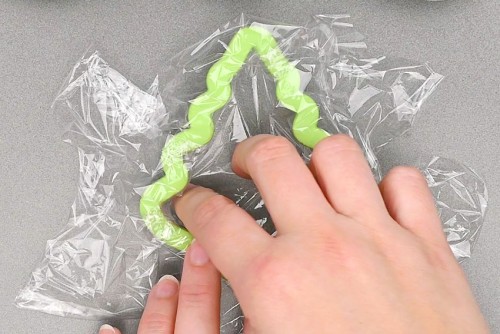
- Cut a piece of plastic wrap larger enough to fit inside the cookie cutter.
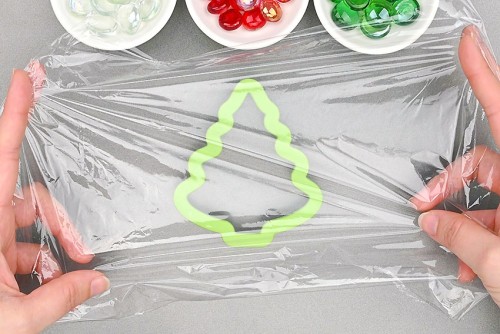
- Push the plastic wrap down into the cookie cutter, making sure the bottom, the corners, and the edges are all flat.
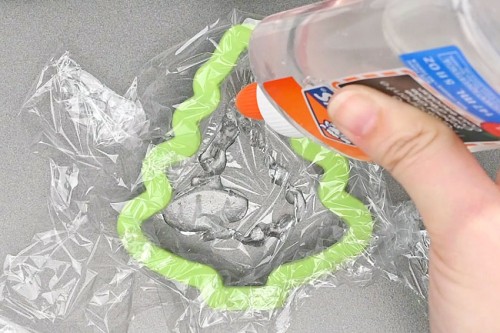
Step 3: Add glue and glass beads to the prepared cookie cutter
- Add a thin layer of clear glue (about 1/8 inch deep) inside the cookie cutter, on top of the plastic wrap.The glue needs to be thick enough to connect the glass beads, but not too thick, or it won't dry properly.
- Place a glass bead into the glue. We found it best to start along the edge, or in the corners, of the cookie cutter.
- Continue, filling the cookie cutter with glass beads. Use different sizes and colours of beads, to fit as many as possible. Shift the gems around in the glue to make room for more if needed.
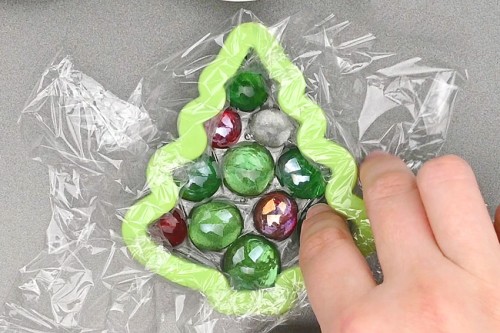
- Allow the ornament to dry in the cookie cutter mold. This will take approximately 2 to 4 days.

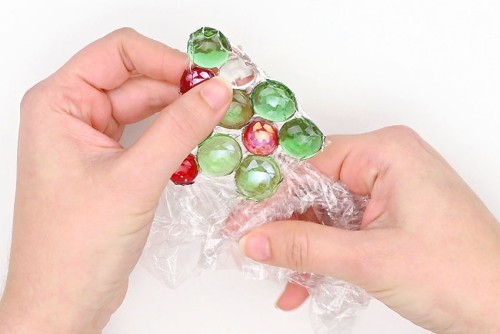
Step 4: Complete your glass bead ornament
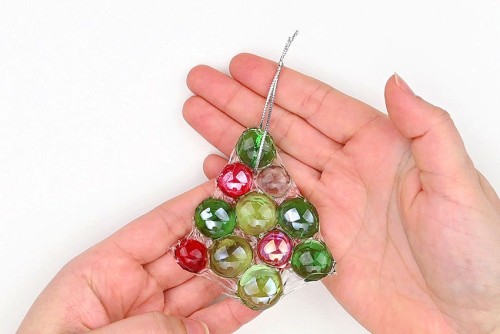
- Once your ornament is dry enough that you can remove it from the mold without losing its shape, you can remove it from the cookie cutter.Scrunch the extra plastic wrap on top of the ornament and pull the cookie cutter up and away from the ornament. It should come off easily if you push down on the ornament gently at the same time.

- Peel the ornament off of the plastic wrap.If the back of your ornament isn't completely dry, you can set it down, wet side up, and allow it to dry for another day or two.
- Trim off any messy glue bits around the outside of the ornament.

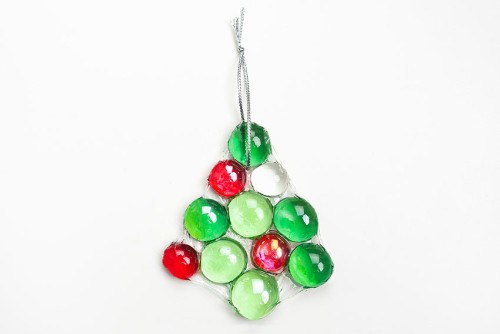
- Poke a hole through the glue with a needle, near the top of the ornament.
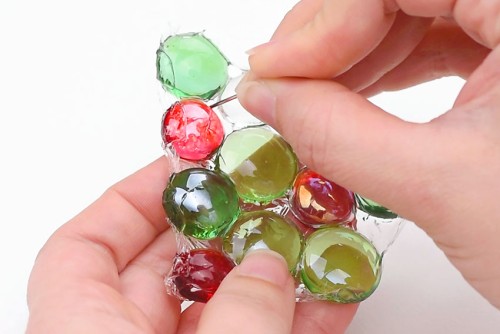
- Cut a 6 inch piece of metallic cord and string it through the hole in the ornament. Tie the ends into a knot to make an ornament hanger.
- Your glass bead Christmas ornament is complete!
Video
Notes
Looking for more glass bead crafts? Here's a few of our favourites:
Glass Bead Christmas Candle Holder
Glass Bead Heart Suncatcher
DIY Suncatchers with Glass Beads