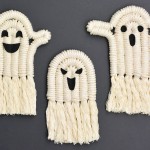
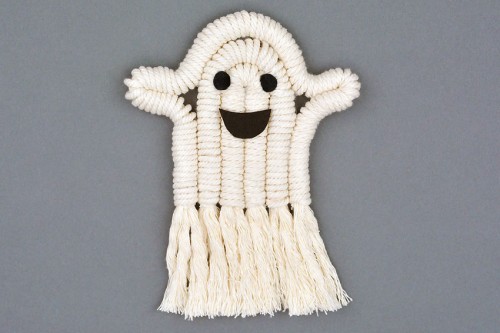
How to Make a Macrame Ghost
This non-spooky macrame ghost is SO CUTE and a fun and easy craft for macrame beginners!
Yield: 1 macrame ghost
Cost: $2
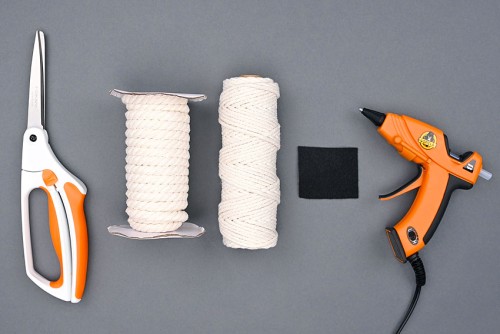
Equipment
Materials
Instructions
Step 1: Find what you need
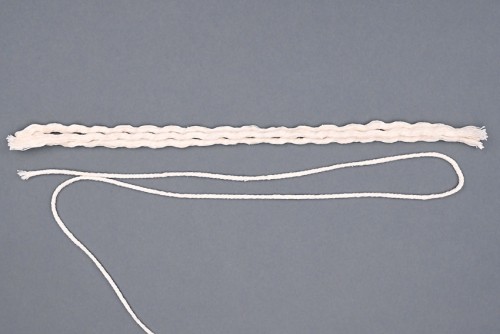
- Gather your supplies and materials.
Step 2: Make the inside of the macrame ghost
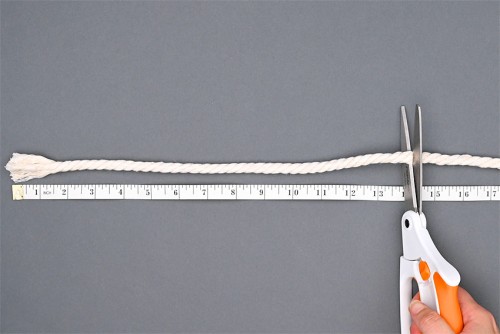
- Cut a piece of 8mm macrame rope to be 14 inches long.
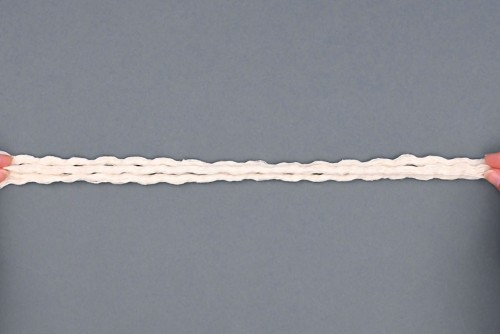
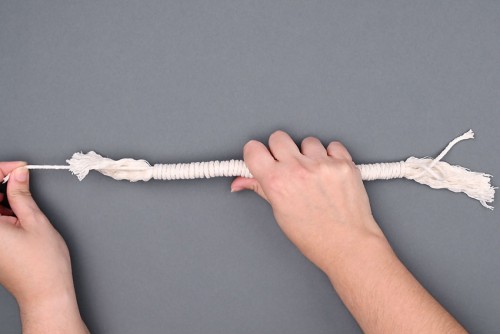
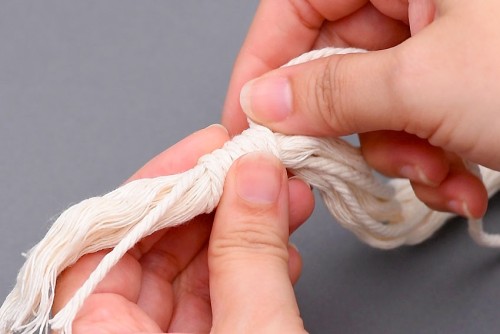
- Unravel the piece of 8mm cord into three separate pieces and place them together.
- Keep the 2mm cord attached to the spool and arrange it so there's two lengths of cord alongside the 8mm cord, with a loop at the right.
- Bring the thin cords and thick cords together into a bundle, keeping them in roughly in the same position as shown in the previous step. Pinch the cords together to hold them in place. Then wind the long end of the 2mm cord (attached to the spool) around the cord bundle, starting 3 to 4 inches in from the end.
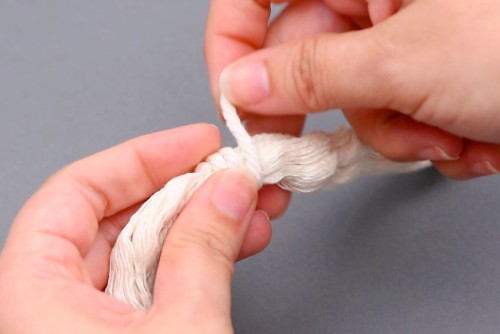
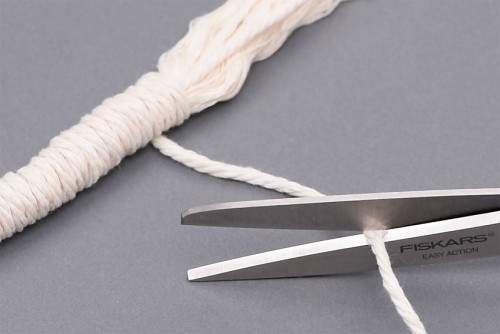
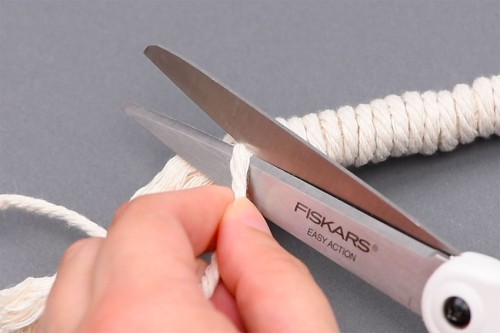
- Continue to wind the 2mm cord tightly and evenly around the bundle until you're 3 to 4 inches from the other end. (It should match the length on the other side.)Then cut off the 2mm cord from the spool, leaving about 2 inches extra.
- Put the end of the cord you just cut through the loop of 2mm cord you created at the beginning. (It should be near the end you just finished).
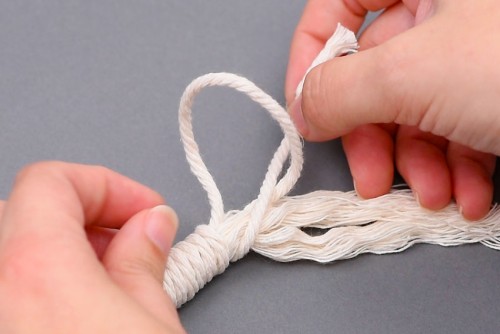
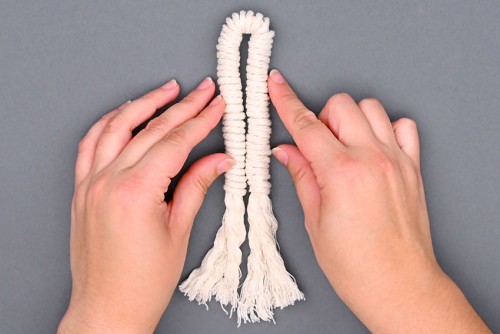
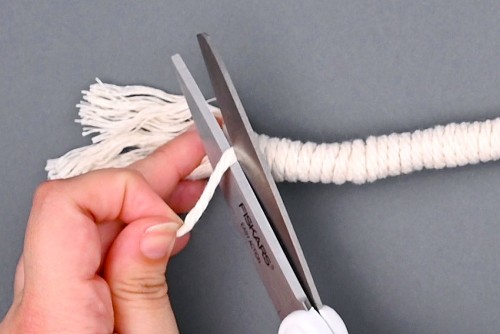
- Now pull the cord from the other side (where you started wrapping). Pull until the loop and cord end disappear inside the wrapping.
- Once the loop is hidden inside the wrapped cord, cut off the extra cord as close to the wrapping as possible.
- Bend the wrapped cords into a closed arch. This will be the middle of the ghost.
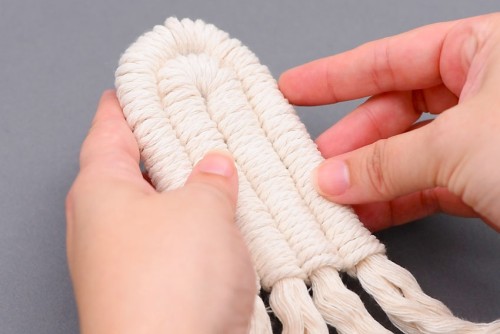
Step 3: Make the middle part of the ghost
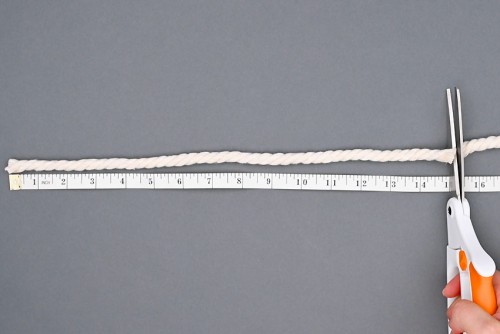
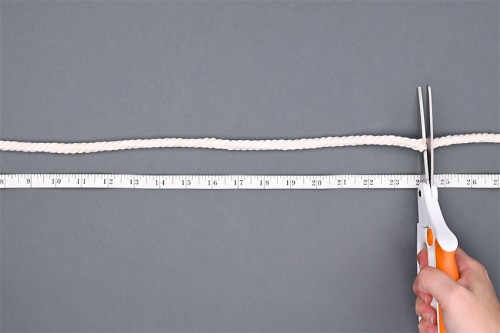
- Cut a piece of 8mm macrame rope to be 15 inches long.
- Repeat the instructions in Step 2 to wrap these cords.
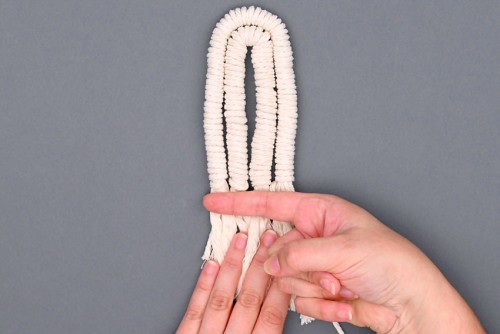
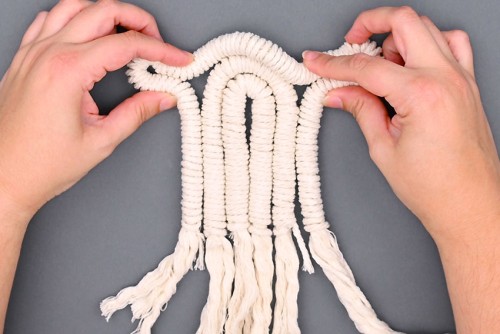
- Don't cut the cord until you measure the arches to make sure they line up. Match up the first end of the wrapped parts. Then wrap the outer arch around the inner arch. Remove a few windings or add more windings until the wrapped ends line up in a straight line. (Where our finger is shown in the photo).
- Finish this arch in the same way as the first, bringing the cord through the loop and pulling it to secure the cord.
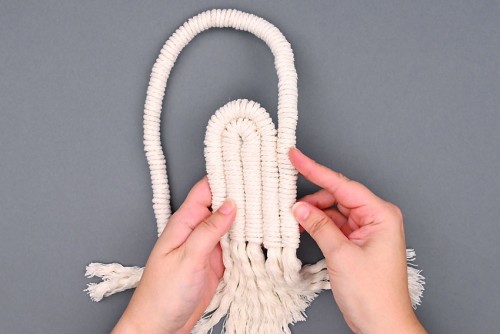
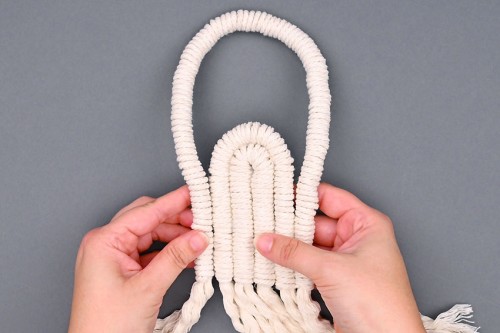
Step 4: Make the outer arch of the ghost
- For the outside layer of the ghost, cut a 24 inch piece of braided 8mm macrame cord.
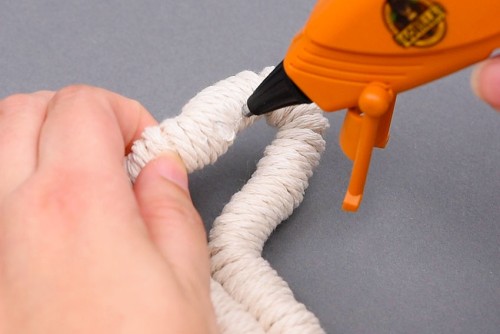
- Wrap the cord in the same way as the other two arches. When you're finished, line up the center of this long arch with the top center of the other two arches.Pinch out a small section of cord on either side to make ghost arms and check that the wrapped sections line up on the bottom before cutting and tying off.
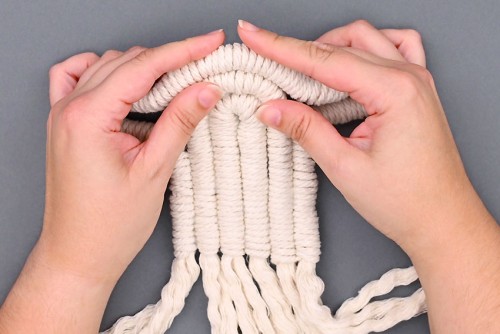
Step 5: Glue the macrame ghost together
- Add hot glue to the inside of the smallest arch.
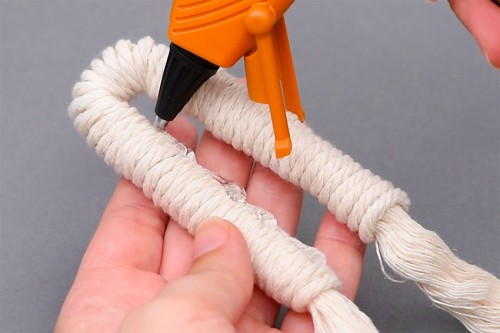
- Line up the bottom edges and push the arch together, holding it in place until the glue is dry enough to hold.
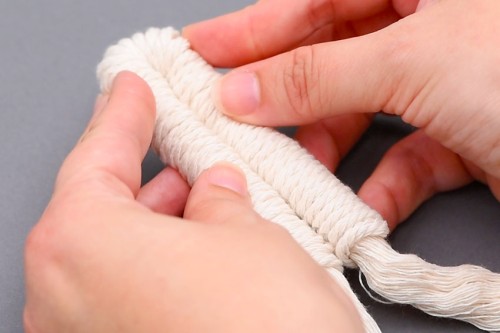
- Arrange the middle arch around the outside of the center arch. Apply a thin line of glue, about 2 inches long, to the center inside of the middle arch.
- Continue adding hot glue every couple of inches until the two pieces are completely connected. Again, hold it in place until dry.
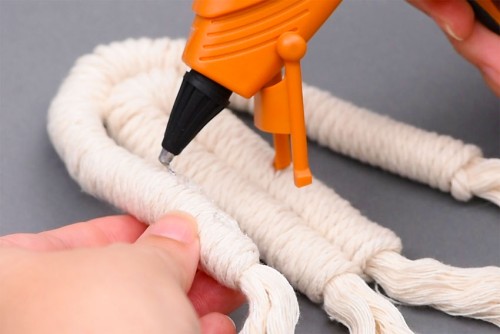
- Next, add the largest outside piece of the ghost. Begin by lining up the right edges and gluing a couple inches together.
- Now line up the left side and attach a couple inches on that side.
- Find the center of the outside arch and glue this to the top of the middle arch.
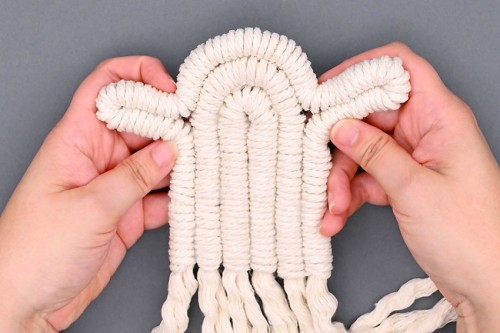
- The arm shapes should form naturally. Add glue to the inside of one arm before pushing the two parts together.
- Glue the second arm together and then add glue to any other sections of the ghost that aren't yet secure.
Step 6: Add a ghost face and trim the fringe
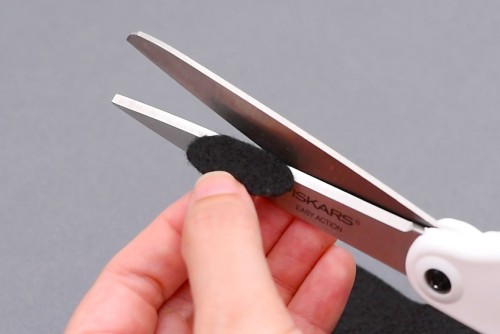
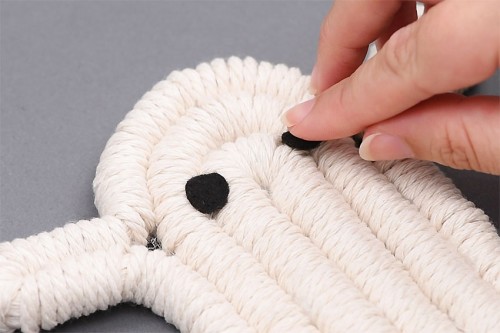
- From the black felt, cut out two eyes and a mouth shape.
- Use hot glue to attach the ghost's face.
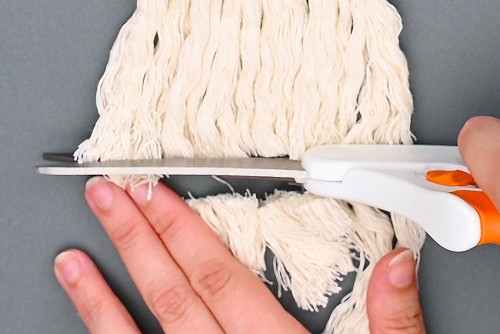
- Trim the bottom of the fringe so that it's even.
- Your macrame ghost is complete!
Video
Notes
Looking for more ghost crafts? Here's a few of our favourites:
Cheesecloth Ghosts
Paper Roll Ghosts
Paper Plate Handprint Ghosts