How to Make "Watercolor" Prints Using Markers
Use markers to create art that looks like a real watercolor painting!
Yield: 1 "watercolor" painting
Cost: $1
Equipment
- Spray bottle (with water)
Instructions
Step 1: Find what you need
- Gather your supplies and materials.

Step 2: Set up your watercolor paper
- Cut your watercolor paper to 8.5 x 11 (letter size) and print off one of our free templates! You can find a link in the supplies list above, or many more options below!

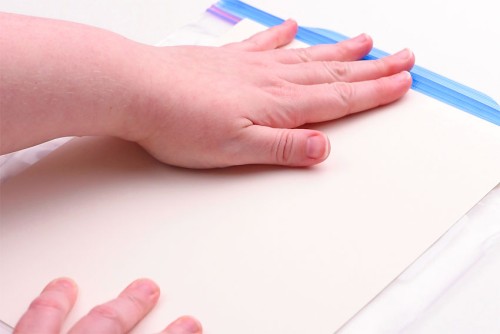
- Place a large plastic bag overtop of the template.

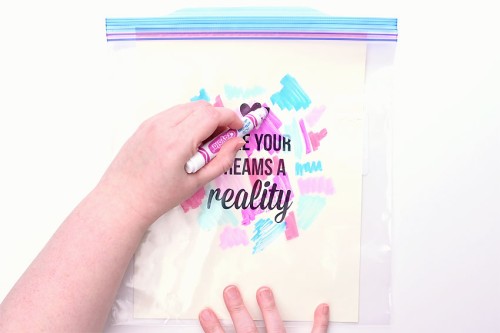
Step 3: Color on the freezer bag with markers
- Use a washable marker to color on the plastic bag. Start with one color and add random scribbles in different areas across the bag.
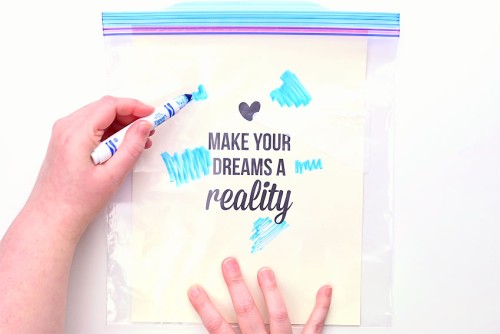
- Choose two or three complimentary colors and continue coloring until you're happy with the colors or the pattern you've made.You can leave a bit of space between colors, or put them right next to each other. The closer the colors, the more they will blend.
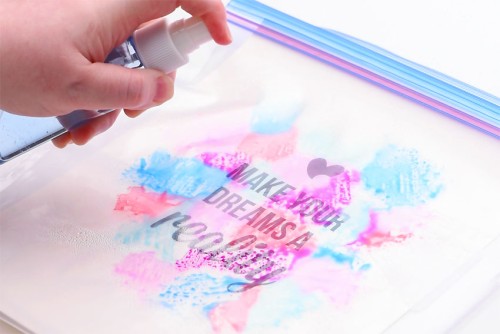
Step 4: Add water and watch your design come to life
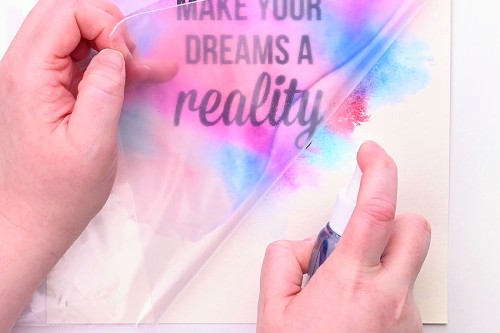
- Spray water overtop of the marker. Be generous, spraying close to the plastic, until the color starts to bead up on the plastic.
- Slide your watercolor paper out from under the bag and place it, printed side down, on top of the bag.Press the paper down, pushing out from the center. Use a paper towel to wipe away any extra liquid that comes out the sides of the paper.
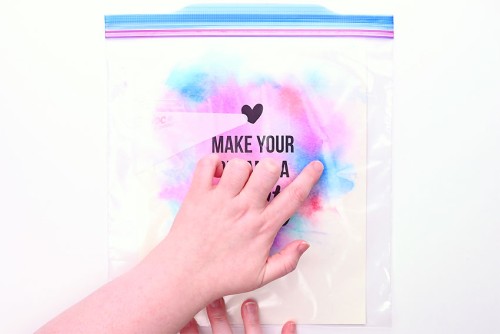
- Flip the paper and plastic bag back over so you can see your design.Push with your finger to spread the color around. You can spread the color out from the center, or try to blend two colors together.

- Optional: If you'd like the color to spread a bit more, lift the bag and spray a bit of water directly on the paper.
- Then put the bag back down and push the color out with your finger.
- Remove the plastic bag and use a paper towel to blot any excess water.Allow to dry.

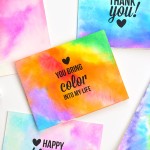
- Your "watercolor" print is complete!

Video
Notes
Looking for more art projects? Here's a few of our favourites:
Seashell Painting
Tape Resist Art
Bubble Painting