
DIY Ribbon Flowers Craft
This ribbon flower craft is SO CUTE and easy to make!! These simple flowers are such a fun kids craft for Mother's Day or any time.
Yield: 1 ribbon flowers craft
Cost: $2
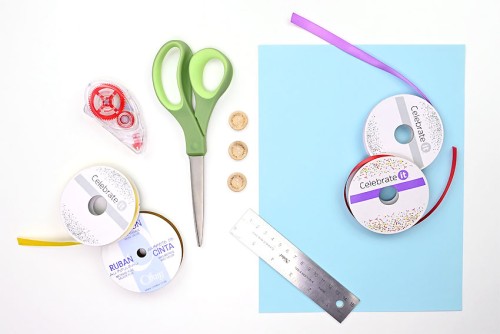
Materials
- Colourful satin ribbon (3/8 inch; 3 colours)
- Blue cardstock (or white, or colour of choice)
- Green satin ribbon (1/4 inch)
- Wooden buttons (3/4 inch)
Instructions
Step 1: Find what you need
- Gather your supplies and materials.
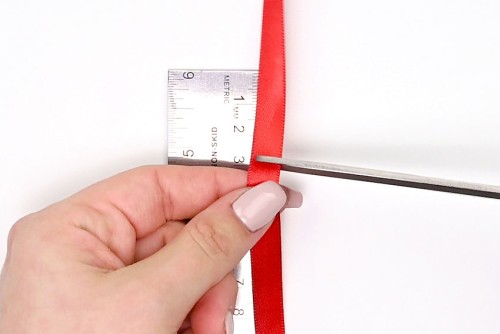
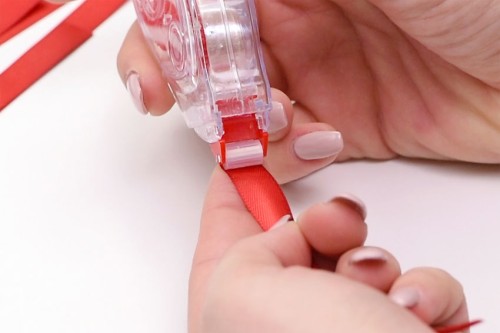
Step 2: Make the pieces of the ribbon flower
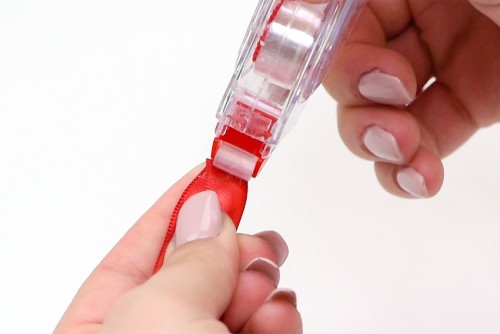
- Cut five pieces of ribbon to be 5 inches long.
- Add glue tape to the front of one end of a piece of ribbon.
- Take the back of the other end of the ribbon, fold it over and press it onto the glue tape, creating a twisted loop.
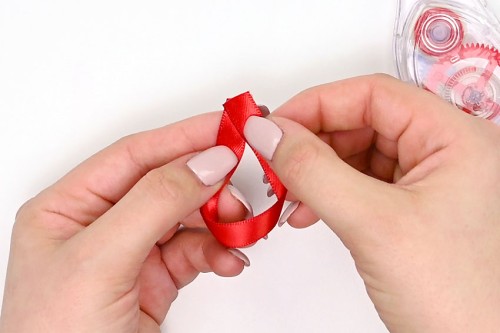
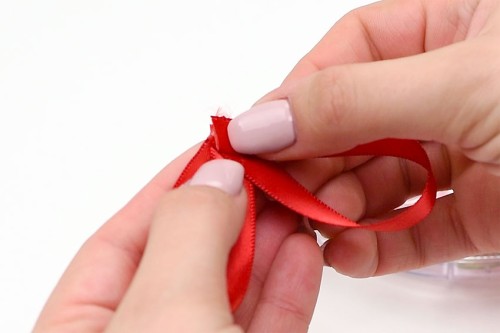
- Repeat with the next four pieces of ribbon so you have 5 twisted loops.
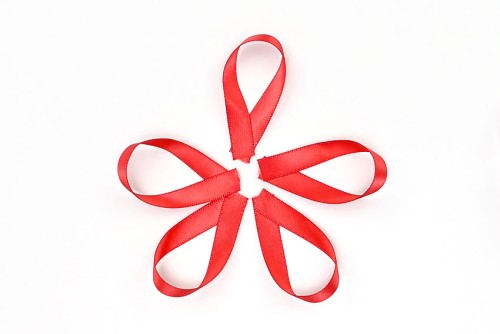
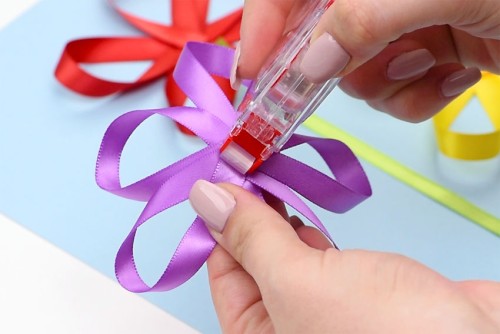
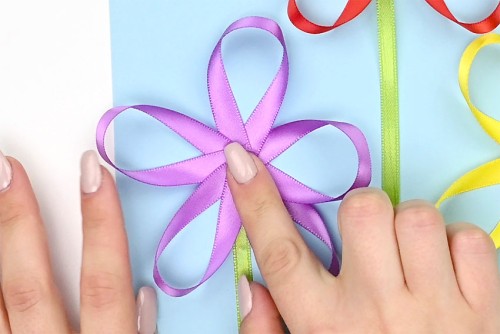
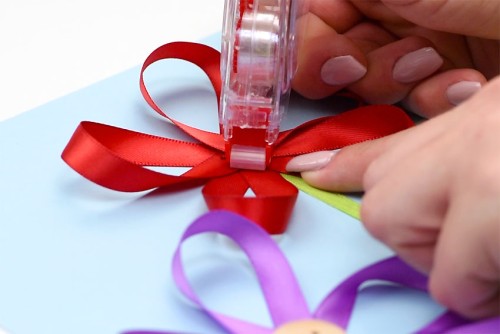
Step 3: Connect the ribbon loops into a flower
- Add more glue tape to the connecting end of one of the ribbon loops.
- Connect a second ribbon loop to the other, making sure the loops stick out at different angles.
- Repeat until all five loops are connected in a flower shape.
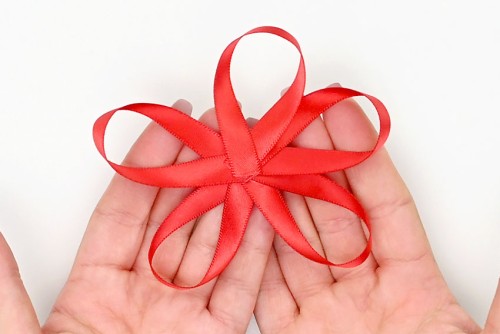
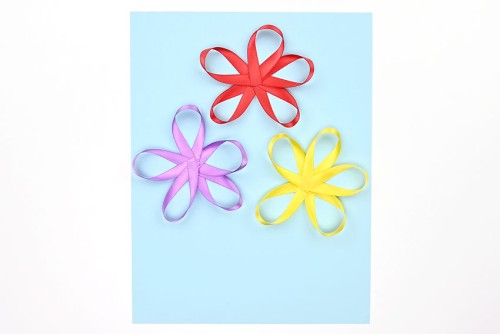
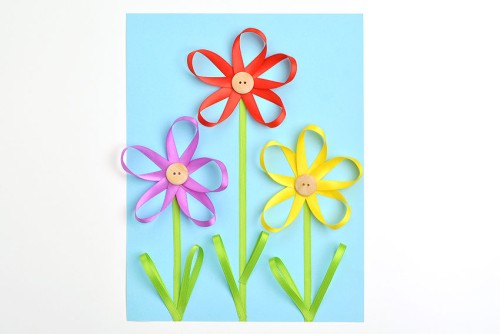
- Make 2 more ribbon flowers in different colours. Place them on a piece of cardstock and arrange them how you'd like.
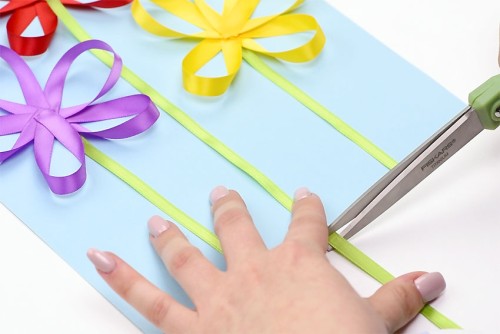
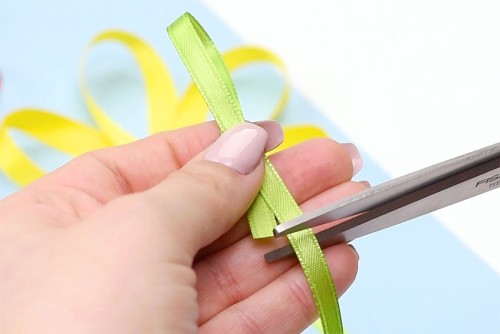
Step 4: Cut stems for the flowers and attach them
- Cut a piece of green ribbon long enough to come from the center of the flower to the bottom of the cardstock.Repeat for the next two flower stems. The lengths of ribbon will vary, depending on where you've placed the flowers.
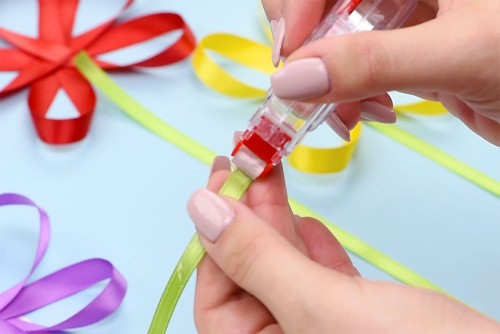
- Add glue tape to one side of the green ribbon
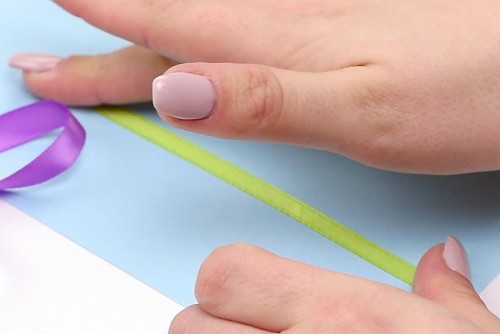
- Press the green ribbon stems onto the paper.
Step 5: Attach the flowers and leaves to the cardstock
- Add glue tape to the center back of the flower.
- Press it firmly onto the cardstock so that green ribbon is lined up with the center of the flower.Repeat, adding the next two flowers to the top of their stems.
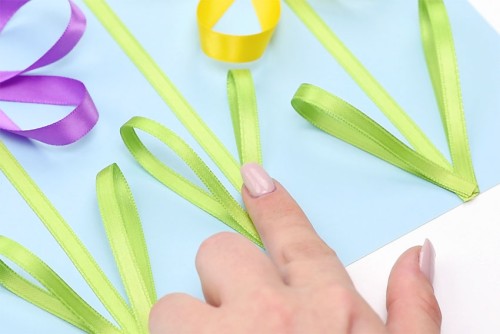
- Cut green ribbon for the leaves, about 4 inches long (or twice as long as you'd like your leaves to be).
- Add glue tape to the end. Take the other end, fold it over and press it onto the glue tape - This time we don't want to twist the loop. Add more glue tape and press the leaf onto the bottom of the stem. Repeat so there are two leaves on each stem.
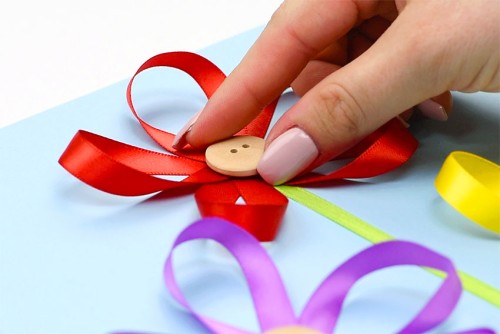
- Add glue tape to the center of each flower.
- Attach wooden buttons to the middle of the flowers.Line up the button holes so they're all facing the same direction for the neatest look.
- Your ribbon flower craft is complete!
Video
Notes
Looking for more flower crafts? Here's a few of our favourites:
How to Make Paper Hyacinths
Pressed Flower Lanterns
Beaded Pipe Cleaner Flowers