How to Make Paper Mache Pumpkins
Paper mache pumpkins are such a fun twist on a classic craft! These DIY paper mache pumpkins are SO EASY and make the perfect fall decoration.
Yield: 1 paper mache pumpkin
Cost: $1
Equipment
- Mason jar (or glass; to hold pumpkin as it dries)
Materials
- Plastic grocery bag
- Fiber fill stuffing
- Yarn
- Masking tape
- 1 cup Flour
- 1-1/2 cups Water
- Newspaper
- Latex primer
- Orange acrylic paint
Instructions
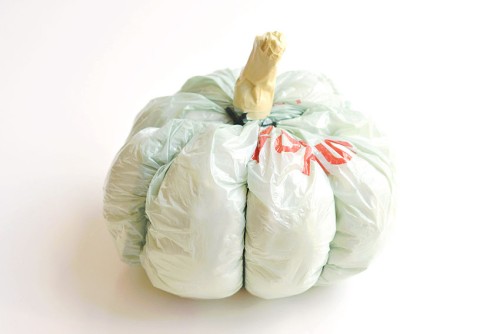
Step 1: Form pumpkin base
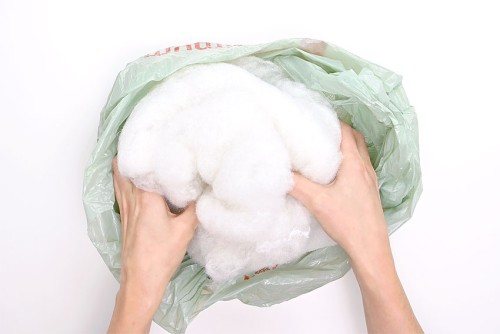
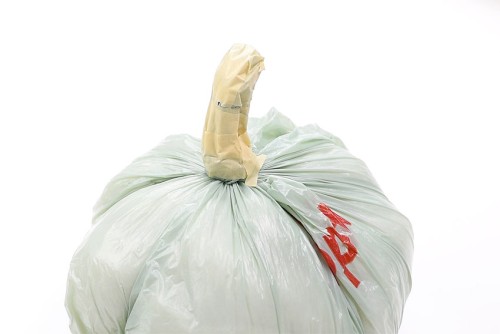
- Stuff the plastic bag with fiber fill stuffing. We used the stuffing from an old pillow.
- Tie a knot in the grocery bag, close to the fiber fill, making sure all the air is pushed out.
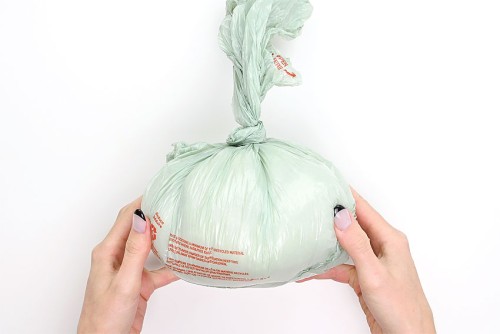
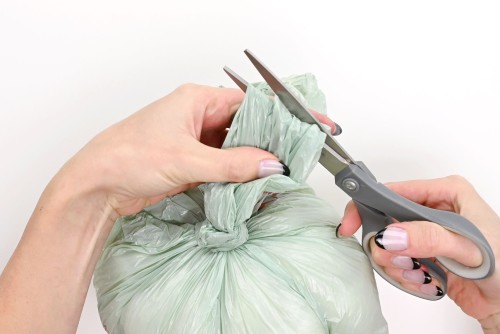
- Cut the handles off the bag so you're left with a few inches of plastic above the knot.
- Fold the remaining handle around itself and use masking tape to make a stem for the pumpkin.
- Cut a piece of yarn long enough to fit around the pumpkin (about 20 inches).
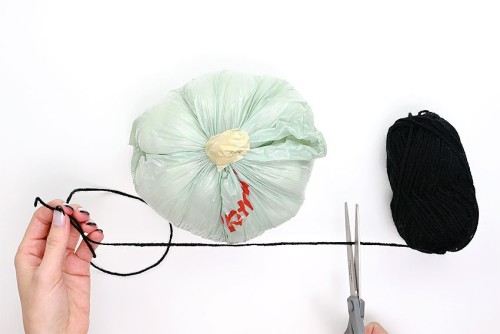
- Tie the yarn around the pumpkin and pull tight, creating ridges for the pumpkin.
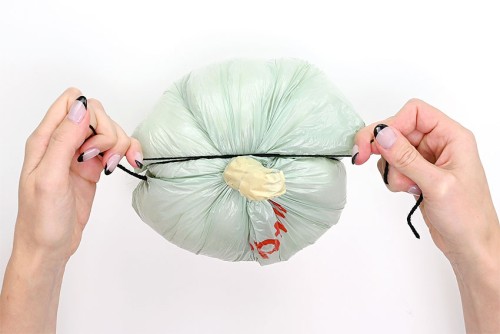
- Tie a knot in the tightened yarn and cut off the loose strings close to the knot.
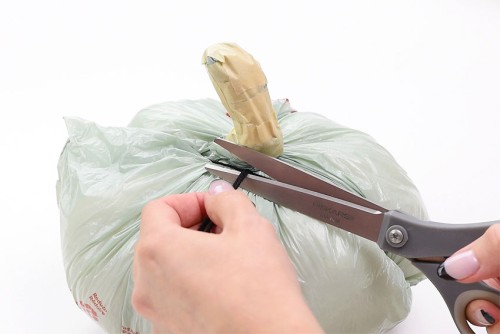
- Tie three more strands of yarn around the pumpkin at different angles, creating the ribs of the pumpkin. You should see a pie shape on the bottom of the pumpkin.
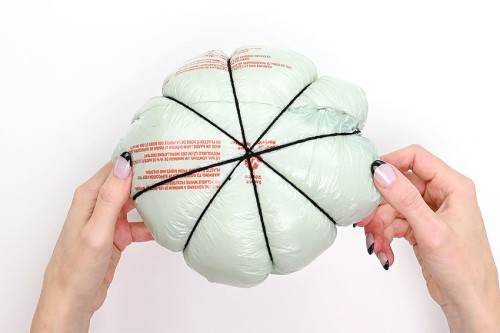
- Your pumpkin is now ready to have paper mache added to it.
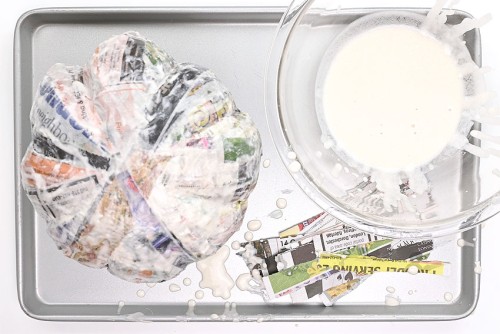
Step 2: Paper mache the pumpkin
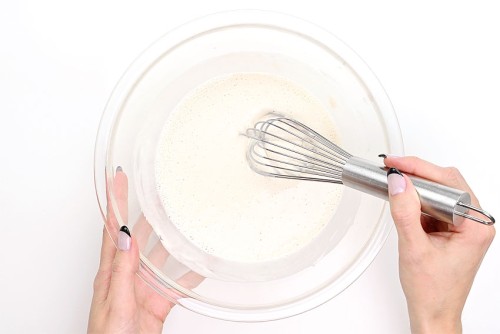
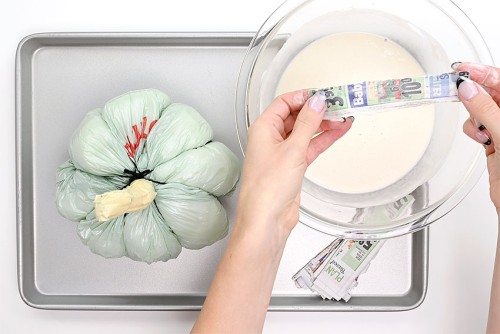
- Add 1-1/2 cups of water to 1 cup of flour.
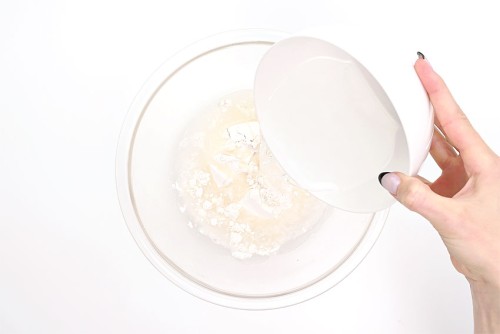
- Whisk the mixture together until there are no clumps remaining.
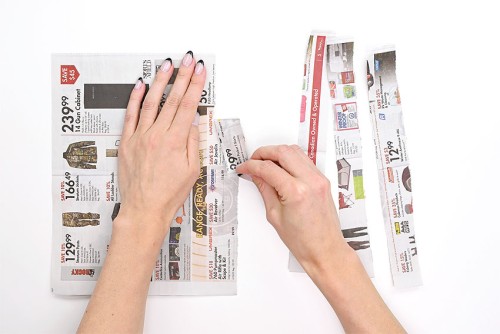
- Rip up the strips of newspaper into various sizes. Our strips ranged from 1/2 to 2 inches wide and they were 4 to 6 inches long.
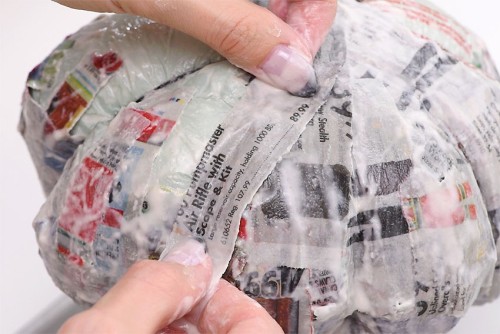
- Place a strip of newspaper into the paper mache mixture, dipping it completely. Use your fingers to wipe off the excess paste.
- Place the strip vertically on the pumpkin, smoothing it down with your fingertips.
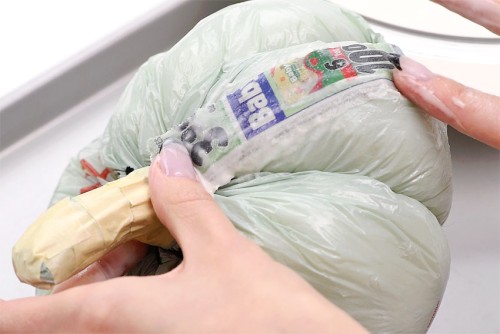
- Add more strips of paper with paper mache paste on them, putting some horizontally, and overlapping the strips as you work your way around the pumpkin.Placing the strips at different angles makes the paper mache stronger.
- Continue adding strips of newspaper until the top of the pumpkin is covered.
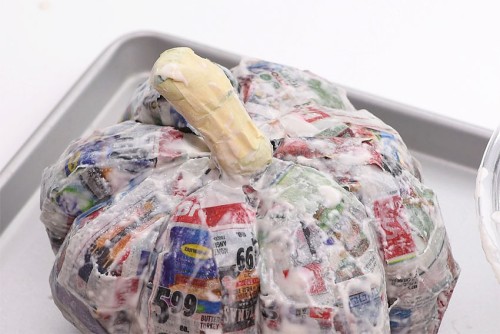
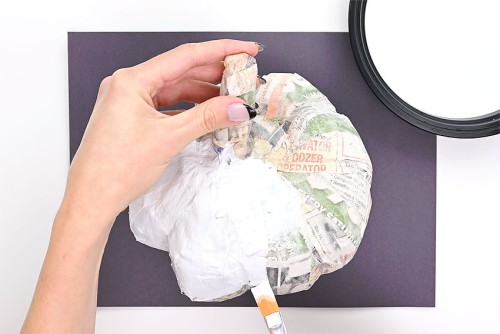
- Then add paper mache strips to the stem of the pumpkin, making sure to cover the top of the stem.
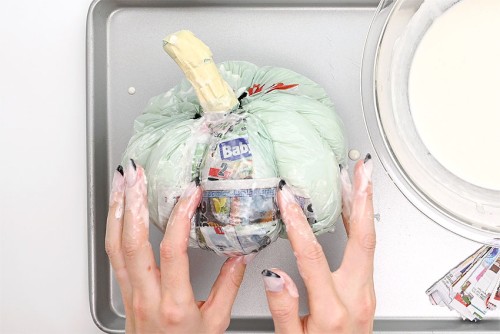
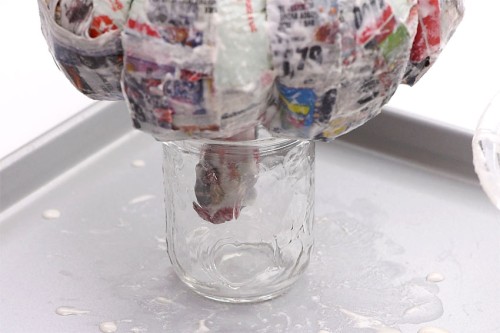
- Flip the pumpkin upside down and place the stem of the pumpkin in a mason jar or glass.
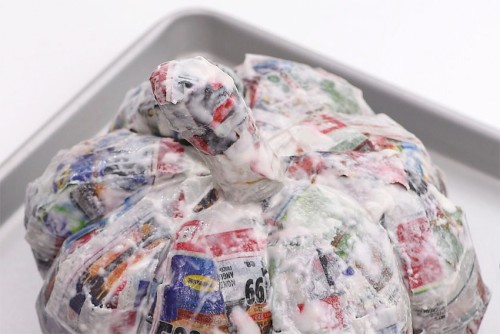
- Begin adding strips of paper mache to the bottom of the pumpkin.
- Allow the paper mache pumpkin to dry on the mason jar for 24 hours. Then add a second layer of paper mache following the steps above. Allow the second layer of paper mache to dry for 24 hours before painting it.
Step 3: Paint paper mache pumpkin
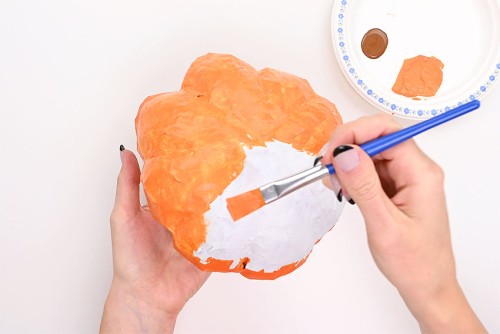
- Once your second layer of paper mache is dry you can add a white coat of paint or primer to cover the entire pumpkin. This is optional but we find that it takes fewer coats of orange paint to cover the newsprint if you paint it white first.
- Paint the top of the pumpkin orange and the stem brown. Allow to dry for at least 30 minutes.
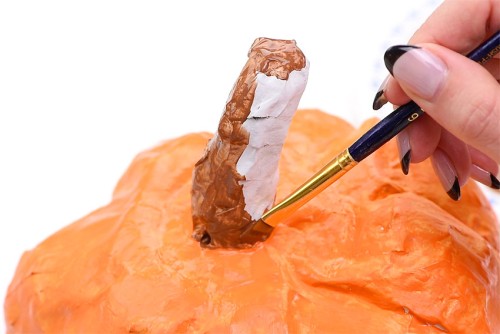
- When the top is dry enough to handle, paint the bottom of the pumpkin orange.Paint a second coat of orange and brown paint on the pumpkin and stem if needed.
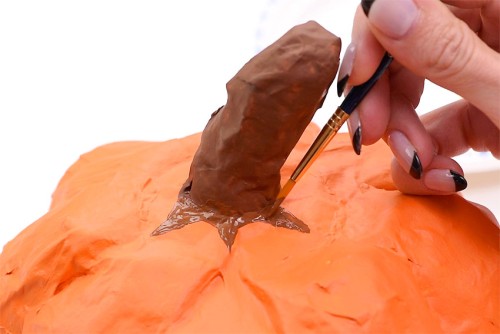
- Paint lines down from the base of the stem into the grooves of the pumpkins to give the stem more shape. Start thicker near the stem and taper down into a point, almost like a triangle.
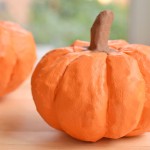
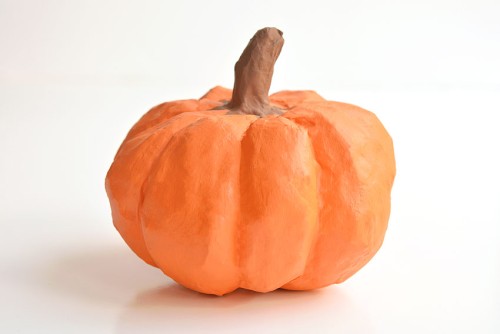
- Your paper mache pumpkin is complete!
Video
Notes
You can smooth out any rough edges on your paper mache pumpkin by sanding it with sandpaper before painting it.