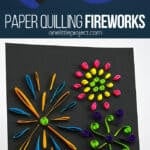
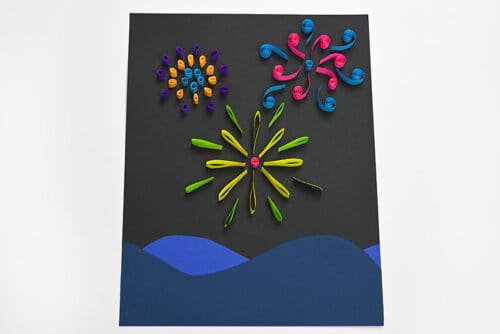
These paper quilling fireworks are the perfect way to enjoy the sparkle of fireworks without any loud bangs or booms! They’re SO PRETTY and surprisingly relaxing to make once you get rolling (literally, haha). Use colourful paper strips and a few simple quilling shapes to create bright bursts that look like they’re exploding right across a night sky.
This is a fun New Year’s craft, but it also works beautifully for summer fireworks celebrations like the 4th of July or Canada Day. If you’re looking for a festive paper craft that feels creative, looks impressive, and is totally frame-worthy, follow our step-by-step tutorial and make your own quilled fireworks today!

This post contains affiliate links. If you use these links to buy something, we may earn a small commission at no extra cost to you. This helps support our website and allows us to keep creating fun, free content.
How to Make Paper Quilled Fireworks
Instructions:
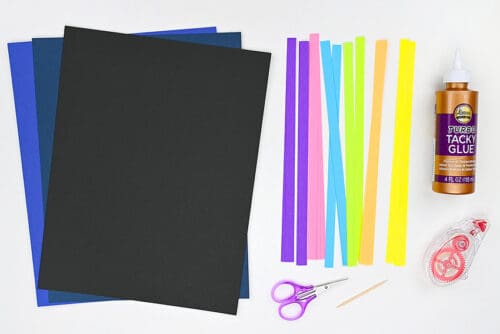
Step 1: Find what you need
- Gather your supplies and materials.

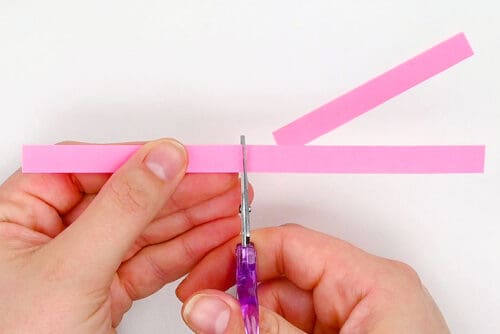
Step 2: Make the first rolls
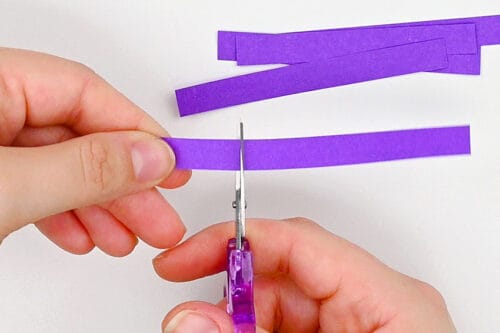
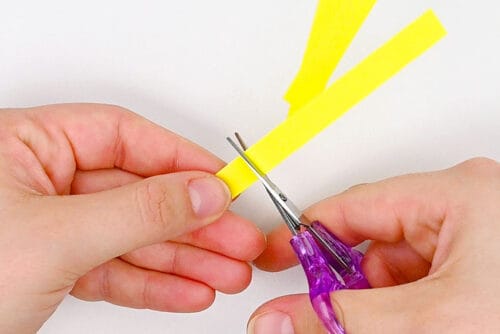
- Cut a piece of quilling paper into 3 equal sections (about 3 inches long).
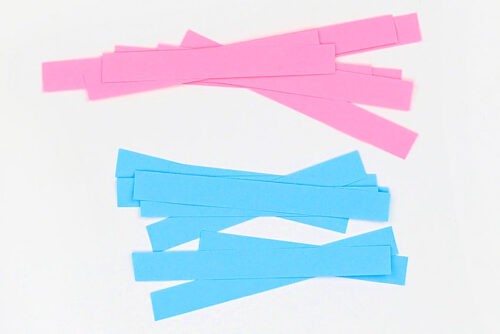
- Repeat so that you have at least 6 pieces of one colour (pink) and 7 of another (blue). You can cut a few extra and use them later, too.
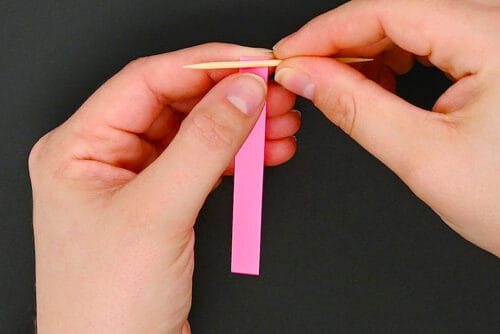
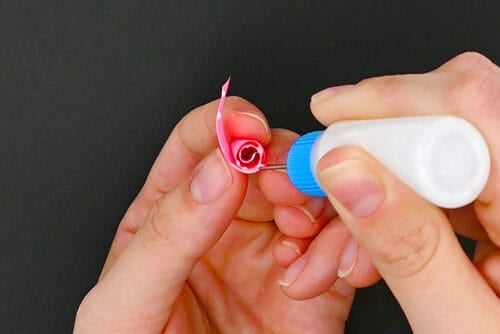
- Place a toothpick or needle on top of one of the papers. (You can also buy special quilling tools.)
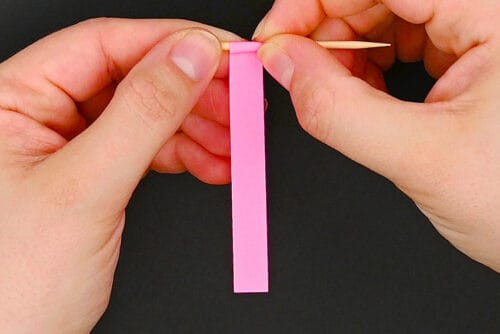
- Roll the paper around the toothpick until you have a tight/secure roll that will hold the tension on its own. Then remove the toothpick.
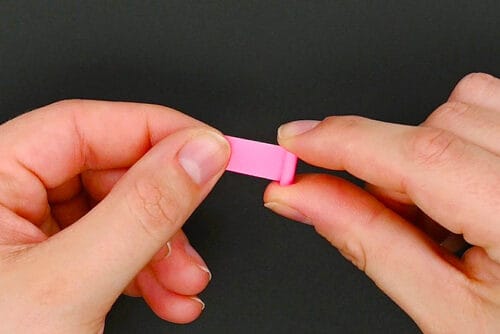
- Keep rolling the paper around itself until there’s just 1 to 2 cm left.
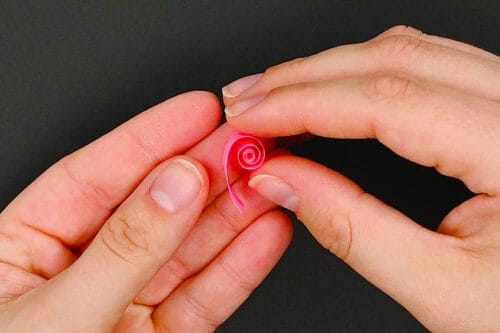
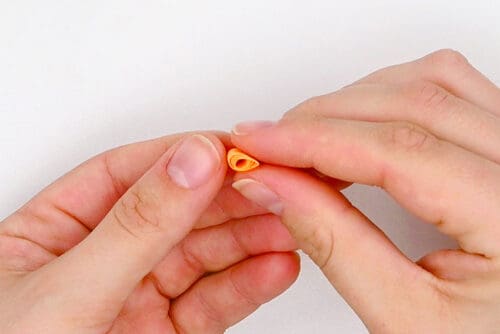
- Release some tension on the roll so it loosens a bit, and bend the end so it curves in.

- Repeat, so you have 6 of each colour.
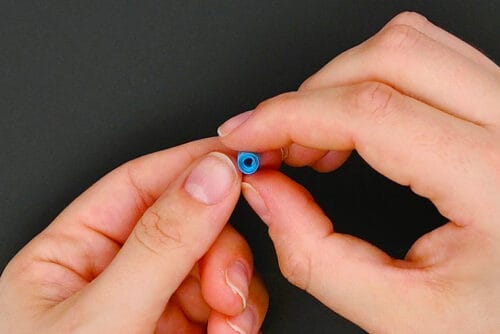
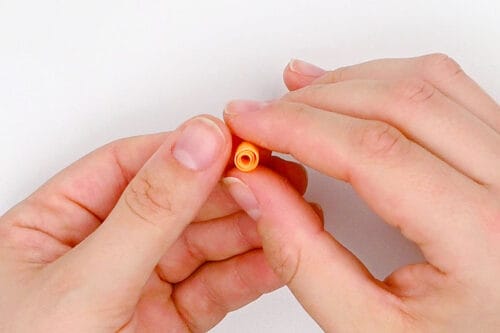
- Roll a 7th piece of the second colour (blue) all the way. Release the tension on the roll so it loosens into a larger circle.
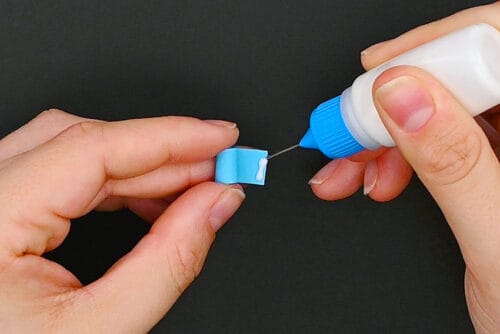
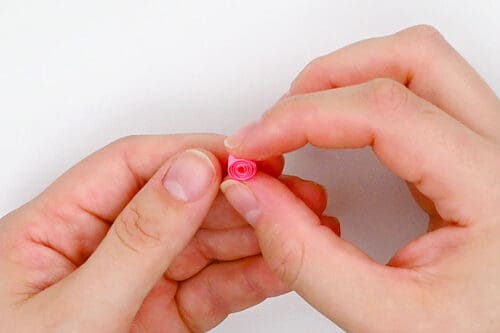
- Add a thin line of glue to the end of the roll.
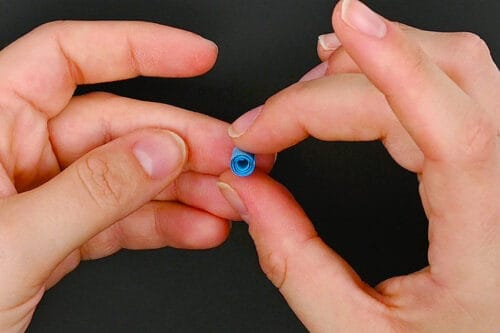
- Press it down to form a small circle.

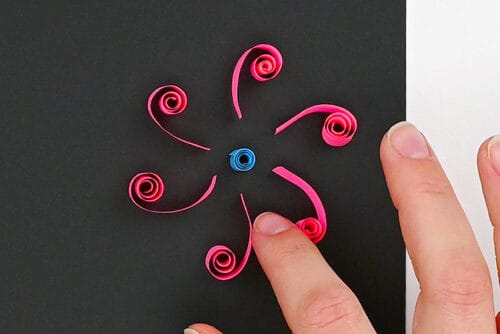
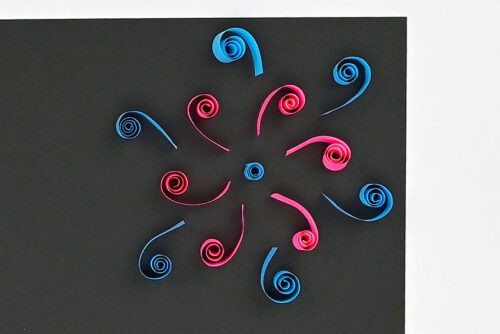
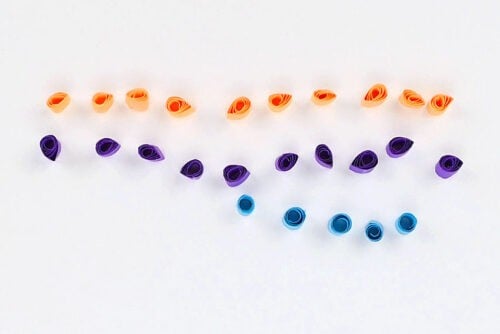
Step 3: Make firework style #1
- Set the blue circle on a black piece of paper. Arrange the pink spirals around the blue circle, setting them so they’re all facing the same direction.
- Then add the blue spirals around the pink, placing them “upside-down”, so the tails face in the opposite direction.
- Add a small amount of glue to the bottom of each piece and set them back into place on the paper.
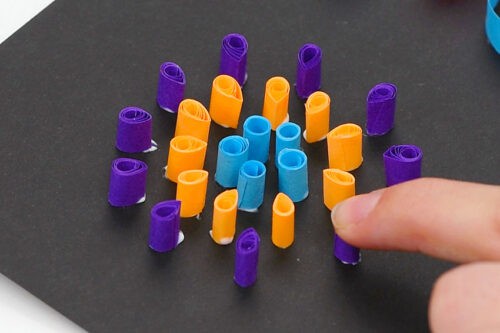
Step 4: Make firework style #2
- Cut 2 more colours of quilling paper into 3 equal sections. Repeat so you have about 10 pieces of each colour (purple and orange).
- Roll one of the orange pieces into a circle, relax the tension to make a looser circle, and then glue the end in place. (Just like you did with the blue circle).
- Pinch one side of the circle to create a teardrop shape.
- Repeat so you have 10 teardrop shapes in each colour (orange and purple).Then cut 5 pieces of a third colour and make circles with these (the same process as the teardrops, just don’t pinch the sides of these.)
- Arrange the pieces on the paper with the 5 circles forming a circle in the middle. Choose one colour to go around the circles, setting them with the point of the drop facing inwards.Then add the other colour drops around these, spacing them out so they’re between the first drops. Glue them in place.
Step 5: Make firework style #3
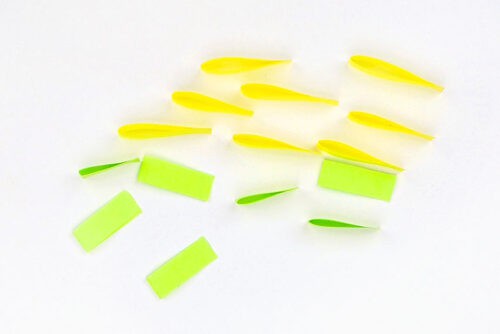
- For this firework you’ll want to cut 8 pieces that are about 2 inches long (green) and 8 pieces that are about 2-1/2 inches long (yellow).
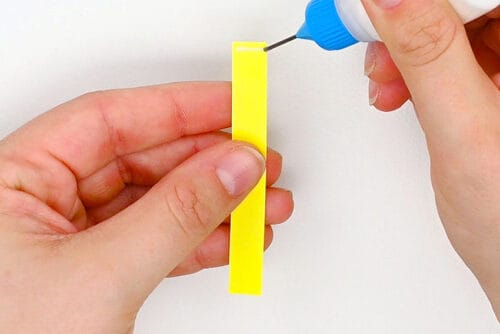
- Add a line of glue to the end of a yellow piece.
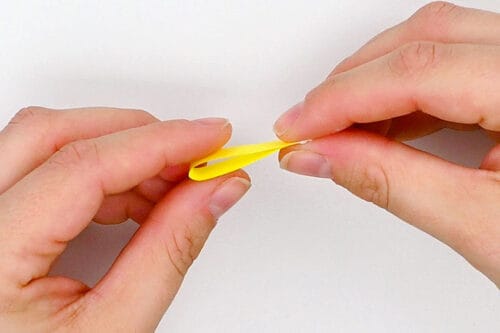
- Fold the piece in half, creasing the fold only slightly, so there’s still a loop at the end.
- Repeat with the rest of the yellow and green pieces.
- Then cut one last 3 inch piece in a third colour (pink) and make the same circle as you’ve done for the other fireworks.
- Arrange this firework on the paper with the circle in the middle. Set the longer loops (yellow) evenly around the circle, with the rounded parts facing out. Then place the shorter loops (green) farther out, tucking them in-between the yellow ones.If you want to add mountains or other details to the paper, leave a space at the bottom. Glue the firework into place.

Step 6: Add mountains (optional)
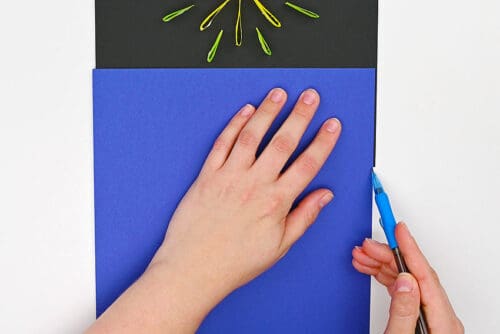
- Set a bright blue piece of paper so it overlaps the black, filling up the bottom section. Use a pencil to mark where the papers overlap.
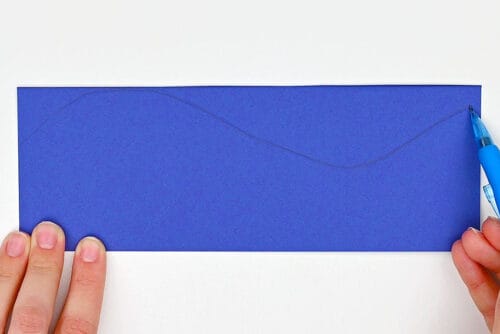
- Fold the paper up at this mark and cut it off. Draw a wavy mountain onto the paper, with one side higher than the other. Cut it out, leaving the sides and bottom straight.
- Place the mountains on a navy piece of paper and trace them. Cut out these mountains, so you have 2 of the same shape in different colours.
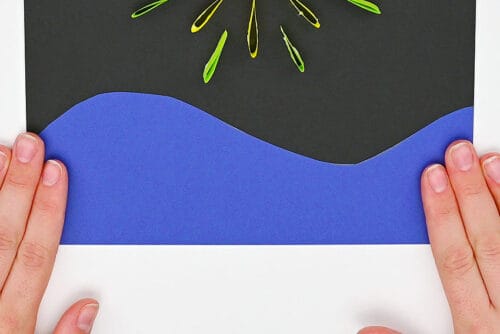
- Use glue tape to attach the bright blue mountains to the bottom of the page.
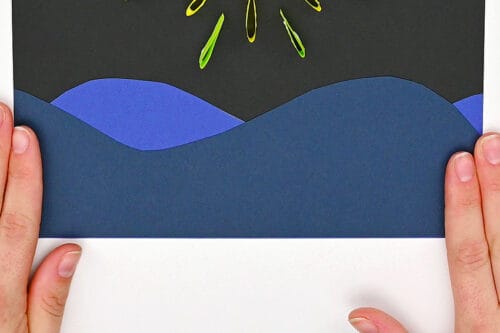
- Then add glue tape to the other side of the navy mountains. Attach them on top, so you have 2 sets of overlapping hills below the fireworks.
- Your paper quilling fireworks are complete!

Helpful Tips:
- Use a fine-tip glue bottle (or a toothpick): It makes it much easier to add tiny dots of glue.
- This craft works for lots of holidays! It’s perfect for New Year’s Eve, the 4th of July, Canada Day, Guy Fawkes Day, or any celebration that usually includes fireworks.
- Mix up your colour scheme: Try fireworks in different shades of the same colour for a “glow” effect, or make bright rainbow bursts across the sky!

Do I need special tools to make paper quilled fireworks?
Nope! A quilling tool can be helpful (especially for beginners), but it’s not required.
You can roll paper strips around an embroidery needle or toothpick to form coils and shapes.
If you end up loving quilling, a small quilling tool set is a great next step because it gives you more control over coil sizes and makes shaping faster.

What paper is needed for making paper quilling fireworks?
This project uses two kinds of paper. The background sky and mountains are made from cardstock, and the fireworks are made from pre-cut quilling strips.
We highly recommend buying quilling strips, since cutting perfectly even, thin paper strips can be tricky and time-consuming. A variety pack of quilling paper (found online or at most craft stores) is a great option for this project and future quilling crafts.

What glue is best for paper quilling crafts?
Tacky glue (especially turbo tacky glue) or another quick-dry craft glue works best for paper quilling. It holds the paper well and dries clear.
For neat results, use a fine-tip glue bottle or apply glue with a toothpick so you don’t accidentally use too much.

And that’s it — your paper quilling fireworks are ready to shine! This is one of those crafts that feels almost meditative: roll, pinch, place… and suddenly you’ve built a whole burst of “wow” out of a few tiny paper strips! Plus, once you get the hang of it, it’s hard not to keep making “just one more” firework.
It’s also a really fun way to play with colour and design without needing tons of supplies or artistic perfection. Every burst looks a little different, and they all look great together. Add a few, fill the whole sky, or even make them match your party colours. Then display, or even frame, the finished piece as festive decor!
Here’s even more fireworks craft ideas:


Now available
Low-Mess Crafts for Kids Book
72 cute and fun crafts that kids and parents alike can enjoy. All with as little mess as possible!
Where to buy:
You can purchase Low-Mess Crafts for Kids from Amazon, or wherever books are sold:
Amazon | Barnes and Noble | Books-A-Million | Indiebound | Amazon Canada


Leave a Reply