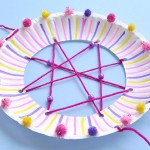
DIY Dreamcatcher
These dreamcatchers are so pretty and so easy to make! Keep bad dreams away with this simple kids version of a traditional dreamcatcher.
Yield: 1 dreamcatcher
Cost: $2
Equipment
- Glue or Tape
Materials
- Paper plate
- markers (or pencil crayons or crayons)
- stickers, pom poms, buttons, etc (for decorating plate)
- Yarn
- Pony beads (or other beads that will fit over yarn)
- feathers
Instructions
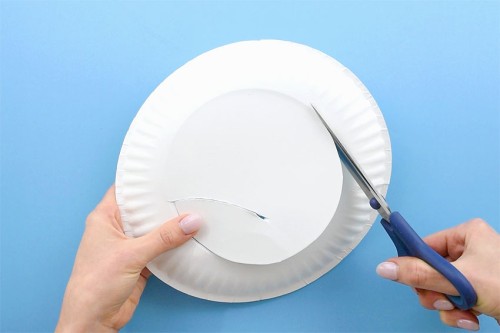
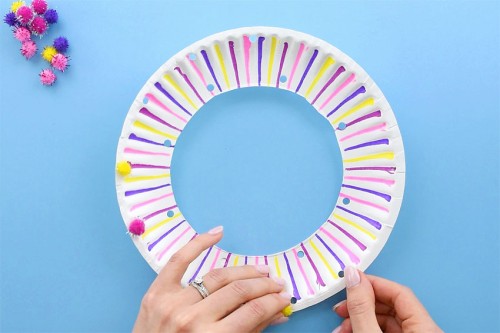
Step 1: Prepare & decorate paper plate
- Carefully cut out the center, or inner circle, of the paper plate.
- Using a one hole punch, punch eight evenly spaced holes around the inside edge of the paper plate.
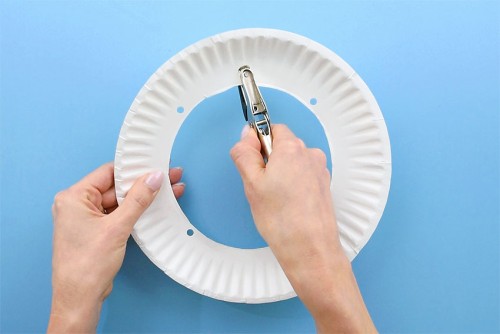
- Punch two holes in the top of the outer edge of the paper plate, roughly 2 inches apart - This will be where the dreamcatcher is hung. Punch three holes 2 inches apart on the bottom of the outer edge of the paper plate - These will be where the feathers hang. (Note, the photo is upside down.)

- Decorate the paper plate however you'd like! Draw patterns or shapes, or paint your paper plate. We used markers to make a line design on our plate.
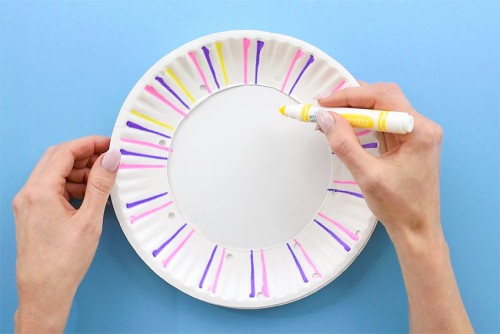
- Use glue or crafters tape to attach decorations to the paper plate. You can attach pom poms, buttons, gemstones, sequins or anything else in your craft bin!
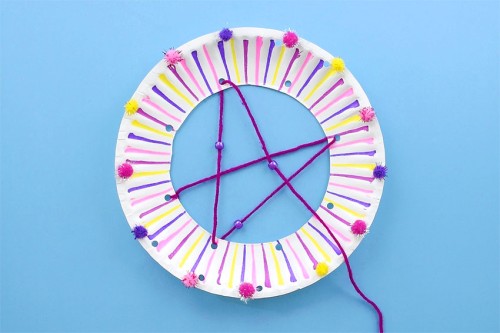
Step 2: Attach yarn
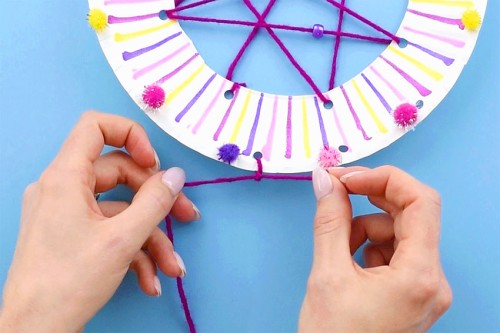
- Cut a 55 inch length of yarn. Tie one end to any of the inner holes, knotting it in place.

- Thread this yarn through the eight inner holes in whatever pattern you would like, crossing them over each other to create a web pattern. String beads on the yarn as you do so.
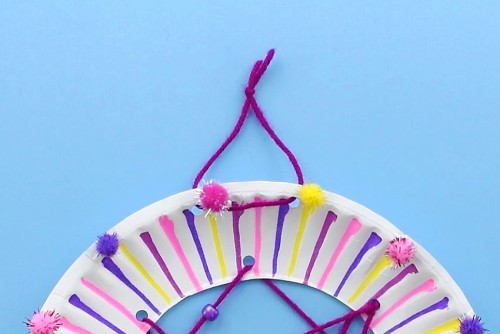
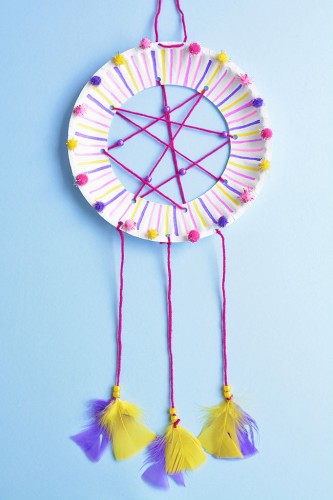
- Cut a 6 inch piece of yarn. Feed this through the top two outer holes and tie a knot in it. This will be the hanger.
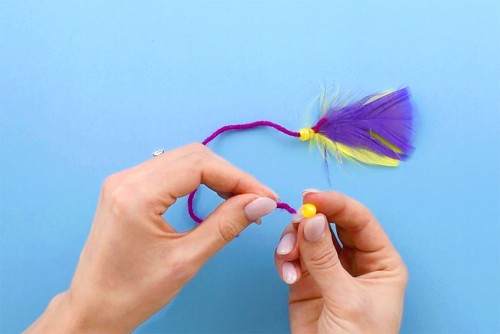
- Cut 3 pieces of yarn, each of them 12 inches long. Tie feathers to one end of each strand. If the feathers slide out, add a dab of glue to keep them in place.
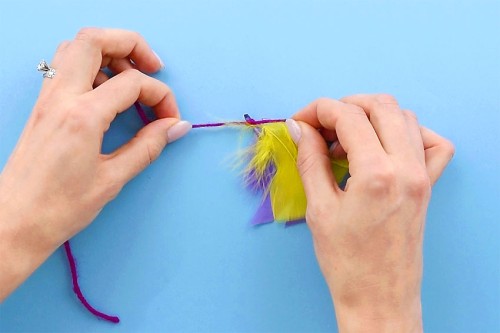
- Slide beads over each yarn strand, letting them fall on top of the feathers.
- Tie the other end of these three strands to the bottom three holes on the plate.
Step 3: Hang the dreamcatcher
- Your dreamcatcher is complete!
Video
Notes
Inexpensive, thin paper plates work great for this craft!
When punching the holes on the inner circle, you can easily keep the holes evenly spaced by starting with the top, bottom, left, and right. Then you can fill in the remaining four holes.