How to Make a Paracord Bracelet
These DIY paracord bracelets are so fun and easy to make! Both kids and adults will love these fashionable and functional bracelets. PARENTAL SUPERVISION: HELP FROM AN ADULT IS REQUIRED WHEN USING THE BBQ LIGHTER.
Yield: 1 paracord bracelet
Cost: $1
Equipment
- Masking tape
Materials
- 8 feet Paracord (4 ft each colour)
- 1 Bracelet buckle
Instructions
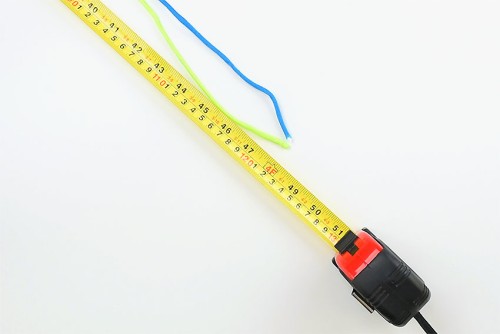
Step 1: Measure cord length & join colours together
- Choose 2 cord colours. Measure out and cut 4 feet of each colour of cord.
- Carefully hold the flame of a BBQ lighter over one end of each of the 2 cord pieces until they start to melt. The flame on the lighter will be on the cord end for about 3 seconds each.
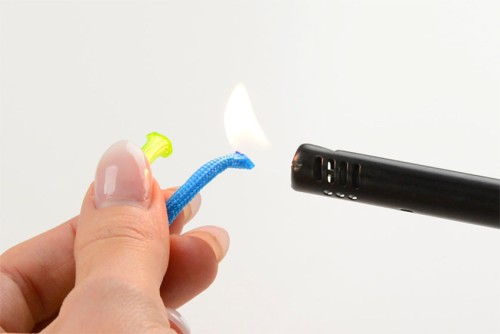
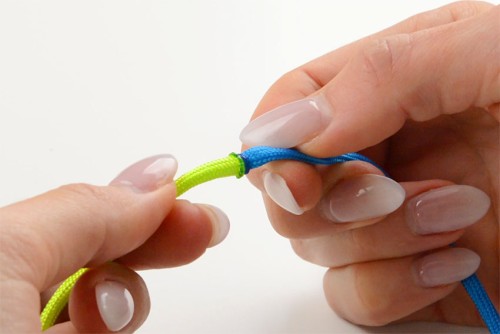
- Quickly and carefully stick the hot cord ends together until they cool off (keep your fingers at least an inch away from the melted ends). You should now have a 2 colour cord that's 8 feet long.
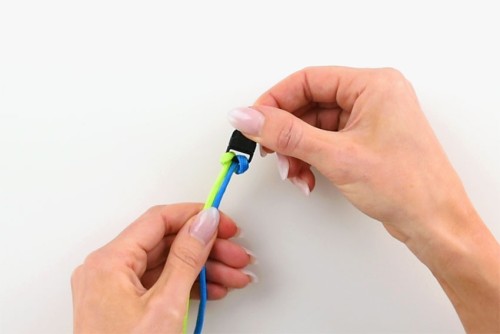
Step 2: Attach cord to buckle
- Clip together the 2 pieces of the bracelet buckle. Push the loose ends of the cord through one side of the buckle. Keeping the ends together, pull them through the buckle until you have about an inch of the centre loop remaining.
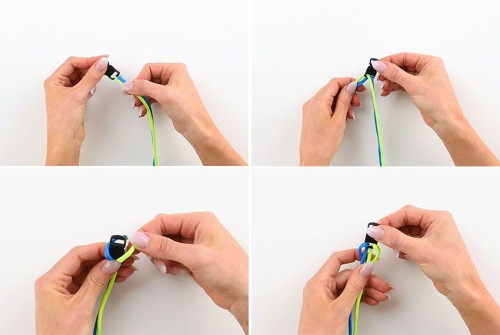
- Open the loop and pull it over top of the buckle to the other side. Pull down on the loose ends to secure the cord into a cow hitch knot.
- Push the loose ends of cord through the other side of the buckle. Pull them through the buckle until it's just large enough to fit over your wrist. Unbuckle the two sides of the bracelet buckle and set aside.
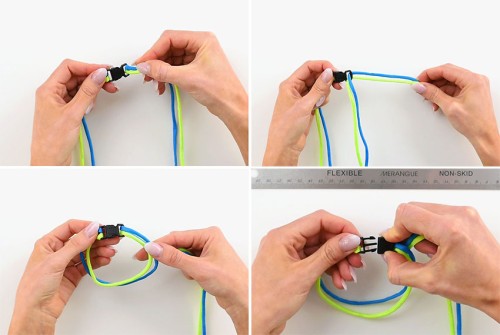
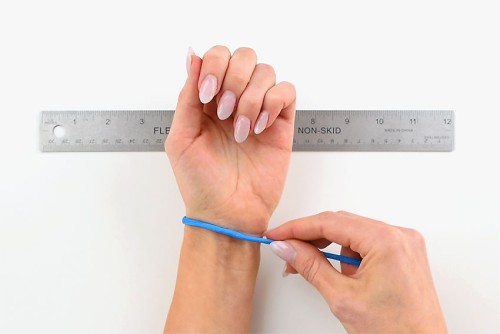
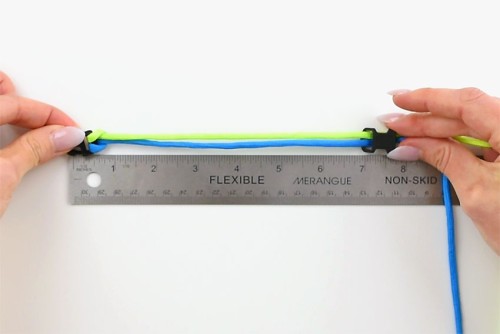
Step 3: Measure bracelet length
- Wrap a piece of paracord around your wrist. Measure this against a ruler to get your wrist measurement.
- Place the open bracelet against a ruler. Pull the loose side of the buckle until it measures your wrist measurement PLUS one inch (eg. for a 6 inch wrist you want a 7 inch bracelet length). Include the length of the buckle in your measurement, but not the length of the male prongs.
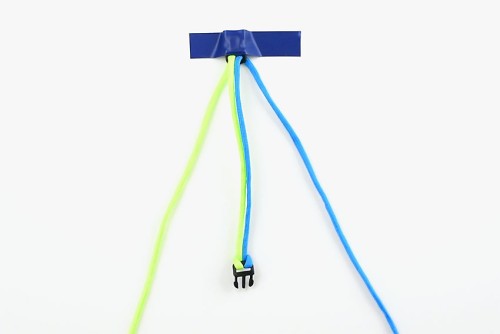
Step 4: Knotting Pattern
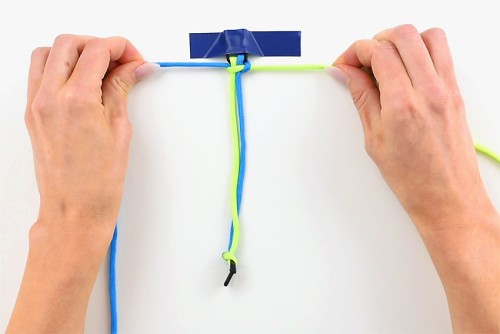
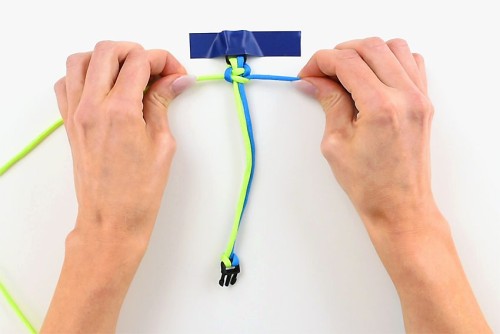
- To make knotting easier, secure the loose end of the buckle to your working surface with tape. The buckle with the cow hitch knot should be free at the bottom. Place 1 cord on the left and 1 cord on the right of the buckle.
- Take the left cord (green in this case) and bend it over top of the two centre strands. Lift the right (blue) strand over top so the green strand is under the blue strand.Take the end of the blue strand and push it through the loop made by the green strand. Pull the blue strand through, making sure you lift the buckle so it's over the blue strand, but under the green strand.

- Pull both cords to tighten the knot.
- Repeat these steps in a mirror image, starting from the right side this time.Take the right cord (green in this case) and bend it over top of the two centre strands. Lift the left (blue) strand over top so the green strand is under the blue strand.Take the end of the blue strand and push it through the loop made by the green strand. Pull the blue strand through, making sure you lift the buckle so it's over the blue strand, but under the green strand.
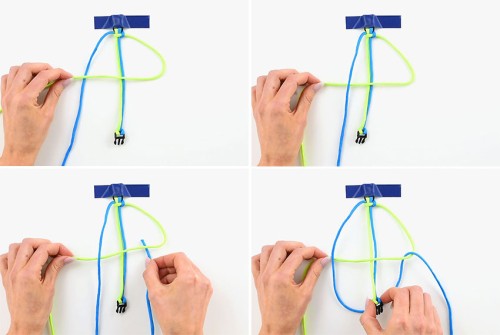
- Pull both cords to tighten the knot.
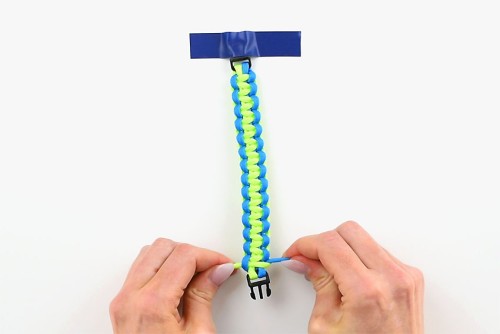
- Continue this knotting technique, alternating sides until the knots reach the bottom bracelet buckle.
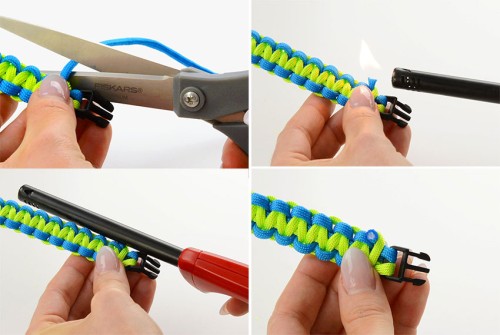
Step 5: Finish off bracelet
- Snip off any leftover, unknotted cord, close to the bracelet. Carefully melt the end of the cord with a BBQ lighter for about 3 seconds.Quickly and carefully push the rounded edge of the BBQ lighter against the melted end and the nearest knot until it cools. This will prevent your knots from coming undone.Repeat for the opposite side.
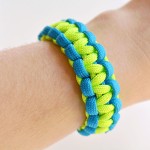
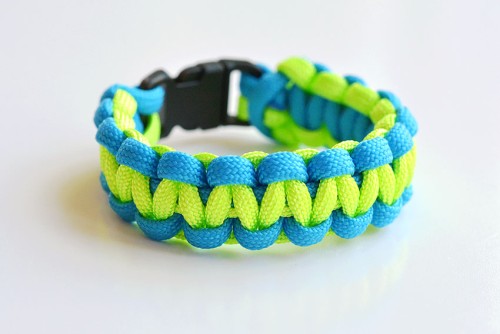
- Your paracord bracelet is complete!
Video
Notes
Sizing - 4 feet of each colour of paracord will fit wrists up to 7 inches around. For wrists that are larger than 7 inches use 5 feet of each colour (10 feet total).