
DIY Father's Day Pop-Up Card
Celebrate Dad with an easy DIY Father's Day pop-up card! These twist and pop cards are colourful, cheerful, and so much fun to make!
Yield: 1 twist and pop card
Cost: $1
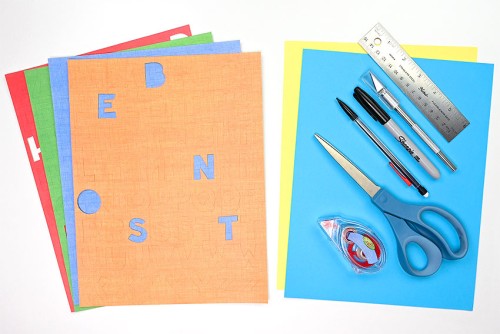
Equipment
Materials
- 2 pieces Cardstock (2 different colours)
- Glue tape
- Cardstock letters (or stickers)
- Black marker
Instructions
Step 1: Find what you need
- Gather your supplies and materials.
Step 2: Fold the card and make the pop-up mechanism
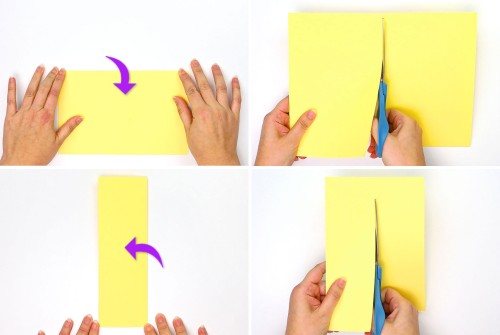
- Choose one colour of cardstock (blue, for us). This will be the main part of your card.Fold the piece of cardstock in half and cut along the fold line. Set one half aside for later and fold the other half in half again. This will be your card!
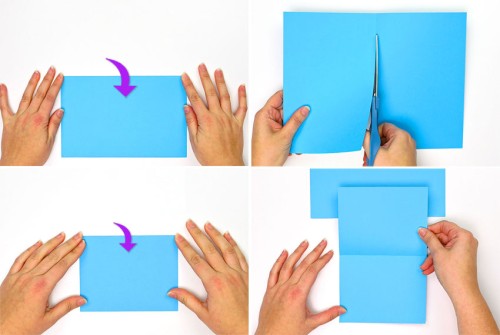
- Take the other half of blue cardstock and fold it in half lengthwise. Open it up and cut along the fold line.Discard one half and fold the other piece in half lengthwise. Open the last fold and fold it in half crosswise.
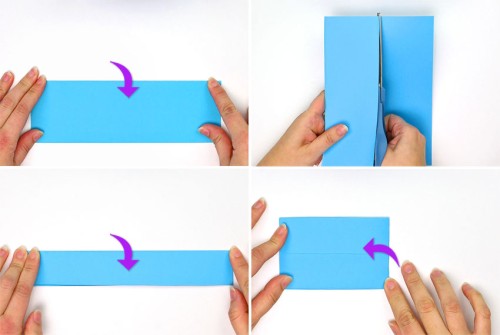
- Open this piece again and fold the top right edge down so that the vertical center line matches up with the left horizontal fold line.
- Open the paper back up again and do the opposite fold. Fold the top left edge down so that the vertical line meets up with the right side of the horizontal fold line.Unfold it again.
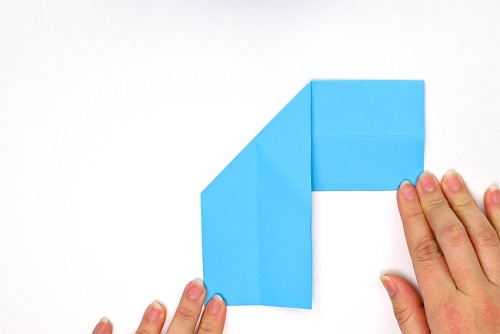
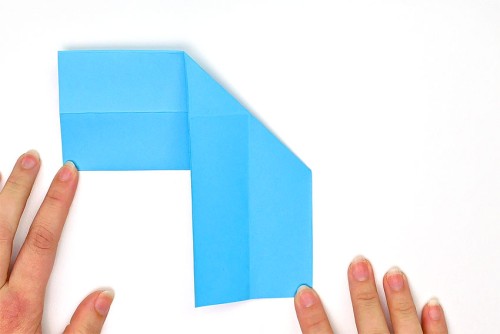
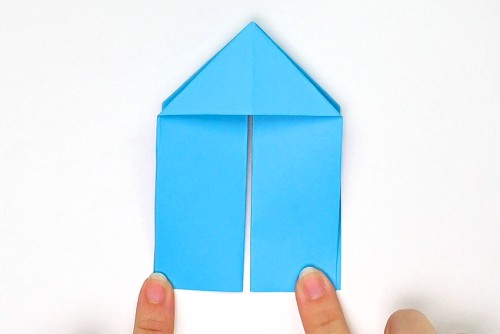
- Turn the cardstock and start pushing the center of the triangles up and in.
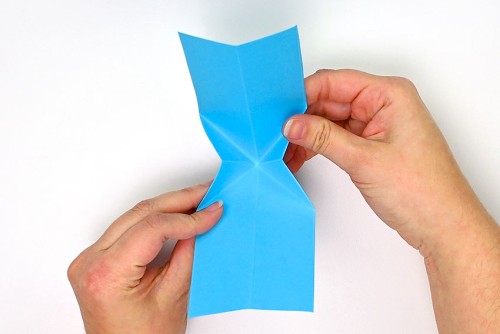
- Push the sides of the triangle in until the paper resembles an upside down house.
- Now fold the edges in and flatten them down, folding the paper in the other direction.
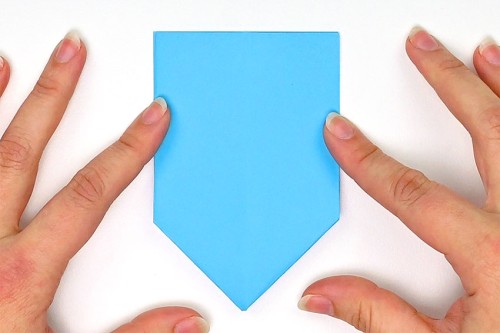
- Once the paper is folded in this way you should still see a house shape, this time with a split line down the center.
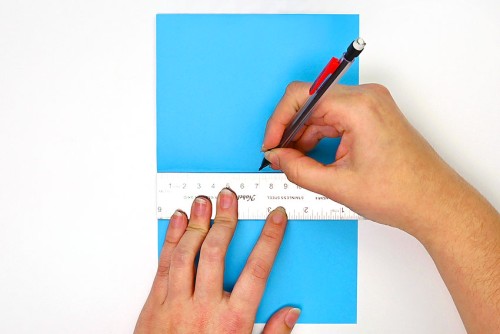
- Grab your card and open it up. Make a small mark with pencil at the half-way point across the center (2-3/4 inches).
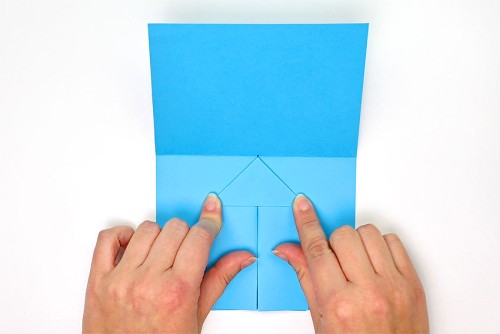
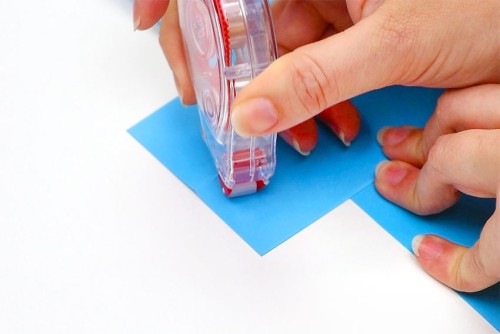
- Add glue tape to one side of the folded triangle - only on the triangle part, not on the rectangles.

- Attach this paper to the inside of the card, with the tip of the triangle touching the pencil mark.
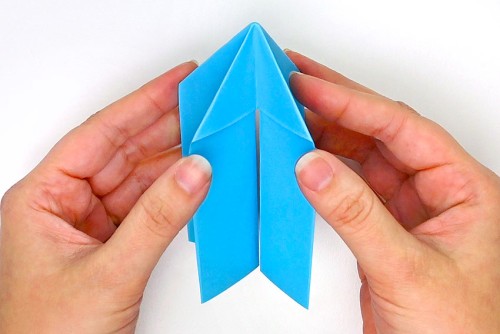
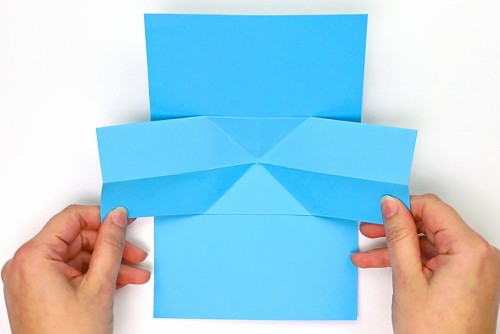
- Put more glue tape on the other side of the triangle and close the card to connect the triangle with the top of the card. This creates the base of the twist and pop mechanism!
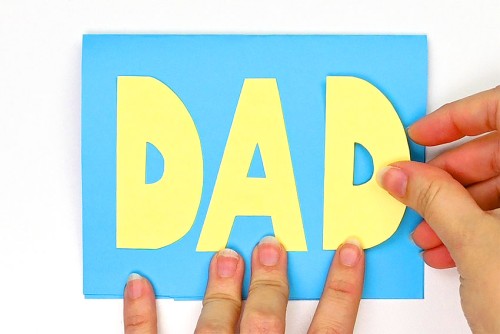
Step 3: Make the "DAD" letters for the front of the card
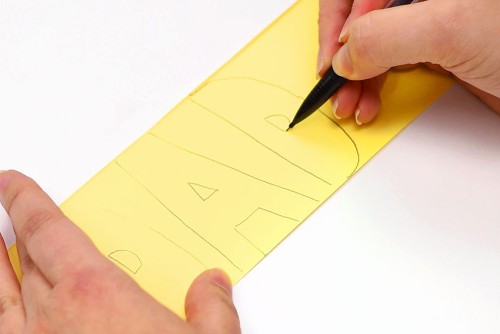
- Choose a second colour of cardstock that contrasts well with your card. This colour will become the "DAD" letters on the front of the card, and the pop-up part on the inside. (We chose yellow.)Fold the paper in half and cut along the fold line. Discard one half. Take the other half, fold it in half lengthwise, and cut along that fold line. You will use both these pieces.
- Take one strip of paper and use a pencil to lightly write the the word "DAD" in bubble letters. The letters should stretch from top to bottom and be between 1-1/4 and 1-1/2 inches wide -- they need to fit on the front of the card.
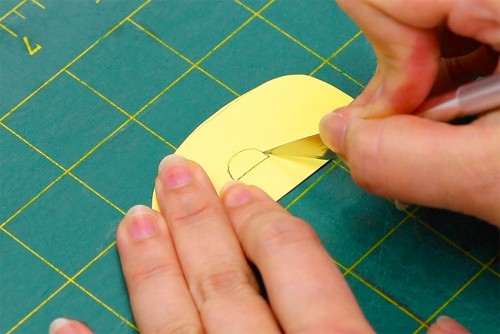
- Cut out the letters and then use a craft knife to cut out the center of the letters. Erase any pencil marks that show.
Step 4: Make the top of the pop-up mechanism
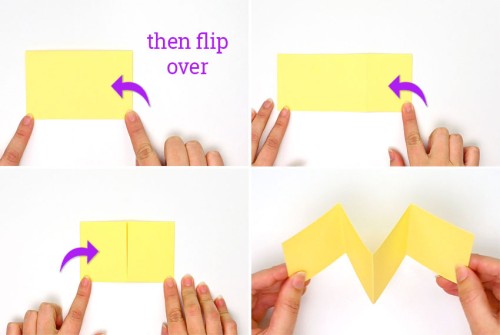
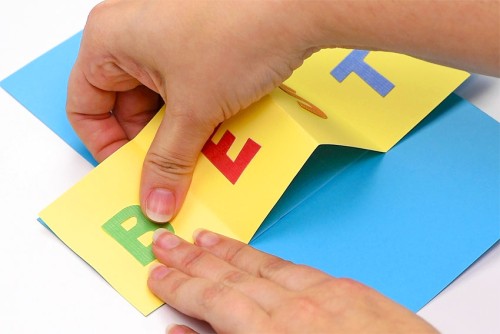
- Take the other paper strip and fold it in half.Open the paper up, flip it over, and fold the right edge in to the center. Now fold the left edge in to the center.This creates an accordion fold that will attach to the pop-up mechanism.
- Punch out cardstock letters (the kind used in scrapbooking) to spell the word "BEST" and use glue tape to attach one letter onto each section of the accordion folded paper.Make sure you add the letters to the side of the paper with the center fold sticking up.

Step 5: Put the card pieces together
- Add glue tape to the back of the "DAD" letters and attach them to the center front of the card.
- Open the card and add a bit of glue tape to the bottom left and top right corners of the pop-up mechanism. Only add glue tape to the areas showing darkened circles in the photo below.
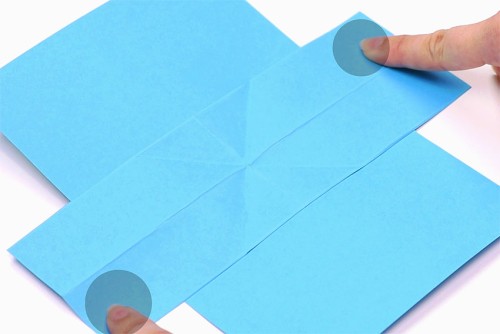
- Don't add glue to all 4 corners - if you do, the pop-up won't work.
- Line up the accordion folded paper with the pop-up mechanism, connecting the two corners to the glue tape.
- Use a marker or pen to write your Father's Day message inside the card. (See below for more ideas on what to write!)
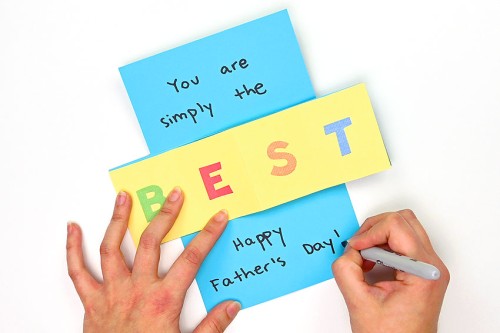
- Your Father's Day pop-up card is complete!

Video
Notes
Looking for more Father's Day crafts? Here's a few of our favourites:
Dad String Art
I Love You to Pieces Picture Frame
Superhero Father's Day Gift