
DIY Pressed Flower Card
It's so easy to make pressed flower cards! Make a homemade card decorated with dried flowers for Mother's Day and other special occasions.
Yield: 1 Pressed Flower Card
Cost: $3
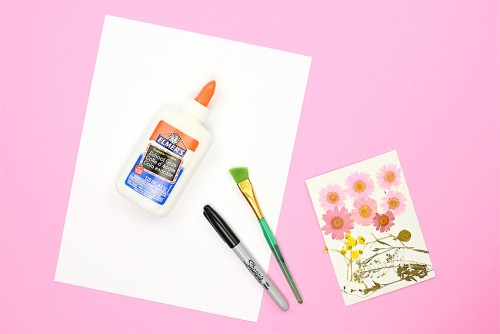
Equipment
- Paper plate (or something to put glue on)
Materials
- White cardstock
- Free Printable Vase template (More vase options below)
- Black Sharpie marker
- White glue
- Pressed flowers
Instructions
Step 1: Find what you need
- Gather your supplies and materials.
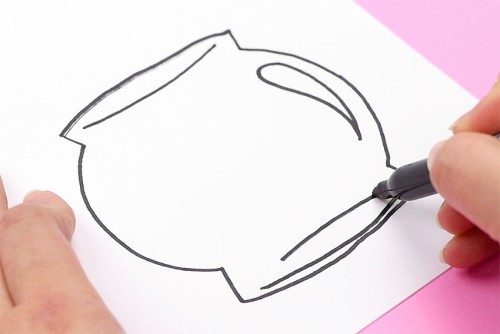
Step 2: Draw a vase on folded cardstock
- Fold a piece of white cardstock in half.

- Draw a flower vase towards the bottom of the card. Or, download and print one of our free printable vase templates! (Scroll down for all the templates)
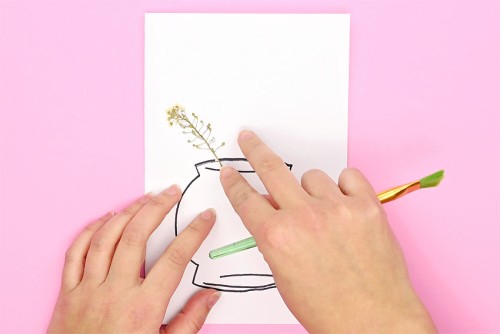
Step 3: Add pressed flowers to the card
- Use a paintbrush to gently spread white glue onto the back of a bit of greenery (or a pressed flower - whatever you'd like to add first).

- Gently press the greenery onto the cardstock, sticking out towards the top of the vase.
- Add a bit of extra glue on top of thin stems to help them stick. (The flowers themselves don't require any extra glue on top of them.)Only add glue to the top of the stems and flowers if they aren't sticking. Don't add glue all over the card stock. Any glue on the card stock will be visible when it's dried.
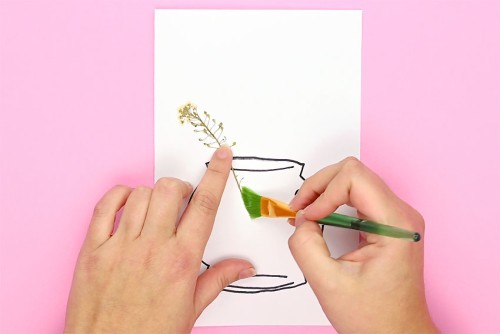
- Gently brush glue onto the back of a flower.
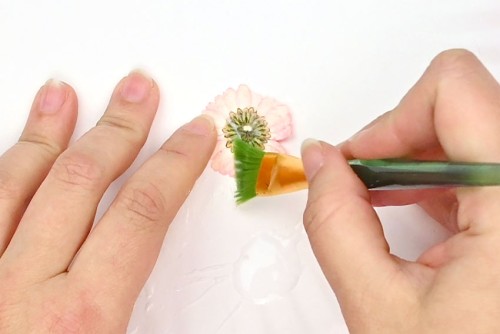
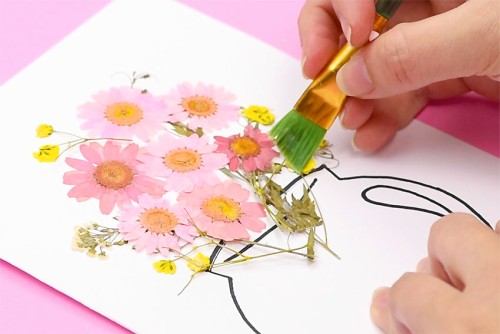
- Carefully add the flower onto the card. You can press your paintbrush on top of the flower to help it stick.Add the flowers close to the vase or further away, at the top of any greenery.
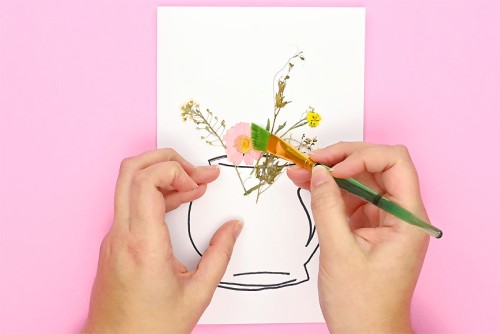
- Continue adding pressed flowers and dried greenery until you're happy with the look of your card.Overlap flowers as necessary, and create some height to your bouquet.Then allow the card to dry. For best results, open the card up, place a sheet of parchment paper on top, then put a heavy book or tray on top of the card front to keep it flat
Step 4: Write your message
- Write a message for Mother's Day (or any other occasion) inside the card.

- Your pressed flower card is complete!Make one for each vase template! (See the links below.)

Video
Notes
Looking for more homemade cards? Here's a few of our favourites:
Paint Chip Christmas Cards
Halloween String Art Cards
3D Paper Christmas Tree Cards