
How to Make a Ninja Star
Follow our easy step-by-step photo and video tutorials to make a paper ninja star. It's such a fun craft, perfect for origami beginners!
Yield: 1 origami ninja star
Cost: $1
Materials
- 2 pieces Origami paper (or other thin paper cut into a square)
Instructions
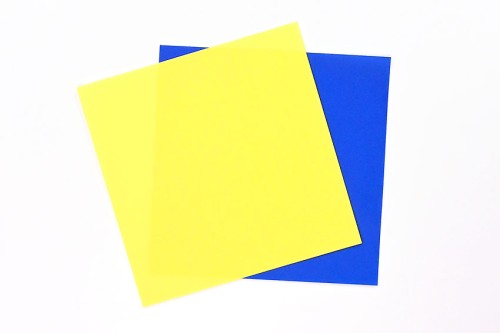
Step 1: Find what you need
- All you need to make a ninja star is two square pieces of paper!
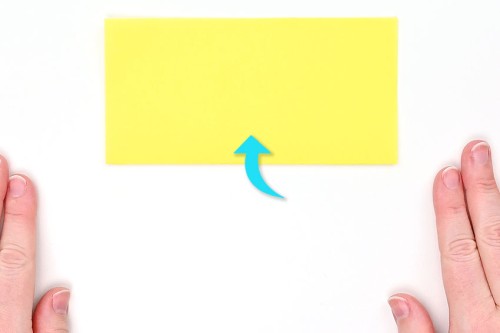
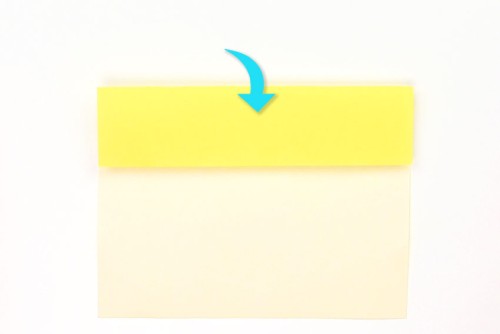
Step 2: Fold both papers into rectangles
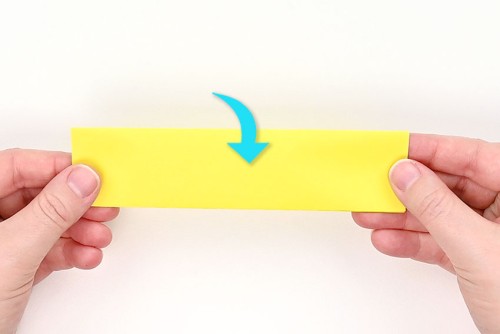
- Take one piece of paper and fold it in half from bottom to top.If you're using single sided origami paper, start with the coloured side down.
- Open the paper up and fold the top edge of the paper down to the center fold.
- Now fold the bottom edge of the paper up to the center fold.
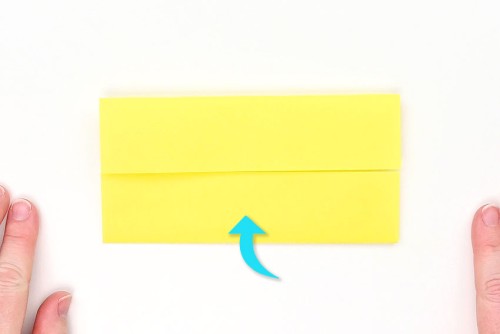
- Fold the paper in half again on the first center fold line.To do this, bring the top edge down to the bottom, with the previous folds inside.
- Now fold the paper in half the other way, from left to right.
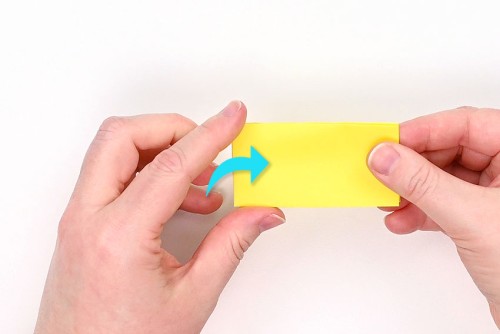
- Repeat all of Step 2 with a second piece of paper.Try using a different colour for this second paper -- it will make it easier to keep track of the folds.
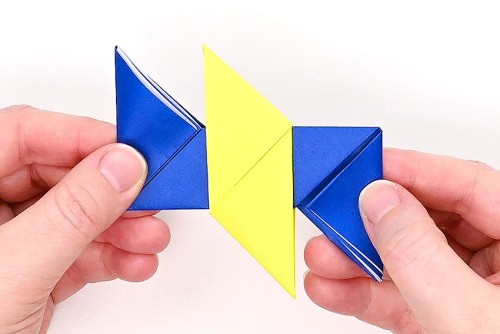
Step 3: Fold the ends in opposite directions
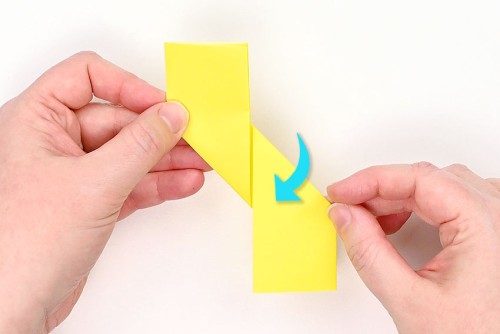
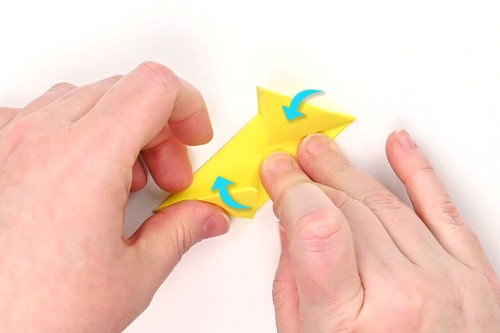
- Open up paper 1 (the yellow paper) and fold the bottom left edge up so it lines up with the fold in the middle.
- Fold the top right edge down so it lines up with the fold in the middle - it should go in the opposite direction of the previous fold.
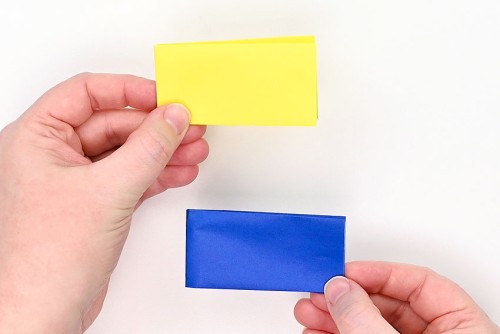
- Fold paper 2 (blue) opposite to the folds on paper 1 (yellow). To start, fold the top left edge down so it lines up with the middle fold.
- Then fold the bottom right edge of paper 2 up.Your two papers should look like the picture below.
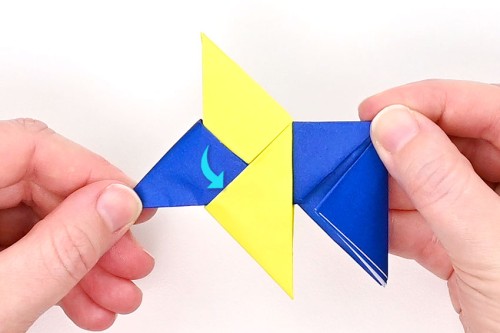
Step 4: Fold the corners into triangles
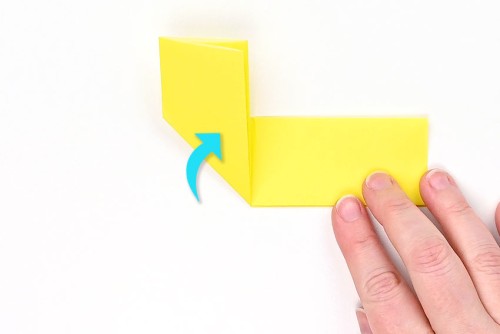
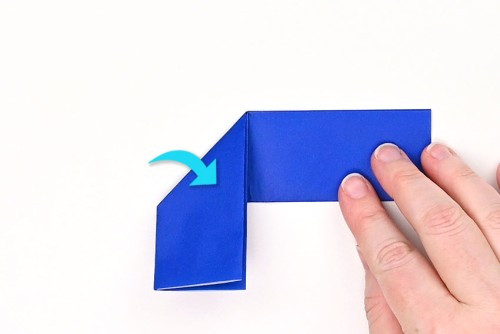
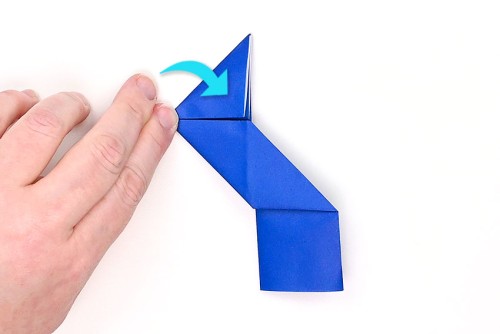
- Flip paper 1 (yellow) over and fold the top right corner down so that the top edge lines up with the left edge.
- Fold the bottom left corner of paper 1 up so that the bottom edge lines up with the right edge.

- Fold both the end triangles in toward the center, then release the folds. You don't want them to stay folded over yet, but these folds will help the ninja star come together in the next step.
- Flip paper 2 (blue) over and, again, make the opposite fold from paper 1. Fold the top left corner down so that the top edge lines up with the right edge.
- Fold the bottom right corner of paper 2 so that the bottom edge lines up with the left edge.Fold both the end triangles in toward the center, then release the folds.
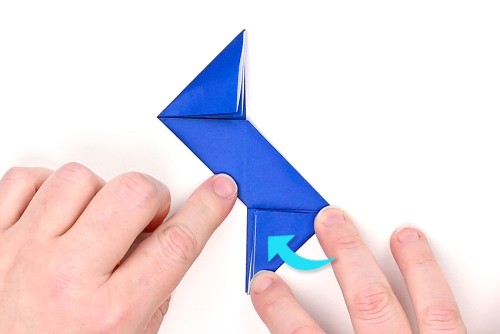
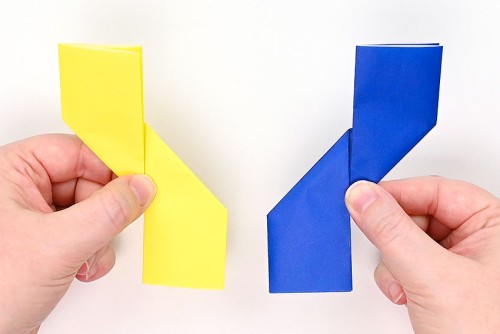
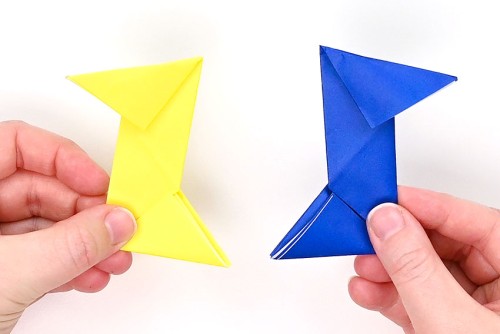
- You should now have two lightning bolt shape papers, going in opposite directions (or, a 'Z' and a backwards 'Z').
Step 5: Combine the two papers
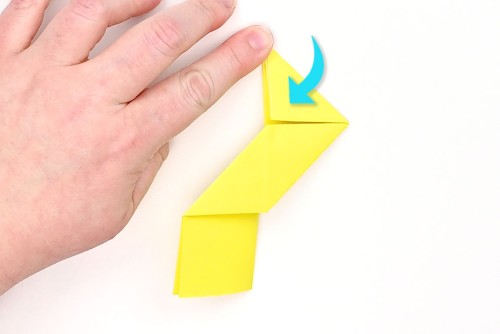
- Flip paper 2 (blue) over and rotate it 90 degrees. Center paper 2 on top of paper 1.
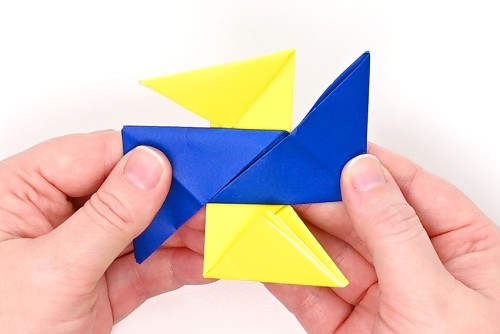
- Fold the top left triangle of paper 1 (yellow) down and right, slipping it inside the top layer of paper 2 (blue).
- Fold the bottom right triangle of paper 1 (yellow) up and left, slipping it inside the top layer of paper 2 (blue).

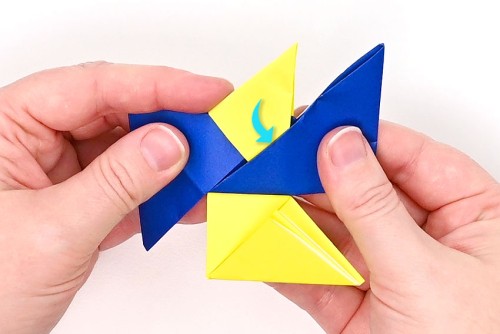
- Flip the papers over.
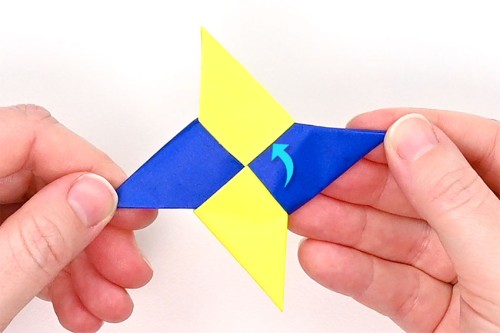
- Fold the top left triangle of paper 2 (blue) down and right, slipping it inside the top layer of paper 1 (yellow).
- Fold the bottom right triangle of paper 2 (blue) into the top layer of paper 1 (yellow).This may be a tight fit, so stick your finger or a pencil in this fold first to open it up and allow paper 2 to slide in neatly.
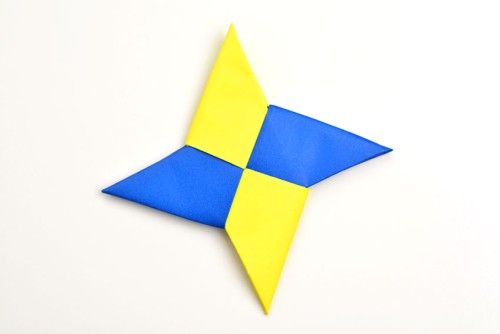
- Your ninja star is complete!
Video
Notes
Looking for more paper crafts? Here's a few of our favourites:
How to Make Paper Claws
Paper Star
How to Make a Paper Boat
How to Make a Paper Hat