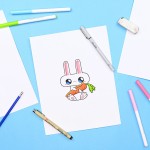
How to Draw a Bunny
Learn how to draw a bunny with our step by step photo and video tutorial. It's SO EASY and fun, perfect for beginners, kids, and adults.
Yield: 1 bunny drawing
Cost: $1
Equipment
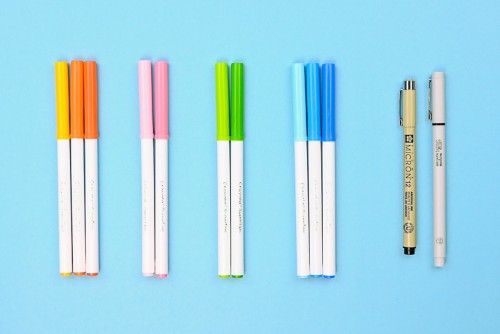
- Pencil (for outline; optional)
- Eraser (optional)
- Black marker pen (0.7mm thickness)
- Thin black marker pen (0.3mm thickness)
- Coloured markers (optional)
Materials
- Printer paper (or drawing paper)
Instructions
Step 1: Find what you need
- Gather your supplies and materials.We used a thicker marker pen for the bunny outline, a thin pen for finer details, and regular Crayola markers to colour the bunny drawing.
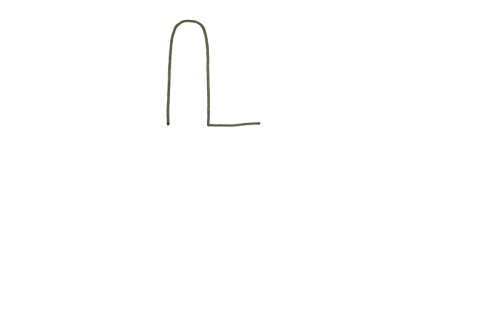
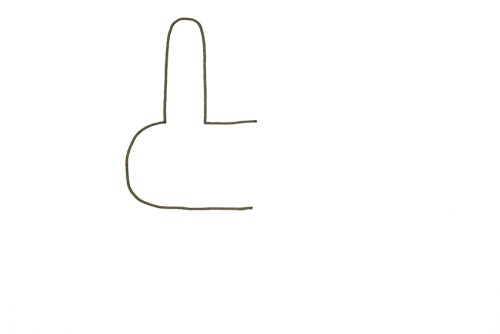
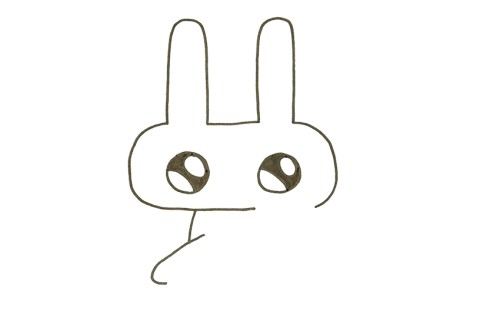
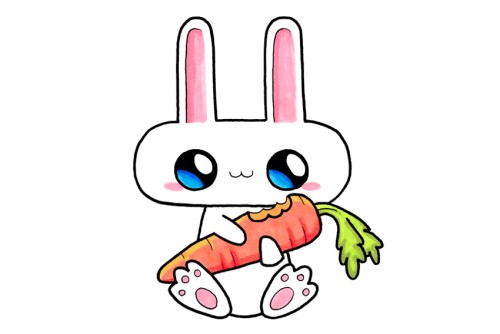
Step 2: Draw the bunny's head
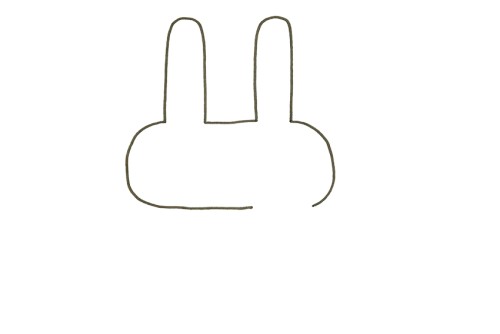
- Start by using the 0.7mm marker to draw the bunny ear on the left. To do this, make an upside down 'U' shape and add a horizontal line at the bottom right, a bit longer than the ear is thick.
- Draw the side of the bunny's face. Make a curved line, connected to the ear, and extend it so it ends in roughly the same place as the top line.
- Add the right ear to match the left and add a curved line for the right side of the head. Make sure not to connect the head at the bottom.
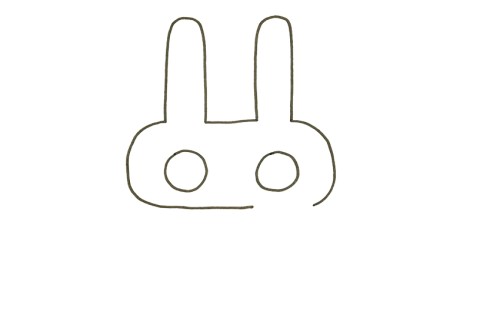
- Now draw the outline of the bunny's eyes. Make two large circles inside the bunny's head, in line with the ears.
- Draw an oval at the top right inside each eye.
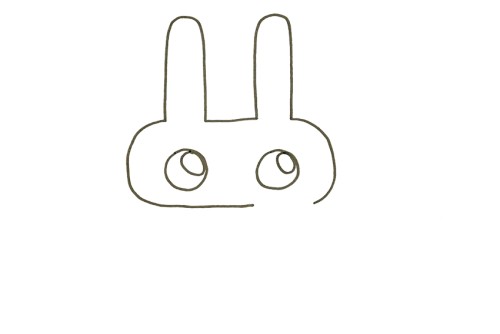
- Add a curved line to the bottom left inside each eye.
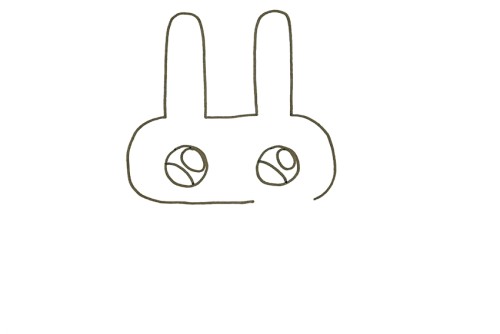
- Colour in-between the oval and curved line to fill in the eye.

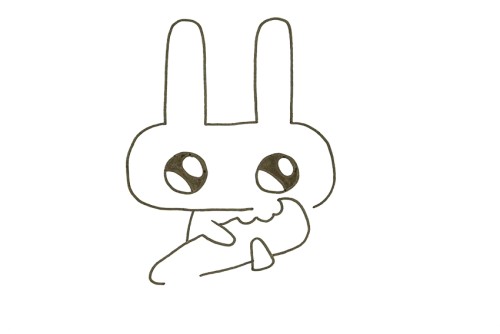
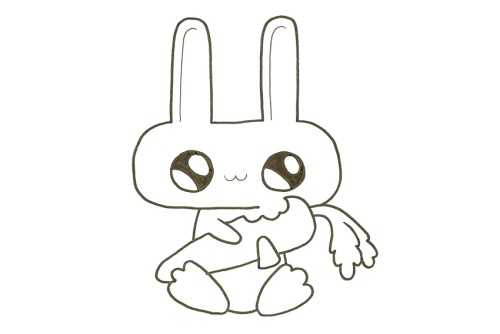
Step 3: Draw a carrot and the bunny's body
- Now we're going to start adding a carrot and the bunny's body. Draw a slightly curved line down from the left side of the bunny.Then add a backwards 'J' shape, sloping down to the left. This will be the bottom of the carrot.
- Starting from the top of the 'J' shape, add a little 'U' shaped front paw pointing down to hold the carrot.
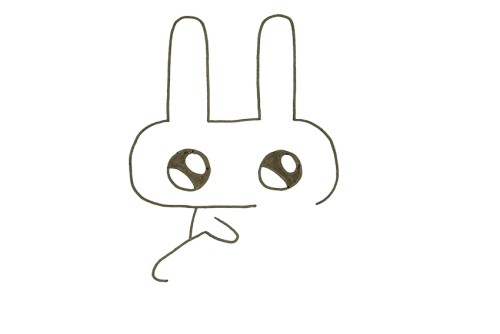
- Add a scalloped line and a curved line to the right of the paw to make the top of the carrot (which the bunny has partially eaten!).
- Draw a curved triangle or candy corn looking shape to make the second bunny paw on the bottom of the carrot.
- Continue the line of the carrot to the left of the bunny's paw, but don't completely connect the carrot lines.
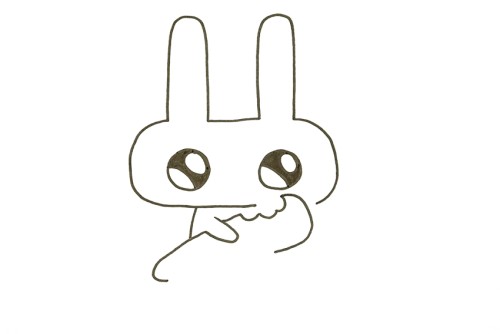
- Add greenery to the top of the carrot. Draw curved lines that get wider as they go out from the carrot, with scalloped edges on the end.
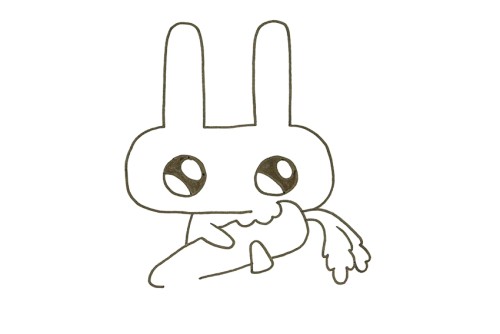
- Draw one of the bunny's feet within the gap on the left so that two of the toes are sticking up in front of the carrot. Make three curved toes and lines that meet in a narrower curve at the bottom.Try to mirror the foot on the right so they're the same size and at roughly the same level and angle.

- Connect the two feet with a curved line at the bottom. Then draw a vertical line connecting the right foot and the carrot.
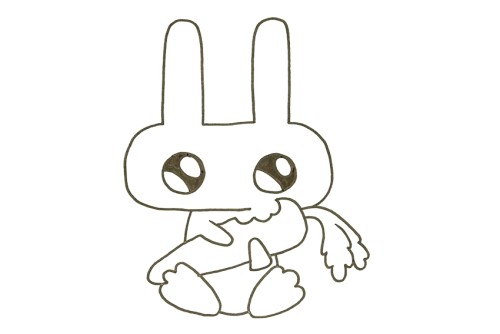
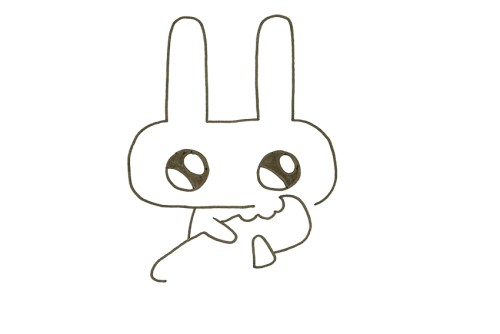
Step 4: Use a fine tip marker to add details
- Start adding fine line details with the 0.3 mm pen. First, draw curved lines inside the ears, following the left side of each.
- Draw a short, curved 'W' shape between the eyes for the bunny's mouth.
- Copy the scalloped edge of the carrot a bit above the thicker lines. The difference in thickness between the lines helps to create depth.
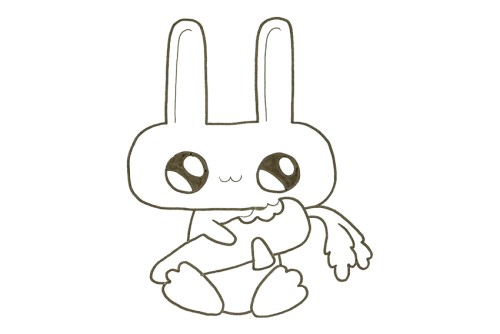
- Draw lines of different lengths on the carrot coming in from the sides. Then add one line coming from the top of the carrot into the greenery.
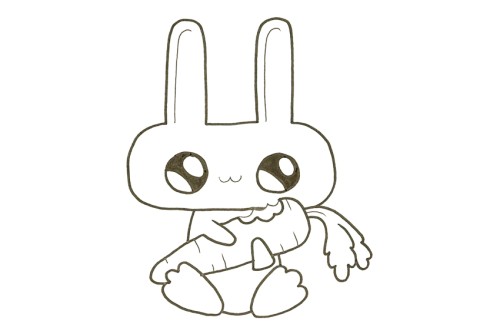
- Finally, add pads to the bunny's feet. Add a large oval in the center of each foot and small circles towards the top of each toe.
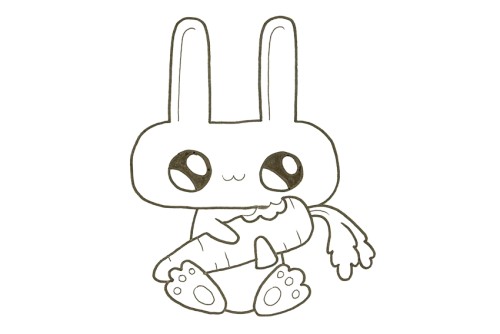
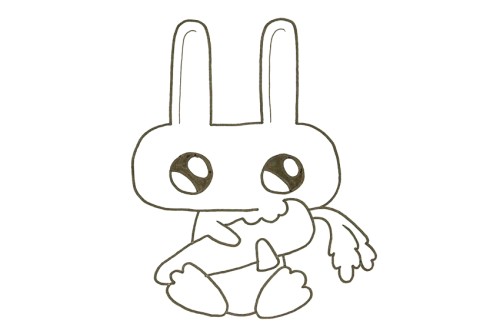
Step 5: Add colour to your bunny drawing
- Use markers or pencil crayons to add colour to your bunny! Try adding different hues of the same colour to create shading.Your bunny drawing is complete!
Video
Notes
Looking for more bunny crafts? Here's a few of our favourites:
Handprint Bunnies
Easy Foam Cup Bunnies
How to Make Paper Roll Bunnies