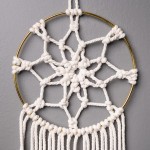
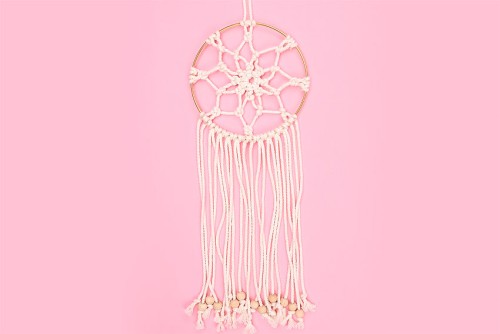
DIY Macrame Dream Catcher
Banish negative vibes with a DIY macrame dream catcher! It's such a fun project that adds bohemian style to any room it's placed in.
Yield: 1 macrame dreamcatcher
Cost: $5
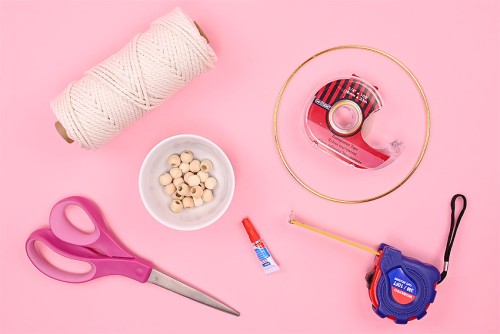
Equipment
Materials
- 3mm Macrame cord
- 6 inch Macrame hoop (metal or wood)
- Super glue
- 12 Wood beads (12 mm)
Instructions
Step 1: Find what you need
- Gather your supplies and materials.
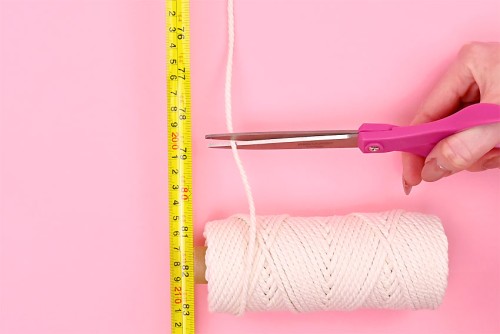
Step 2: Attach cords to form a circle
- Cut 8 pieces of macrame cord, each of them 80 inches (or 200 cm) long.
- Fold one cord in half, setting it down with the middle fold at the top.
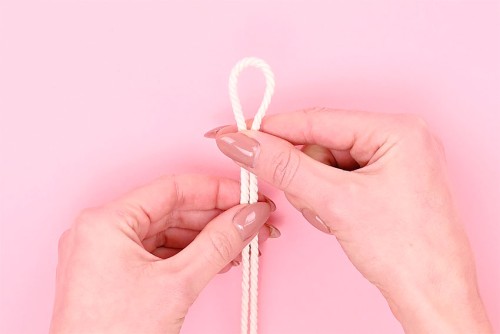
- Create a 2 inch circle by passing the right cord over the left cord so the right cord is on top.Fold a second cord in half and place the middle fold under the circle you just created.
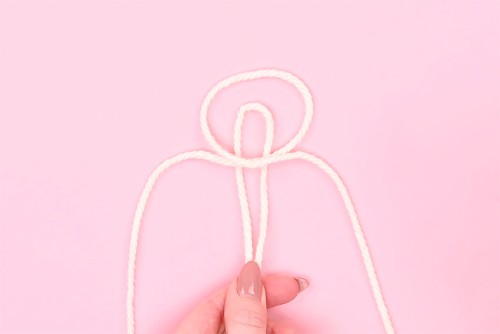
- Attach the second cord to the first with a lark's head knot. To do this, bring the top of the middle loop over, pull the loose cords through, and pull tight.Then pull the right cord out from inside the loop, so that all four cords are on the outside.
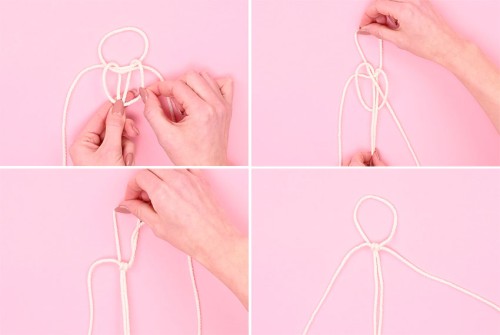
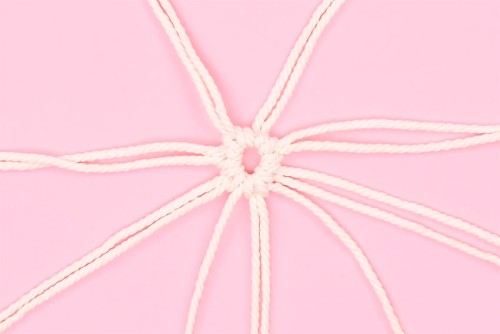
- Attach the remaining six cords to the loop with a lark's head knot.
- Pull on the two cords belonging to the initial circle.
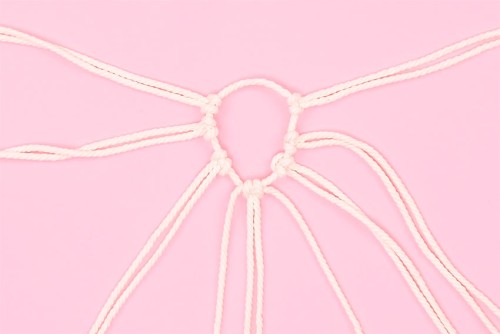
- Pull and adjust the attached cords until you've formed a small circle, about 1/2 inch wide in the middle.
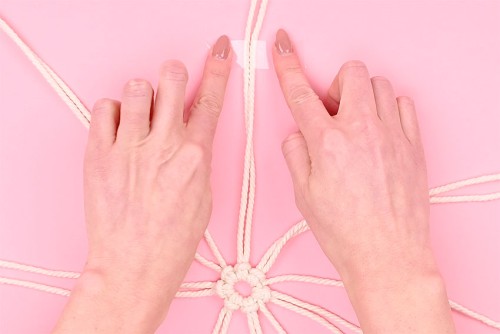
- Flip the circle upside-down and tape two of the cords to your table or working surface.As you work your way around the circle you'll have to peel up the tape and re-attach it to new cords.
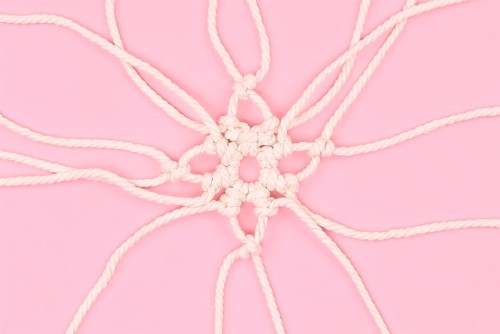
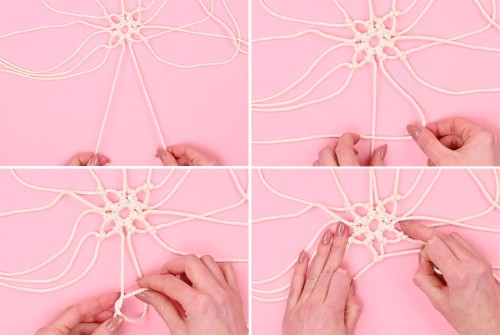
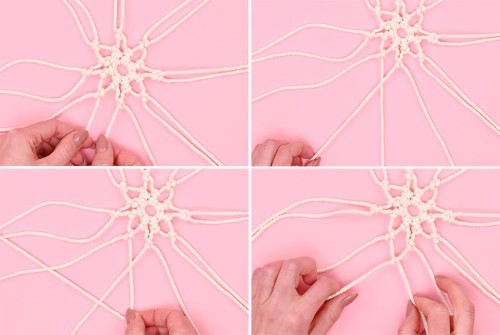
Step 3: Create the first point of the flower
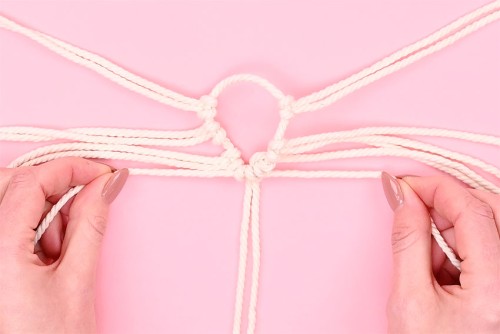
- Tie a double half hitch knot with two of the cords that are immediately beside each other. (You can start at any place, as long as the two cords belong to the same strand.)To do this, bring the left cord over the right cord, and then cross the right cord over, creating a loop. Bring the end of the right cord under and through, and then pull tight.
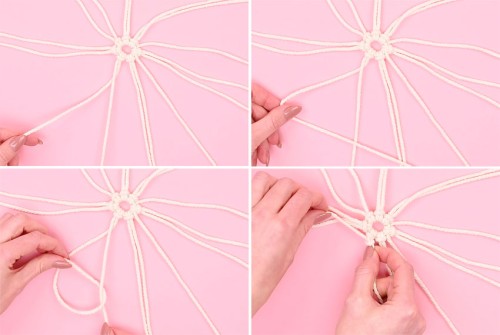
- Repeat the same knot with the same two cords to complete the double half hitch knot.
- Tie a double half hitch knot with the next two cords to the right.Bring the right cord over the left, cross the left over the top, and then pull through and tight. Repeat.
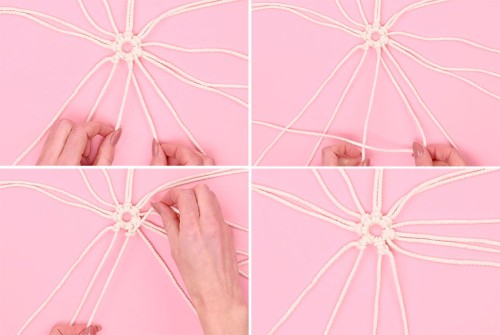
- Now we're going to work with the inner two cords out of the four we've been working with. (Cords 2 and 3 if you label them 1 - 4, from left to right.)Bring cord 3 over cord 2, and then cross cord 2 over 3. Pull the end through the bottom to make a loop.
- Pull the cords so that there's a space, about 1/2 inch from the previous knots.

- Tie a second knot, being sure to keep the spacing in the loop. (Don't pull too tight and close the loop).
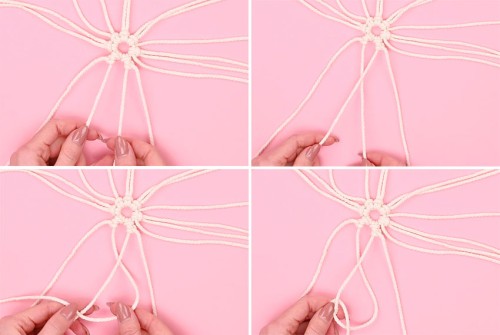
Step 4: Repeat step 3 with the remaining cords
- Turn the circle and re-tape it so you're working with the next four cords.Repeat the exact same knots as in Step 3.
- Repeat the same knots again for the next two sections.
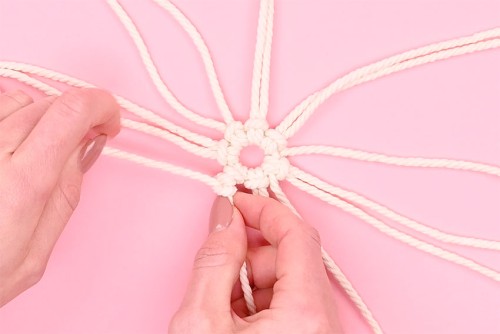
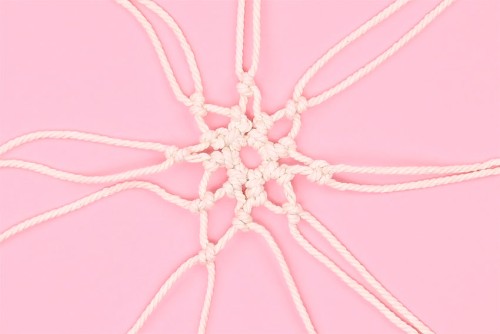
Step 5: Complete the inner flower ring
- There are four areas where two strands side by side do not come to a point. Choose one of those areas to work with the two strands.Cross the right strand over the left, bring the end of the right under and through, and pull. Leave the same size (1/2 inch) gap to match the other tied cords.
- Tie a second knot with these same cords, completing the double half hitch.
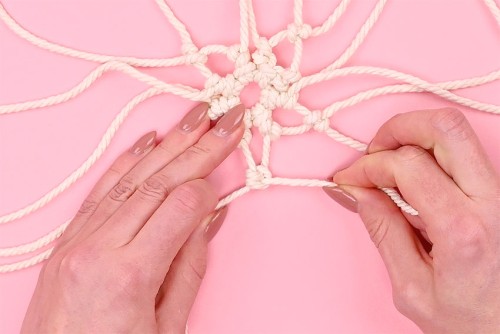
- Do the same double half hitch knot for the next three sections.You should now have eight inner points of a flower.
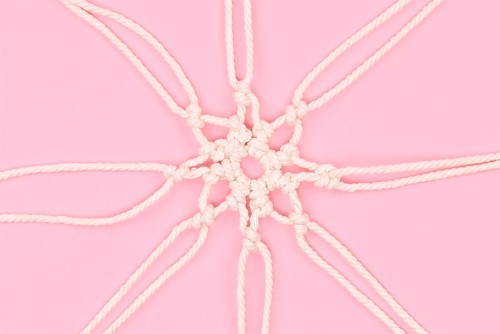
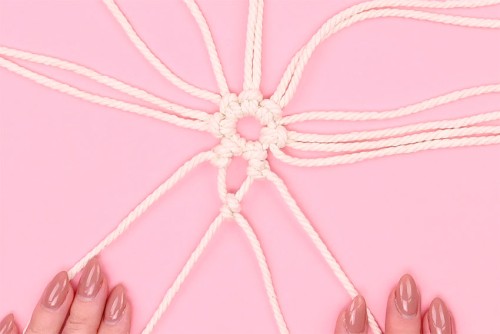
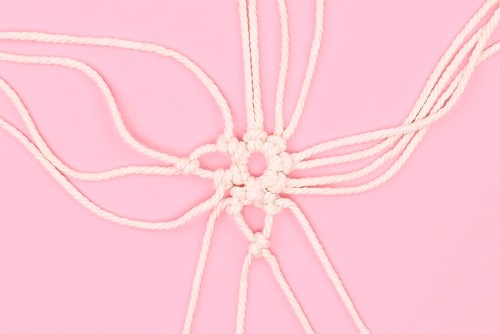
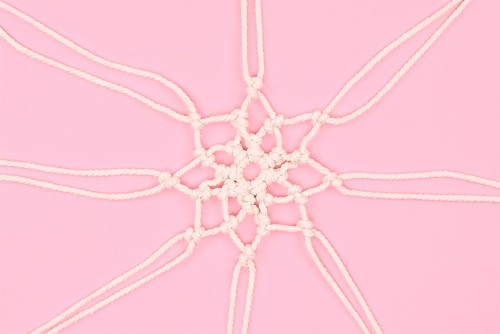
Step 6: Create the outer flower ring
- Choose two cords that are beside each other, but do not belong to the same knot.Cross the right cord over the left, then pull the end of the left over and under through the loop. Pull to leave a larger gap than the first points (about 1 inch).
- Tie the second knot with the same cords, maintaining the spacing.
- Tie a double half hitch knot with the next two strands.
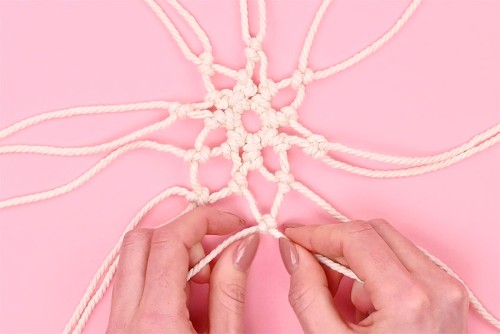
- Tie six more double half hitch knots, turning the project and re-taping as needed as you work your way around the circle.
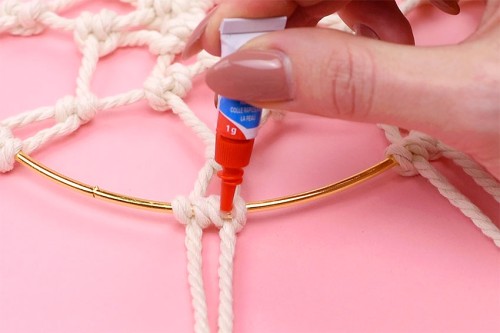
Step 7: Connect the cords to the macrame hoop
- Spread the cords out evenly in a circle and place the macrame hoop on top of the cords, with the inner ring of the flower centered.
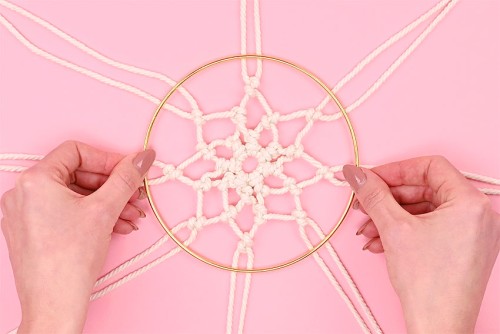
- Each point of the flower has two cords. Attach these cords to the macrame hoop, working with one point at a time.To do this, take the end of the left cord and wrap it over the metal ring. Then pull the end under and through the loop it created. Repeat, tying a second knot.
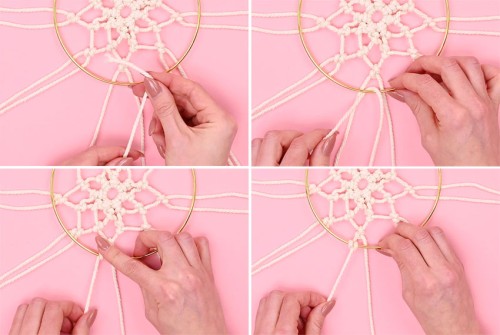
- Repeat the last step with the right cord, tying two knots and pushing the knots close together.The point of the flower should now be right beside the metal ring.
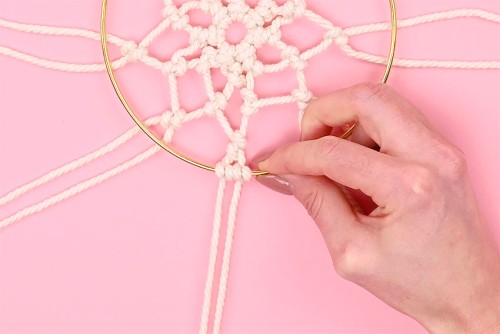
- Connect the remaining points in the same way so all the cords are evenly spaced and attached to the hoop.
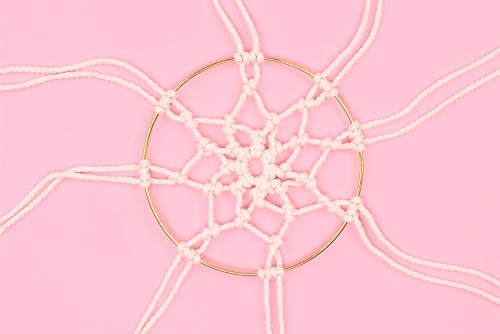
- Add a drop of super glue to the center of each knot where it meets the ring.This will keep the points in place and stop them from unraveling.
Step 8: Create a hanger and add cords to the bottom of the hoop
- Choose two strands to be the top of your dreamcatcher and create a loop with the cords. Pull the strands through the loop and pull tight, creating a basic knot about 5 inches above the ring. Cut off the extra cord above the knot.
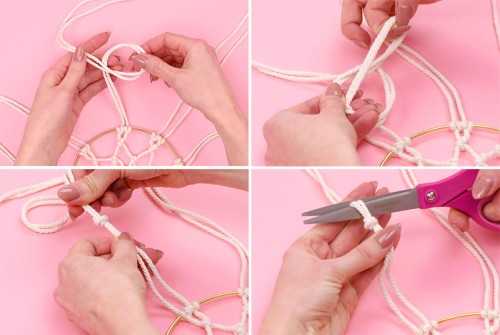
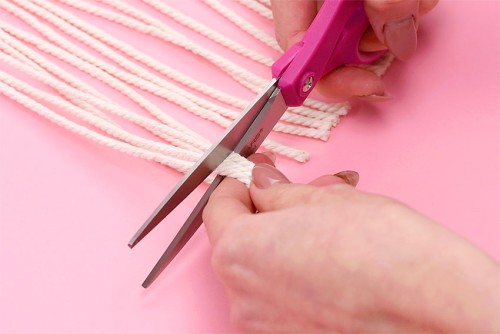
- Cut off the cords from the top four sections (two on either side of the hanger) close to the knots on the hoop. Keep these eight cords for the next step.Do not cut the cords on the bottom three sections.

- Attach one of the cut off cords to the bottom of the hoop with a lark's head knot.Fold the cord in half and place the loop under the hoop, to the right of the left point. Put the ends through and pull tight.
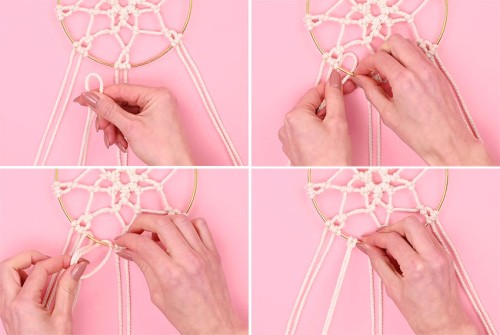
- Attach the next three cords in the same way between the left and middle points. Add the remaining four cords between the middle and the right points.Adjust the cords so that they're spaced evenly.
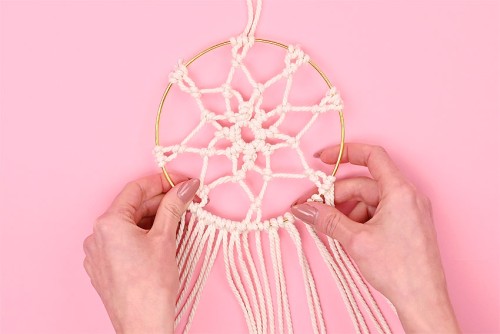
Step 9: Trim the cords and attach beads
- Trim the ends of the cords so that they're all an even length. (Ours are about 9-1/2 inches long, measured from the middle.)
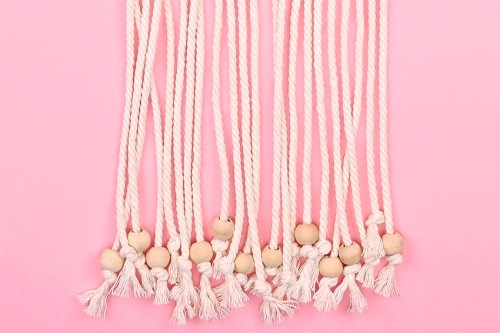
- String a wooden bead on the leftmost cord and secure it with a knot. Don't add a bead to the next cord, and simply tie a knot.
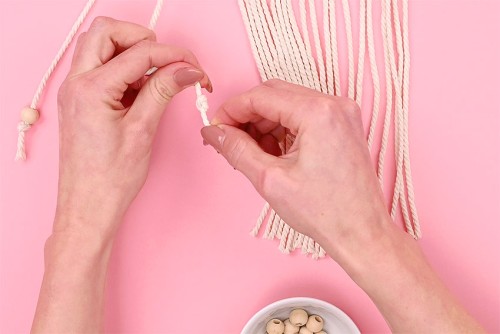
- Repeat the pattern and add a bead to the end of every other cord.
- Your macrame dream catcher is complete!
Video
Notes
Looking for more macrame crafts? Here's a few of our favourites:
How to Make a Macrame Feather
DIY Macrame Coasters
How to Make a Macrame Keychain