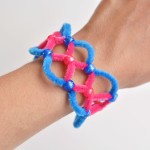
How to Make a 4 Strand Pipe Cleaner Bracelet
These bracelets are so simple and so pretty! Create a cute and fun piece of DIY jewelry using only 4 pipe cleaners and a few beads.
Yield: 1 bracelet
Cost: $1
Materials
- 4 Pipe cleaners (12 inch length)
- 12 beads (outer colour)
- 5 beads (inner colour)
Instructions
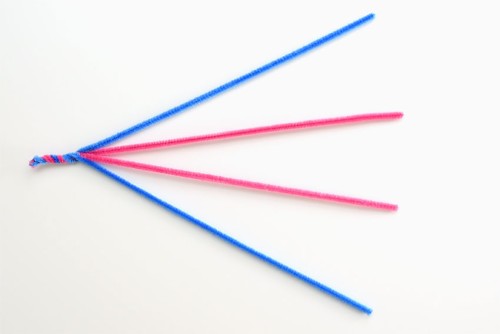
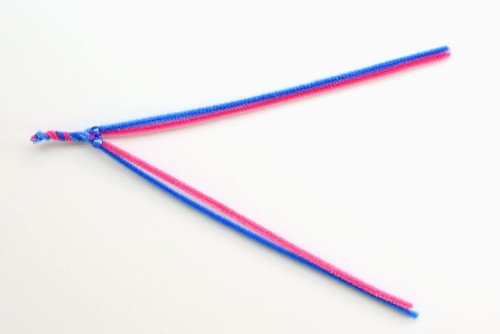
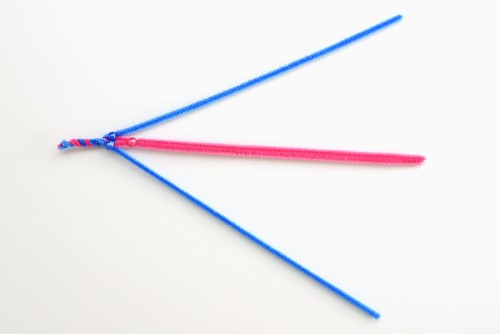
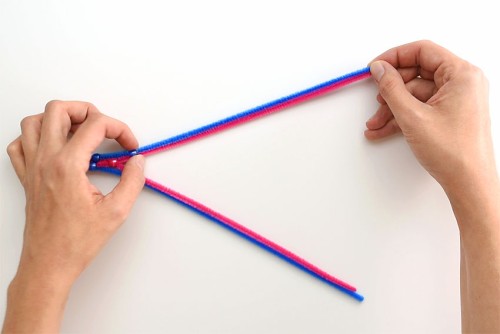
Step 1: Lay out pipe cleaners and twist together
- Lay out your pipe cleaners so there are 2 colours in the middle and 2 colours on the outside.
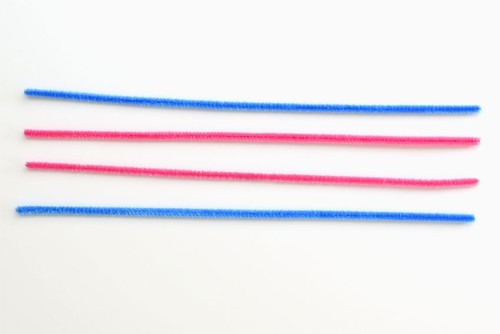
- Line up the ends of the pipe cleaners and twist them together 2 or 3 times.
Step 2: Add the beads
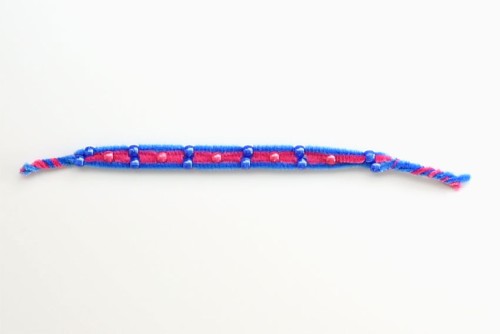
- Pinch together the top 2 pipe cleaners and the bottom 2 pipe cleaners, bending the pipe cleaners slightly so they stay in this position. Slide a blue bead over the top 2 ends and then add a second bead to the bottom 2 ends. Push the beads all the way down to the twisted end.
- Pinch together the middle 2 pipe cleaners and push a pink bead onto them, sliding it until it is about 3/4 inch away from the blue beads.
Step 3: Repeat Step 2
- Add blue beads to the outer 2 pipe cleaners (both top and bottom) and slide them down until they're about 3/4 inch away from the pink bead.
- Add a pink bead to the middle 2 pipe cleaners, again keeping about 3/4 inch spacing between the beads.
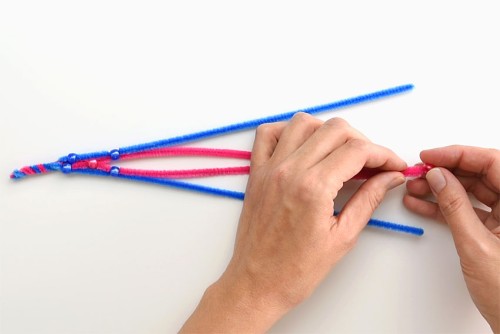
- Continue this pattern until the bracelet is about the size of your wrist.
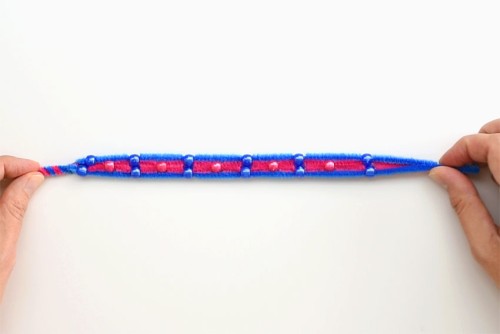
Step 4: Close off and shape
- Twist the ends of the pipe cleaners together 2 or 3 times (like you did in the beginning) to close off your bracelet.
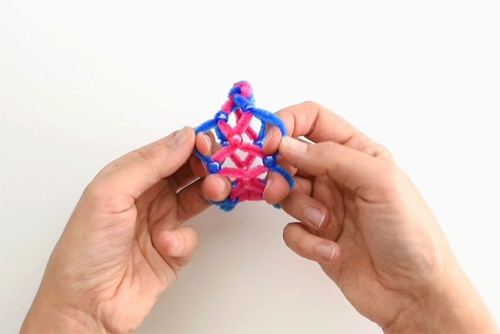
- Pull apart the blue (outside) pipe cleaners to give the bracelet its unique shape.
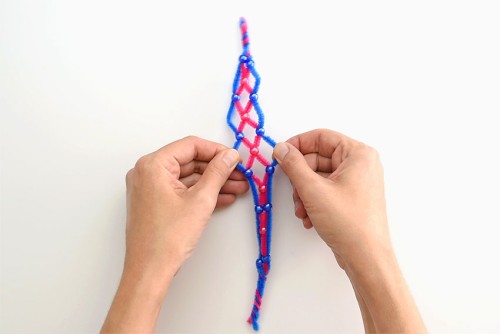
- Cross both ends over each other to create the round bracelet shape.
- Twist the ends together, making sure the sharp ends of the pipe cleaners stay on the outside of the bracelet.
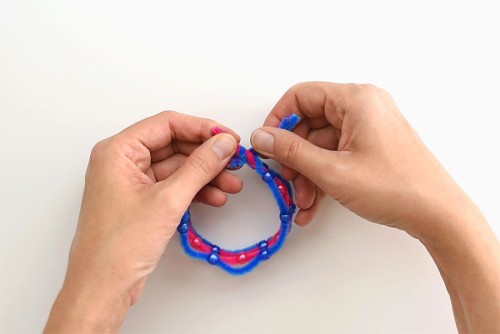
Step 5: Adjust and enjoy!
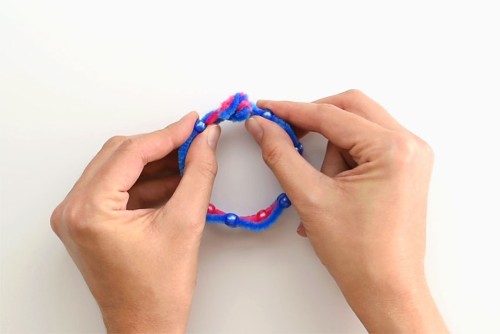
- Pull apart the outer pipe cleaners again and adjust your bracelet shape until you're happy with it.
- Your pipe cleaner bracelet is complete!

Video
Notes
When you're twisting the ends of the bracelet together at the end, make sure you bend the pointy ends of the pipe cleaner towards the outside. If they point towards the inside they'll scratch your wrist when you're putting it on.