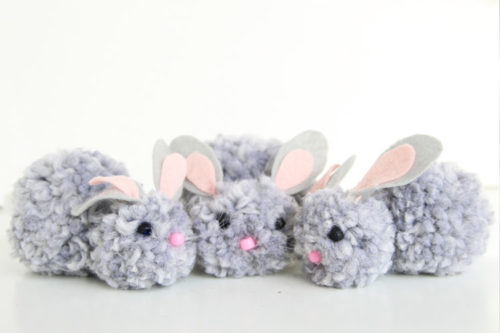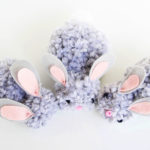
How To Make Pom Pom Bunnies
These little bunnies are super soft and so fun to make!
Yield: 1 bunny
Cost: $1
Materials
- Yarn soft and thicker yarn works best
- Pony beads
- Felt
- Clear Thread
- Cotton Balls
Instructions
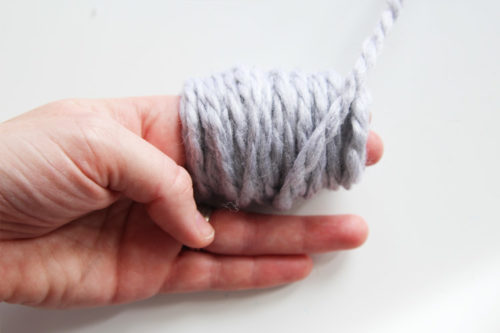
Making the Pom Poms
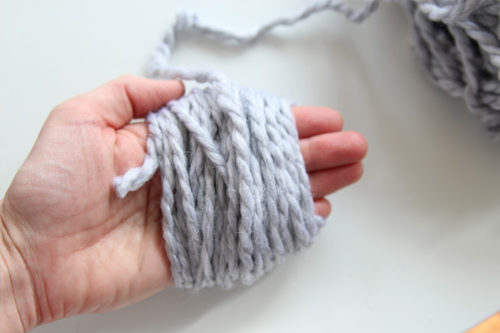
- Begin by wrapping the yarn around two fingers (smaller pom pom). Thicker, softer yarn works best. Wrap it around at least 60 times.
- Carefully slip the looped yarn off fingers, keeping the loops in tact. Cut a separate 5 inch piece of yarn.
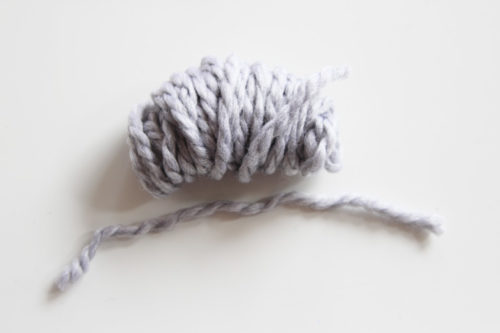
- Slip the separate piece of yarn underneath the looped yarn and wrap it around to the front, tying it REALLY TIGHT.
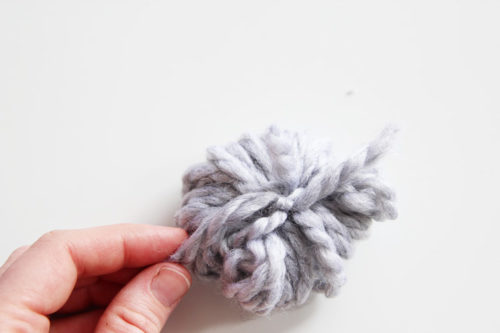
- Next, slip a pair of scissors through the loops and cut through them.

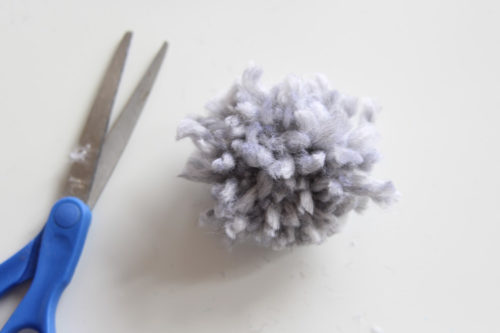
- Keep cutting all the loops. Your pom pom will look uneven and a little wonky. Trim it up and give it a “haircut” until it looks nice and even.
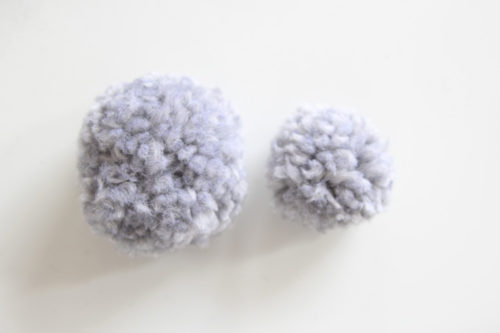
- For the second, larger pom pom, repeat the process above but wrap the yarn around the whole hand. Trim the larger one as well.
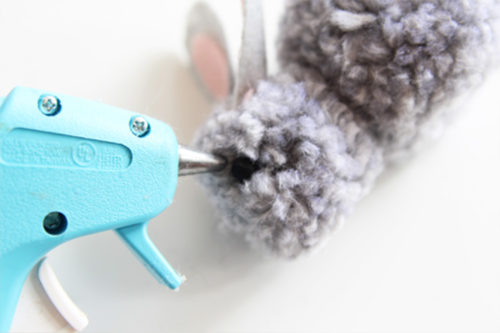
- Using a glue gun, attach the smaller and larger pom poms together (the smaller as the head, the larger as the body.)
Assembling your Bunny
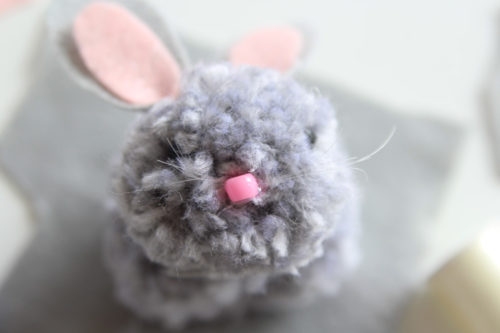
- Cut out some ear shapes out of gray felt and a smaller shape out of pink felt.
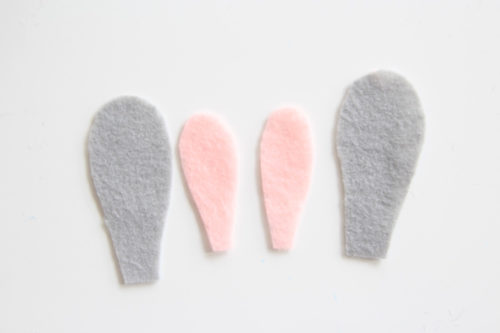
- Layer the pink on top of the gray and pinch the bottom. Glue the pinched portion together. Glue the ears to the head of the bunny.

- Next, take two black pony beads and glue them onto the smaller pom pom as eyes.
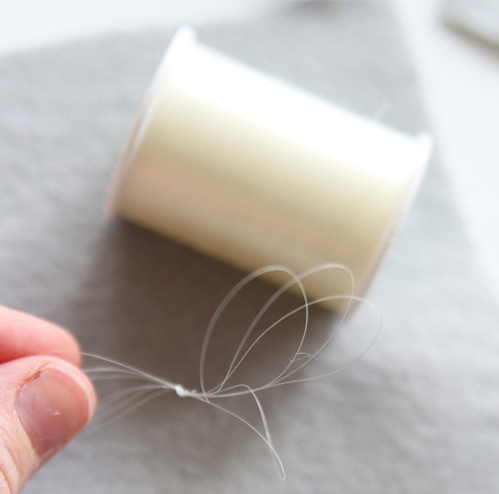
- For the whiskers, loop some clear thread together and tie it in half. Snip through the loops with scissors and glue it on the bunny’s face.
- Glue the pink pony bead on top for the nose.
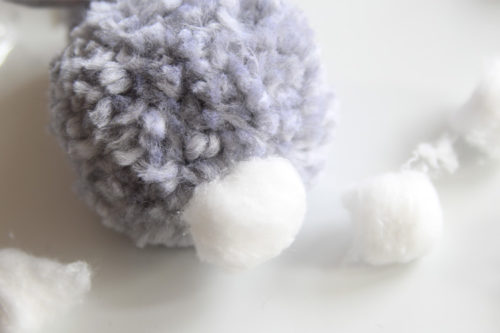
- And finally, add a cotton ball onto the back of the larger pom pom for the tail.
- Your pom pom bunny is complete!