Have you ever tried salt painting?!? With a little bit of white glue and regular kitchen salt you can make some really awesome shapes! It’s like puffy paint except it has a really cool bumpy texture from the salt!
These salt painted Easter eggs are such a fun and festive little craft for Easter! You can paint them when the glue is wet or dry – either way will work! You can colour them however you like and once they’re dry, you have an awesome craft to hang on the fridge! Or you can cut out the egg shapes and make a little Easter basket.
Or you could even make Easter cards with salt painted Easter eggs on the front! So far the salt and the glue on ours seems to be attached really well, even when I tap the paper and rub it gently. I think they’d make super cute Easter cards with “Happy Easter” on them?! Ooooo… Or you could write “Have an EGGScellent Easter” on your cards!

I’ve included my free printable for the egg shapes below, but you can “draw” pretty much whatever shape you want with the glue!
I think my favourite part about salt painting is dabbing the paint onto the salt and watching the colours run. A little paint goes a long way (literally!) so it’s really fun to watch! It’s pretty hard to capture that in photos so you can check it out in the video below.
Check out our video for how to make Salt Painted Easter Eggs:
How to Make Salt Painted Easter Eggs Tutorial
Here’s a list of what you’ll need. The affiliate links below will take you to products on Amazon that are similar to the supplies we used to make this craft:
- Thick Paper (such as watercolor paper, card stock or poster board)
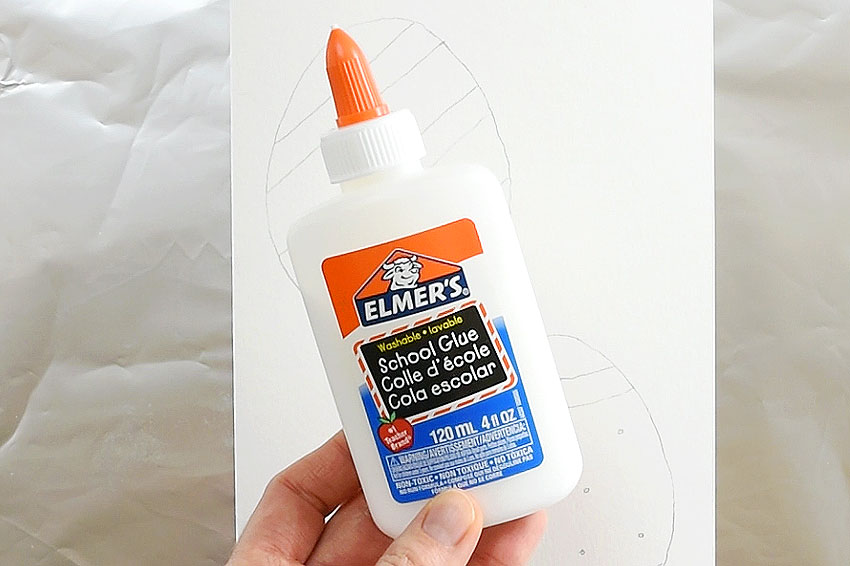
- White Glue (Use Elmer’s glue… generic Dollar Store glue sadly doesn’t work here!)
- Table Salt
- Liquid Watercolor Paint (or watered down food coloring)
- Paint Brushes
I used watercolor paper when I made this craft, but you can use any type of thick paper. Thin paper gets too wet from all the glue, and the eggs don’t turn out as well since the salt sticks where it’s not supposed to.
I HIGHLY recommend using Elmer’s white glue (or another high quality brand). I originally tried this craft using generic dollar store white glue and it didn’t work. My dollar store glue was too watery and when I added the salt on top, the glue spread and made it look very messy.
You can check out a photo of the unsuccessful salt painted Easter eggs we made with dollar store glue here. I also used undiluted watercolors in that one, which is why the colors are so dark.
HELPFUL TRACING TIP:
When you’re tracing shapes onto thick paper that you can’t normally see through, use a window during the day to help you out. First place the template on the window, then place the thick paper on top. You can use tape to hold everything in place if you like. The light shines through both papers and you can easily trace your shapes onto the thick paper!
You can print out our free printable Easter egg template below. I used 9″x 12″ watercolor paper (the exact link is in the list above), and cut each sheet in half so they were 6″ wide by 9″ tall.
>>> Free Printable Egg Template 1 <<<
>>> Free Printable Egg Template 2 <<<
Once you have your shapes drawn on the thick paper, trace over all of the lines with white glue.
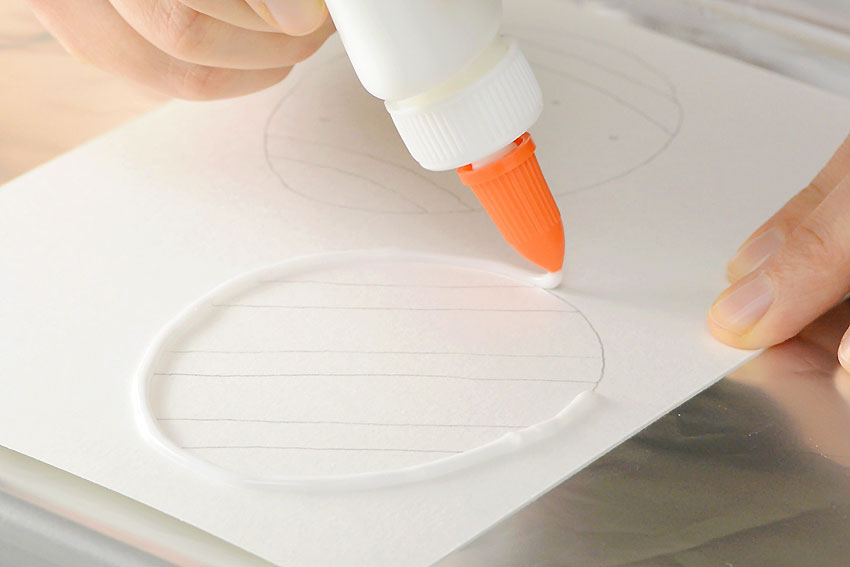
Then sprinkle a generous amount of salt over the glue. Make sure you cover every last bit of the glue with salt. (See the video above.)
I used dollar store table salt that I bought for one of our salt dough projects. It’s just regular old kitchen salt that you’d use for cooking.

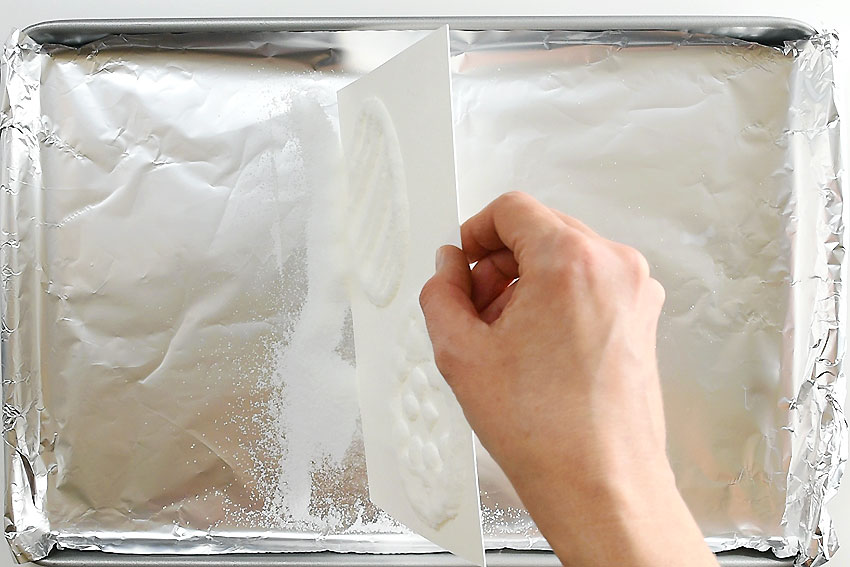
There’s no need to wait for anything to dry. As soon as you add the salt you can carefully lift the sheet of paper and pour off the extra salt. Turn the sheet upside down and give it a very gentle jiggle to get the extra salt off.
Don’t tap the back of the paper to get the salt off. I tried it and way too much glue and salt came off and my shape wasn’t nearly as puffy afterwards!
Next, you’ll want to set up your liquid watercolor paint. I used 5 parts water for 1 part watercolor paint (the exact watercolor paint I used is in the list above). When the salt painted Easter eggs dry, the colours do lighten up considerably. But since these eggs are for Easter and I wanted pastel colours, so it worked out perfectly!
If you use undiluted watercolor paint the colours are VERY strong and vibrant. So it really depends what you’re going for.
Remember, all brands of watercolor paint are slightly different, so if you’re using different paint from what I used, you might have to experiment with how much water to add to figure out what looks best.
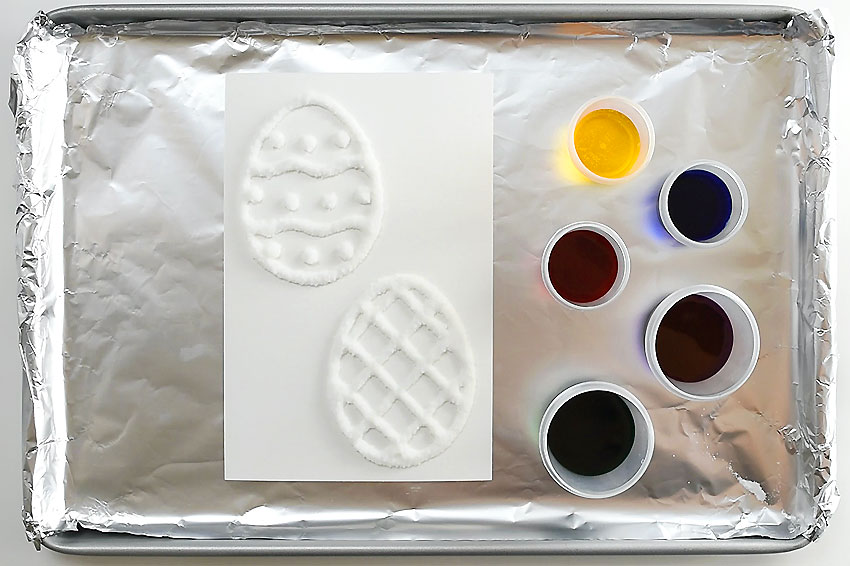
Dip a paintbrush into the liquid watercolour paint, then gently dab the brush onto the salt and glue. Just a very gentle dab, just barely touching the brush to the salt and glue.
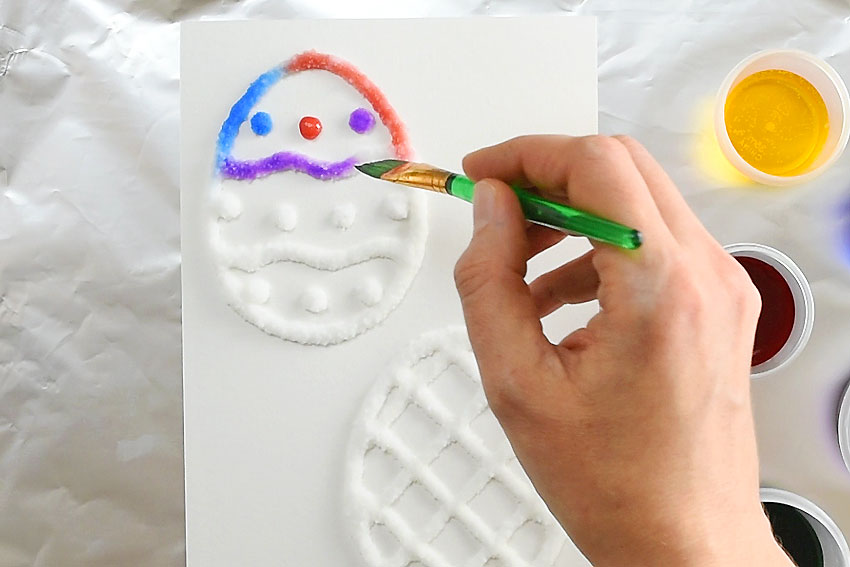
It’s so fun to watch the colour spread! (See the video above!)
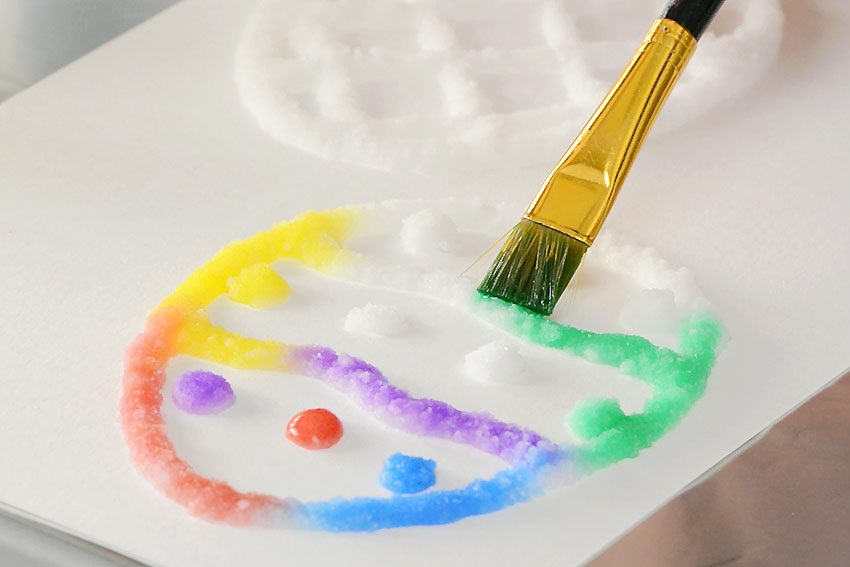
You can paint your eggs however you like! Experiment with what happens when you put different colours next to each other. The colour mixing is really fun to watch!
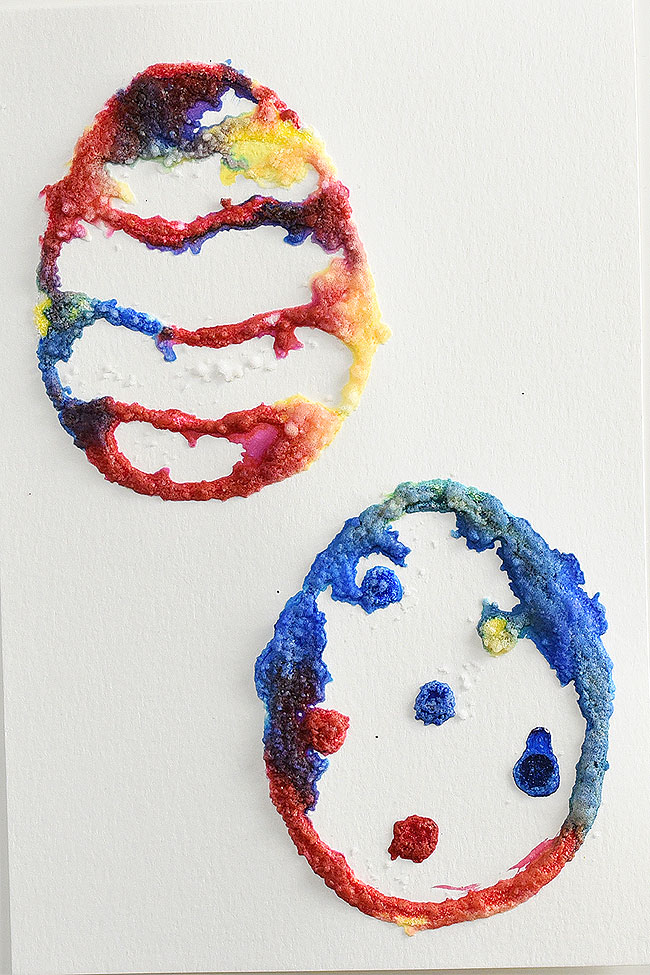
I think the rainbow egg below is my favourite…

Keep in mind that the photos here show our salt painted Easter eggs when they were still wet, so the colours are still very vibrant.

With the watered down liquid watercolor paint, the colours became a nice soft pastel colour when they dried. (Not shown).

When you’re done painting your eggs, you can leave them to dry. The salt and glue stays puffy, even after they dry!
It takes about a day or two for the glue to completely dry.

These salt painted Easter eggs are such a fun and easy craft idea for spring time! With a little bit of salt and glue you end up with colorful puffy paint like shapes with an awesome texture! They even stay puffy after they dry. Cut out the eggs to make an Easter basket craft, or you can make cute DIY Easter cards! This is such a great Easter craft for kids!
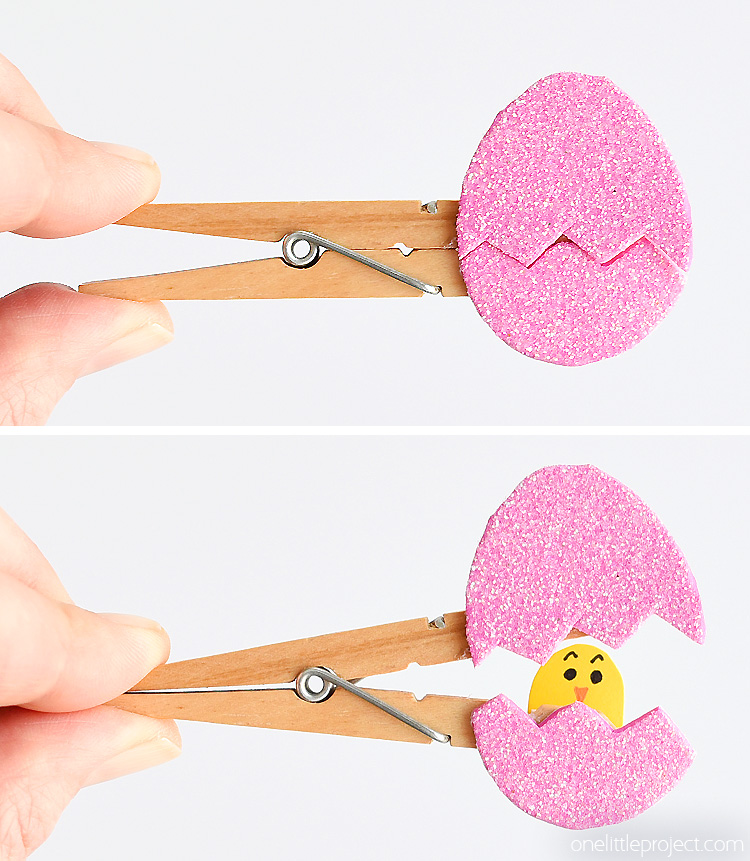
If you’re looking for more egg themed Easter crafts, check out our Peekaboo Clothespin Eggs. With a cute little hidden chick inside, these always make the kids (and me…) smile!
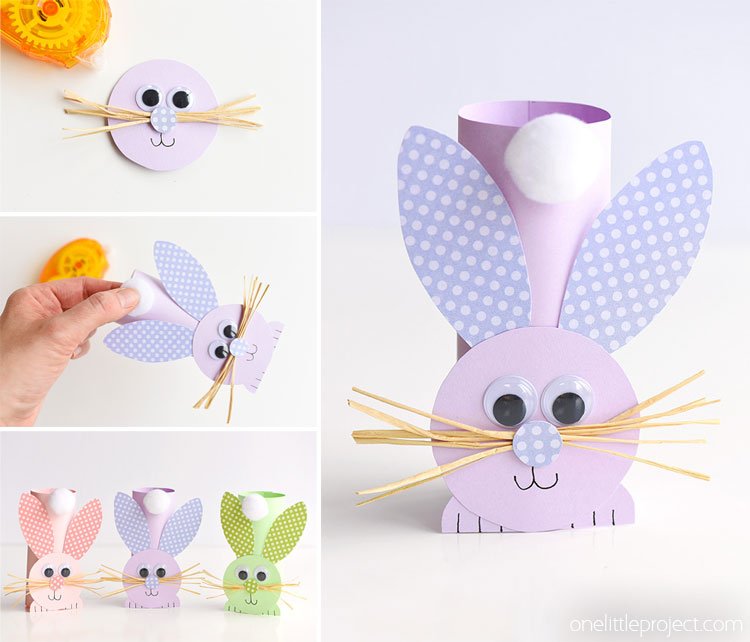
Or you can try our Paper Roll Bunnies. This little craft was #1 on Pinterest for weeks last year when you searched “Easter”. So simple and adorable!
You can also experiment with colour and make these beautiful Painted Salt Sculptures!

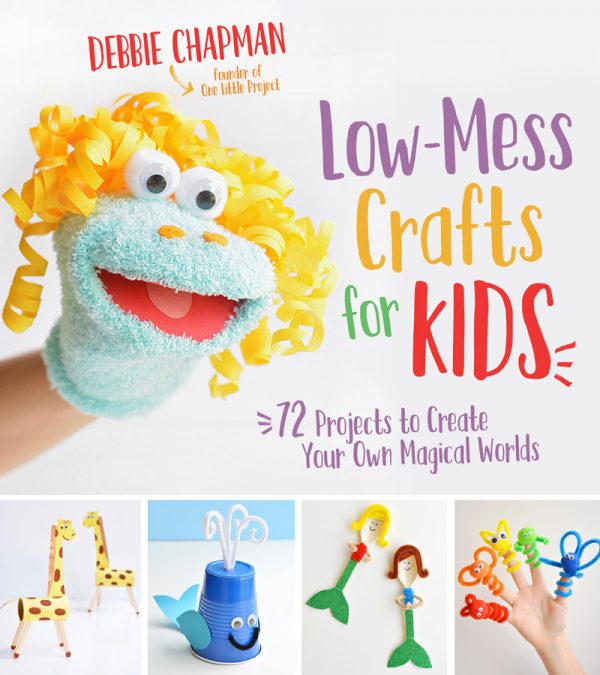
Be sure to check out our book Low-Mess Crafts for Kids for 72 fun and simple craft ideas for kids! The projects are fun, easy and most importantly low-mess, so the clean up is simple!

Where to buy:
You can purchase Low-Mess Crafts for Kids from Amazon, or wherever books are sold:
Amazon | Barnes and Noble | Books- A- Million | Indiebound | Indigo | Amazon Canada
Do you paint them when the glue and salt are dry or wet still?
Either. We prefer to paint them when the glue and salt are wet because everything looks puffier and it just seems more fun.
You are a very clever lady.
The salt painting looks so fun!!! Can’t wait to try it!!!
Does it have to be wet when painting the glue/salt? Can it be dry? I teach 10 preschoolers and afraid if I did it with them some of their art would be dry and wondered if it would still work?
Hi Colleen. You can definitely paint them once the glue is dry!
Just wanted to say thank you. Also, I didn’t have watercolors but did have acrylics. I watered them down and they worked similarly to how I imagine watercolors would have worked. Just in case anyone else is in my situation. more of a 10 to 1 ratio. Very fun and simple Idea.
This was the ‘winning activity’ for our family get together. everyone enjoyed it! thank you so much, Debbie, for sharing it!
I actually printed the templates, added the glue, and spread the salt the night before because I wouldn’t have had the time to prep while the kids (and I) were going crazy. I only removed the extra salt the next day and it came off easily without affecting the salt that was stuck on the glue.
Also, I realized too late that I didn’t have any watercolor paint, so I added a drop of acrylic paint to a plastic, 2 oz shot glass which i had found at the Dollar Tree, filled it with water, and mixed. It did the job.
Results were great!
Can’t wait to do another version of this for the next b’day party!